How to restore old photos with 1 click
There are many ways to restore old photos and many complicated ways to do them. Most of them require a lot of patience and understanding of various post-processing techniques and software. In fact, most of them are so complicated that we end up never using them and restoring the old photographs that we want to. But anyway, what I usually do to my pictures is as follows and though "one click" will get you there but it will be almost! Feel free to tweak the settings and sliders as you wish. I have used a normal flatbed scanner which is used to scan documents to scan this photograph. If you use a higher end scanner, your results will be much better. You will need:
- A scanner
- A copy of Adobe Lightroom
If you don't have Lightroom, download it. It comes with a 30 day free trial, so you can use it free and 30 days should be enough for you to correct all your old pictures. But anyway, this is my primary software for all my processing needs so I highly recommend it. Anyway, import your scanned photograph into Lightroom.
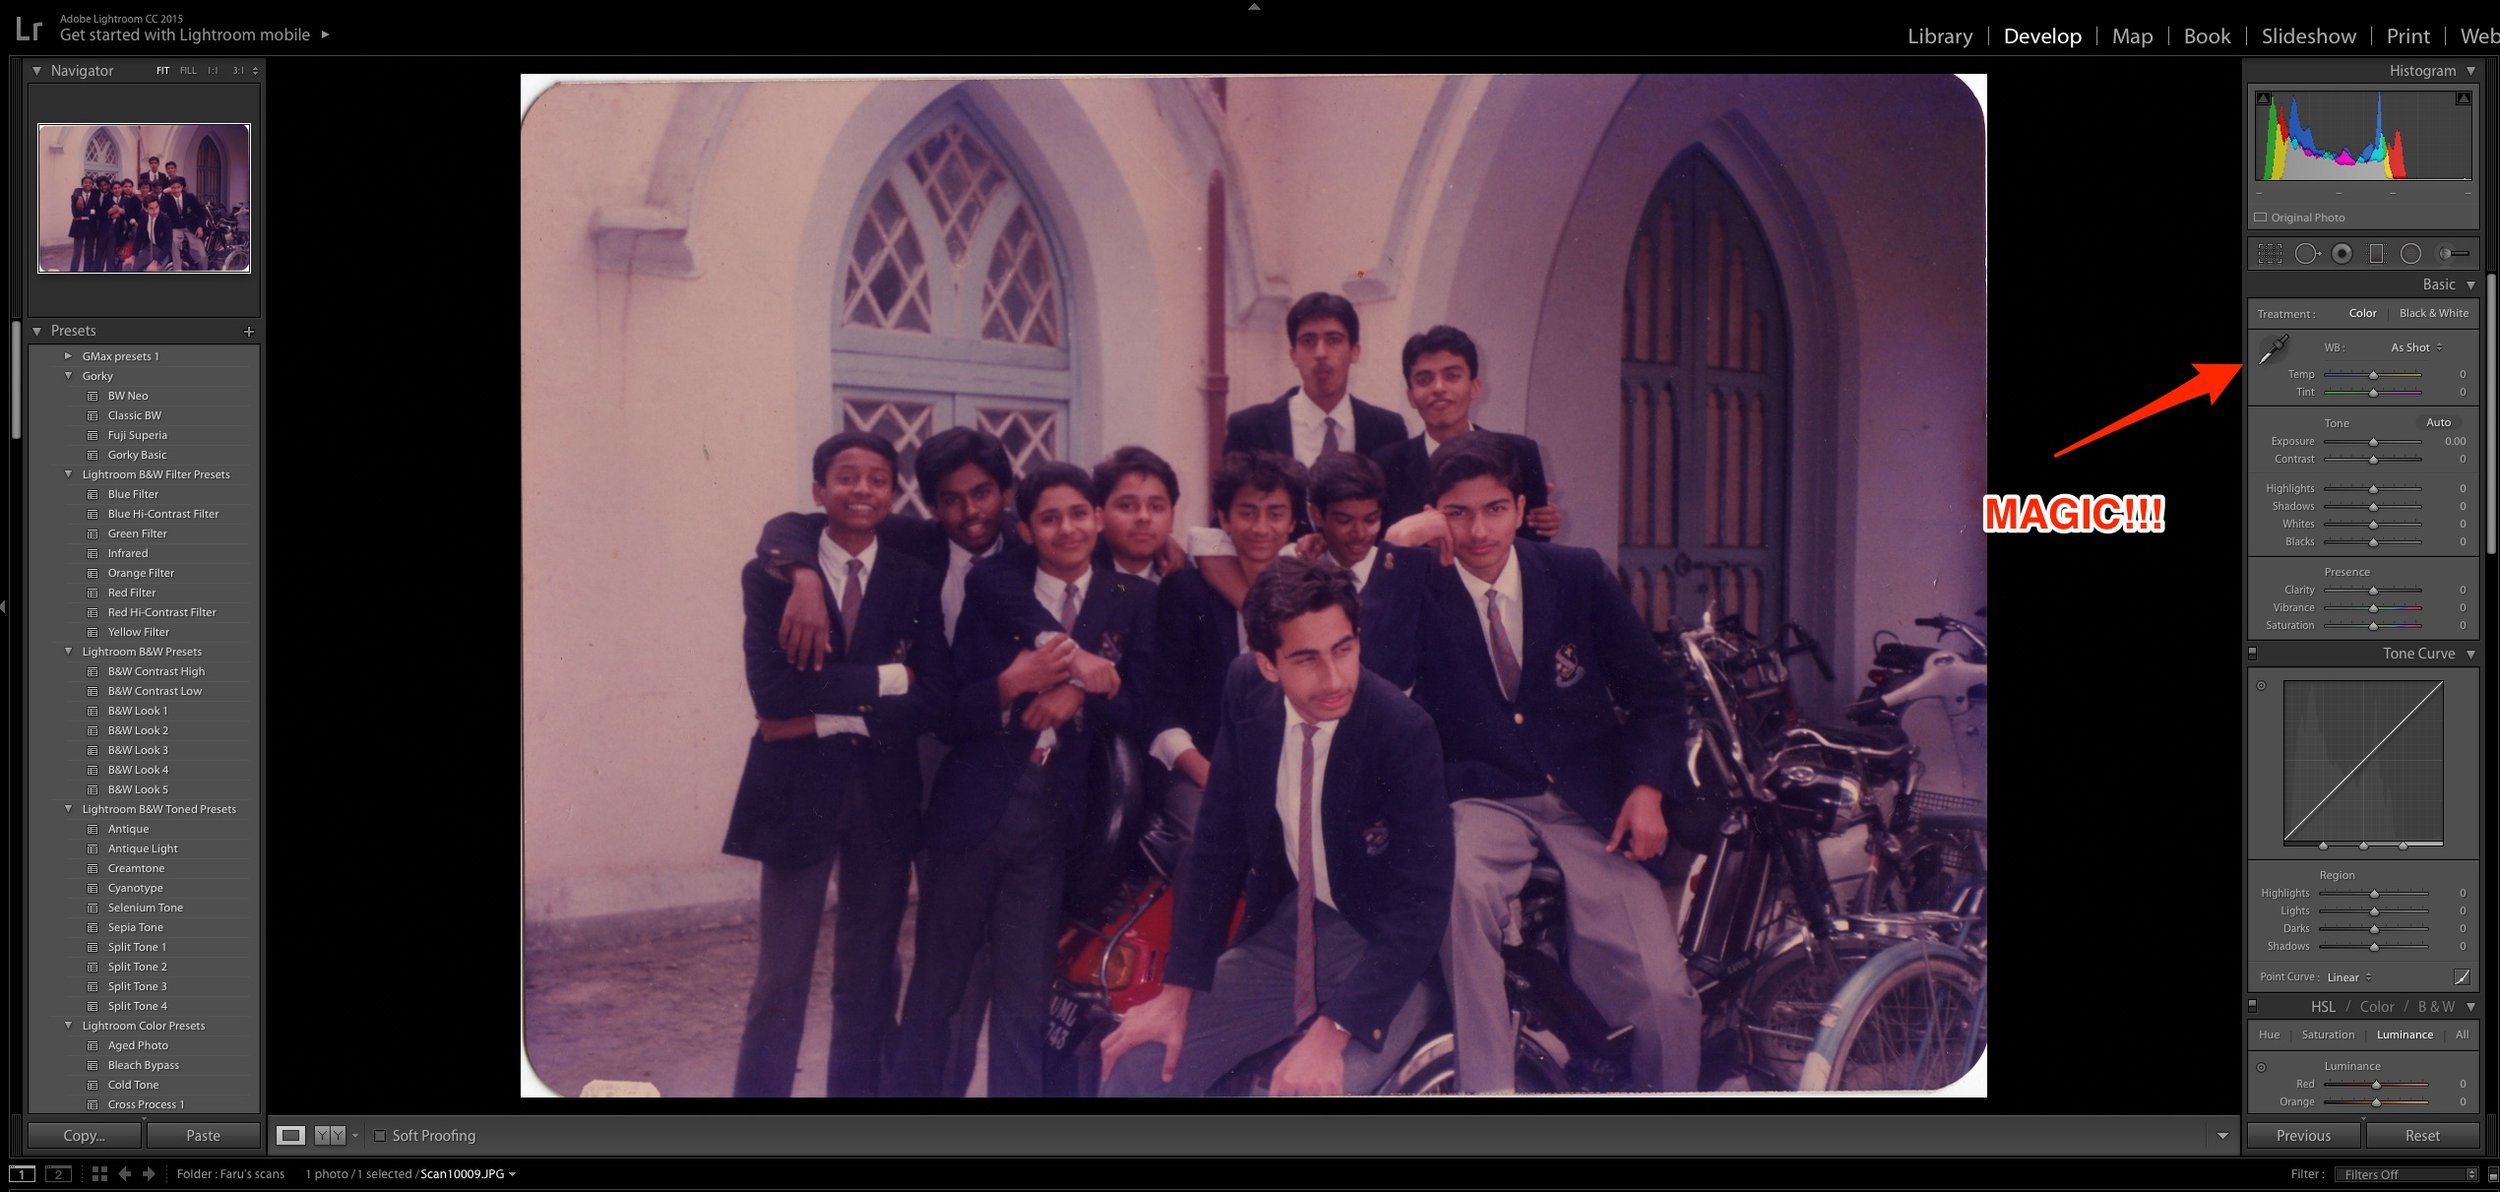
Scanned photograph
Now that magic one click that I was talking about is the one on the top right hand corner.
Select the eyedropper and click on any neutral colour in the photograph. I was lucky that this was a school photo so I could click on the grey trousers that my friends were wearing. Bingo! The software knows which is a neutral colour in the picture and removes the magenta/green cast automatically!
Processed picture
Add some contrast and sharpness and maybe increase the exposure a bit to make the old picture pop. That's it! You are done! Give it a shot! This is what I do to restore my pictures quickly. Here is the comparison.
Also read: How to create a professional white background on any photo in Adobe Lightroom
Do share the pictures that you have restored using this technique. Take look at the video below. Subscribe to our channel by clicking here.


