Colour grading video in Lightroom
Colour grading is a slow and tedious process. With the huge amount of software at our disposal, we can go spend hours and hours trying out various options and looks with the video before we can decide what look to finally go with. As described in our post here, there are quite a few stages to colour correct your footage and get it to the final look that you want. But what if you want to do some quick colour grading and are short of time and don't want to jump through all the hoops? Or what if you just want to quickly see a number of options before you decide the final look of your video or film?
Enter Adobe Lightroom which is primarily a photo post-processing software but can come in very handy if you are in one of the situations described above and are looking at colour grading video in Lightroom. It is even better if you have one of your favourite looks saved as a "preset" in Lightroom. One click is all you need. Take a look at the video below to see how it is done and leave us a comment if you found this useful or have some questions.
http://youtu.be/ScLaTzbm_xk
Colour correction and colour grading in video
To give a professional look to your shot footage, some amount of colour (color for Americans) correction and colour grading is important. Though quite a few people use both the terms, colour correction and colour grading interchangeably - they are in fact, two different processes altogether. So what is the difference between colour correction and colour grading in video, film or photography?

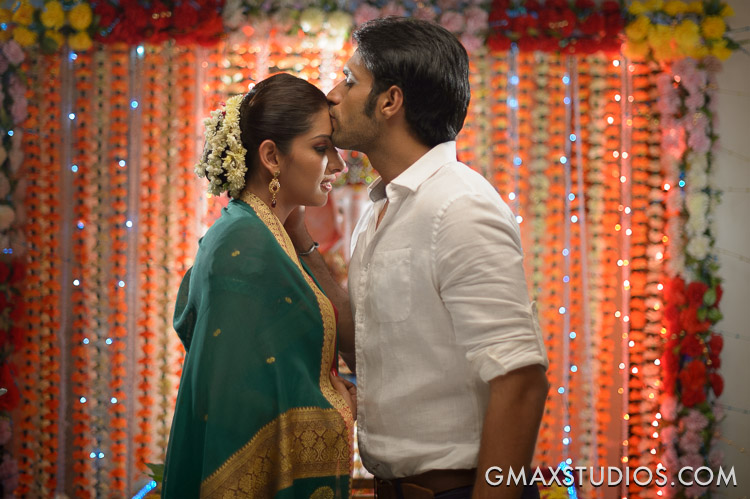
Image 1: Footage as captured. Flat and raw. Notice the low contrast and saturation.
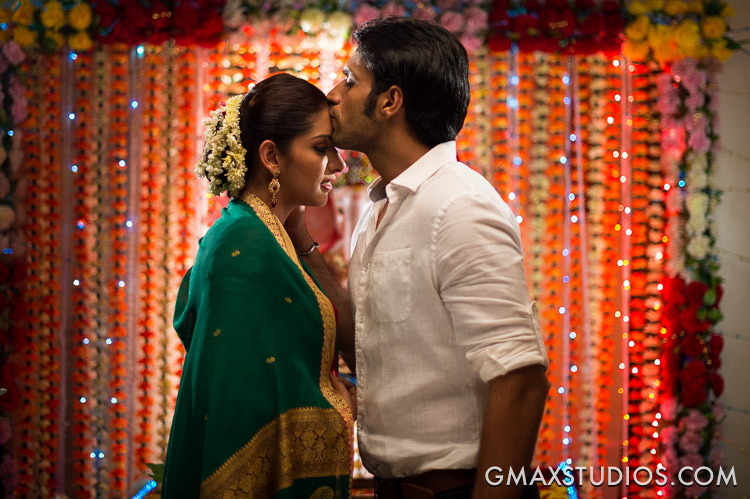
Colour correction is the process by which you ensure that all the shots in your film or video have the right white balance, contrast and tone in every scene so that there is no major visual jump in between shots and scenes and they look like a part of the same production and not different shots assembled from different sources. The final outcome of the colour correction process is to often make the shot footage look as natural or real as possible - more so because more and more people and cameras shoot in a "flat" picture style which might not look very pleasing to the eye. In one sense, colour correction is an essential part of preparing your footage for colour grading.

Image 2: Colour corrected footage. Nice punchy contrast and saturation.
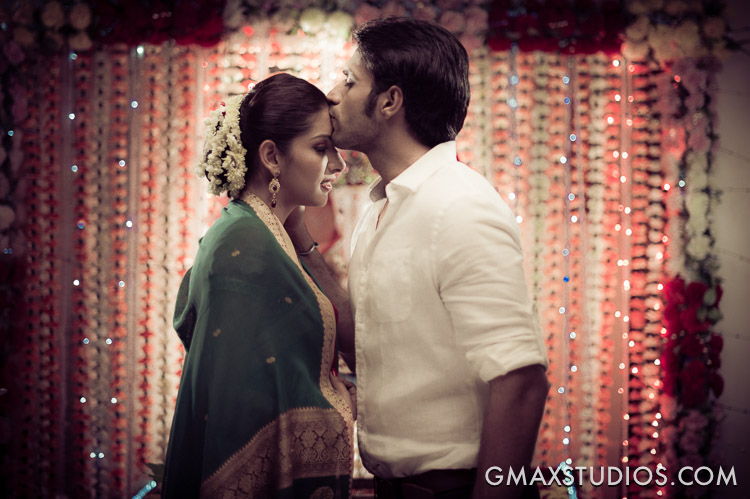
Colour grading is applied after colour correction and is referred to the process of giving different colour tones and hues to your footage so that it creatively conveys the theme on which the film or video is based. It is largely a creative process where the creator of the piece decides that his film will look better with such a tonality. Colour grading is more about conveying a mood that suits the film and it involves manipulation of highlights, midtones and shadows to give the entire footage a different tone altogether.

Image 3: Colour graded. Faded out the colours and diffused the highlights. Since this was a part of a scene where the protagonist is remembering his dead wife the grading helped give the footage a dreamy feel.
Correction before grading is a nice way to remember the difference between the two and while on the subject, take a look at out video below that is perhaps the easiest, quickest and cheapest way to colour correct and grade your footage. Take a look and leave a comment if you have further questions. Also, please subscribe to our YouTube Channel by clicking here.
http://youtu.be/ScLaTzbm_xk


