Atomos Announces Raw Video Recording With Ninja V and Nikon Z7 and Z6
Photographers have long known about the benefits of RAW for stills, now Nikon Z series users will be able to get the same power of RAW in video.
Just when we thought that the dust had settled on the flurry of announcements that 2018 brought, Atomos has announced that it will enable raw video recording for the Nikon Mirrorless Z7 and Nikon Z6 cameras with Atomos Ninja V.

“Photographers have long known about the benefits of RAW for stills, now Nikon Z series users will be able to get the same power of RAW in video. Capturing Apple ProRes RAW video with the Ninja V unlocks complete control of the video image at the highest quality possible. The maximum dynamic range, color accuracy and detail is preserved, while at the same time every aspect of the video image can be controlled with precision for maximum creativity. Colors can be easily matched and the extra information means footage can be easily be manipulated in post-production, which is especially useful for grading and VFX shots. – read more about ProRes RAW. ”

“2019 is all about taking content creation to the next level. Video makers everywhere are looking to add that elusive cinematic quality to their work, whether that be on social media, YouTube or on TV. To answer those needs, Atomos today unveils the next revolution in digital imaging - RAW video output and capture from Nikon’s full frame mirrorless cameras. The Nikon Z 7 and Z 6 full-frame mirrorless cameras will work together with the Atomos Ninja V 4K HDR monitor/recorder to record Apple’s ProRes RAW video format.”
As per Atomos, the 4K data input from the Nikon Z6 and Z7 mirrorless cameras in the Ninja V is transformed into Apple’s ProRes format once recorded via a detachable SSD drive. When the SSD drive is connected to a computer, the footage is then decrypted for editing that gives you the highest quality control. ProRes is also able to keep the RAW data from the cameras into smaller, more manageable file sizes that makes them easier to transfer; having them on a universal format also makes them future proof.
Much more is said to be revealed at CES 2019 in Vegas, but it appears that Atomos is able to achieve this by a “Closed-loop protocol” which essentially means that the ProRes rearranges the pixels from the output of these cameras into a more practical, less-heavy solution for RAW footage. And by using ProRes as the standard, it gives more camera companies to work with RAW because everybody can make use of ProRes RAW without having their processing details handed over.

CREDIT: ENGADGET.COM
Atomos also mentioned on their Instagram that Atomos and Nikon will be unveiling a ‘filmmaker’s kit’ for video creators; the Nikon Z6 being at the center of that kit; along with the Atomos Ninja V and some accessories necessary for professional video shooting and photography. There’s much more to come from CES 2019, but this seems like a great start to the new year.

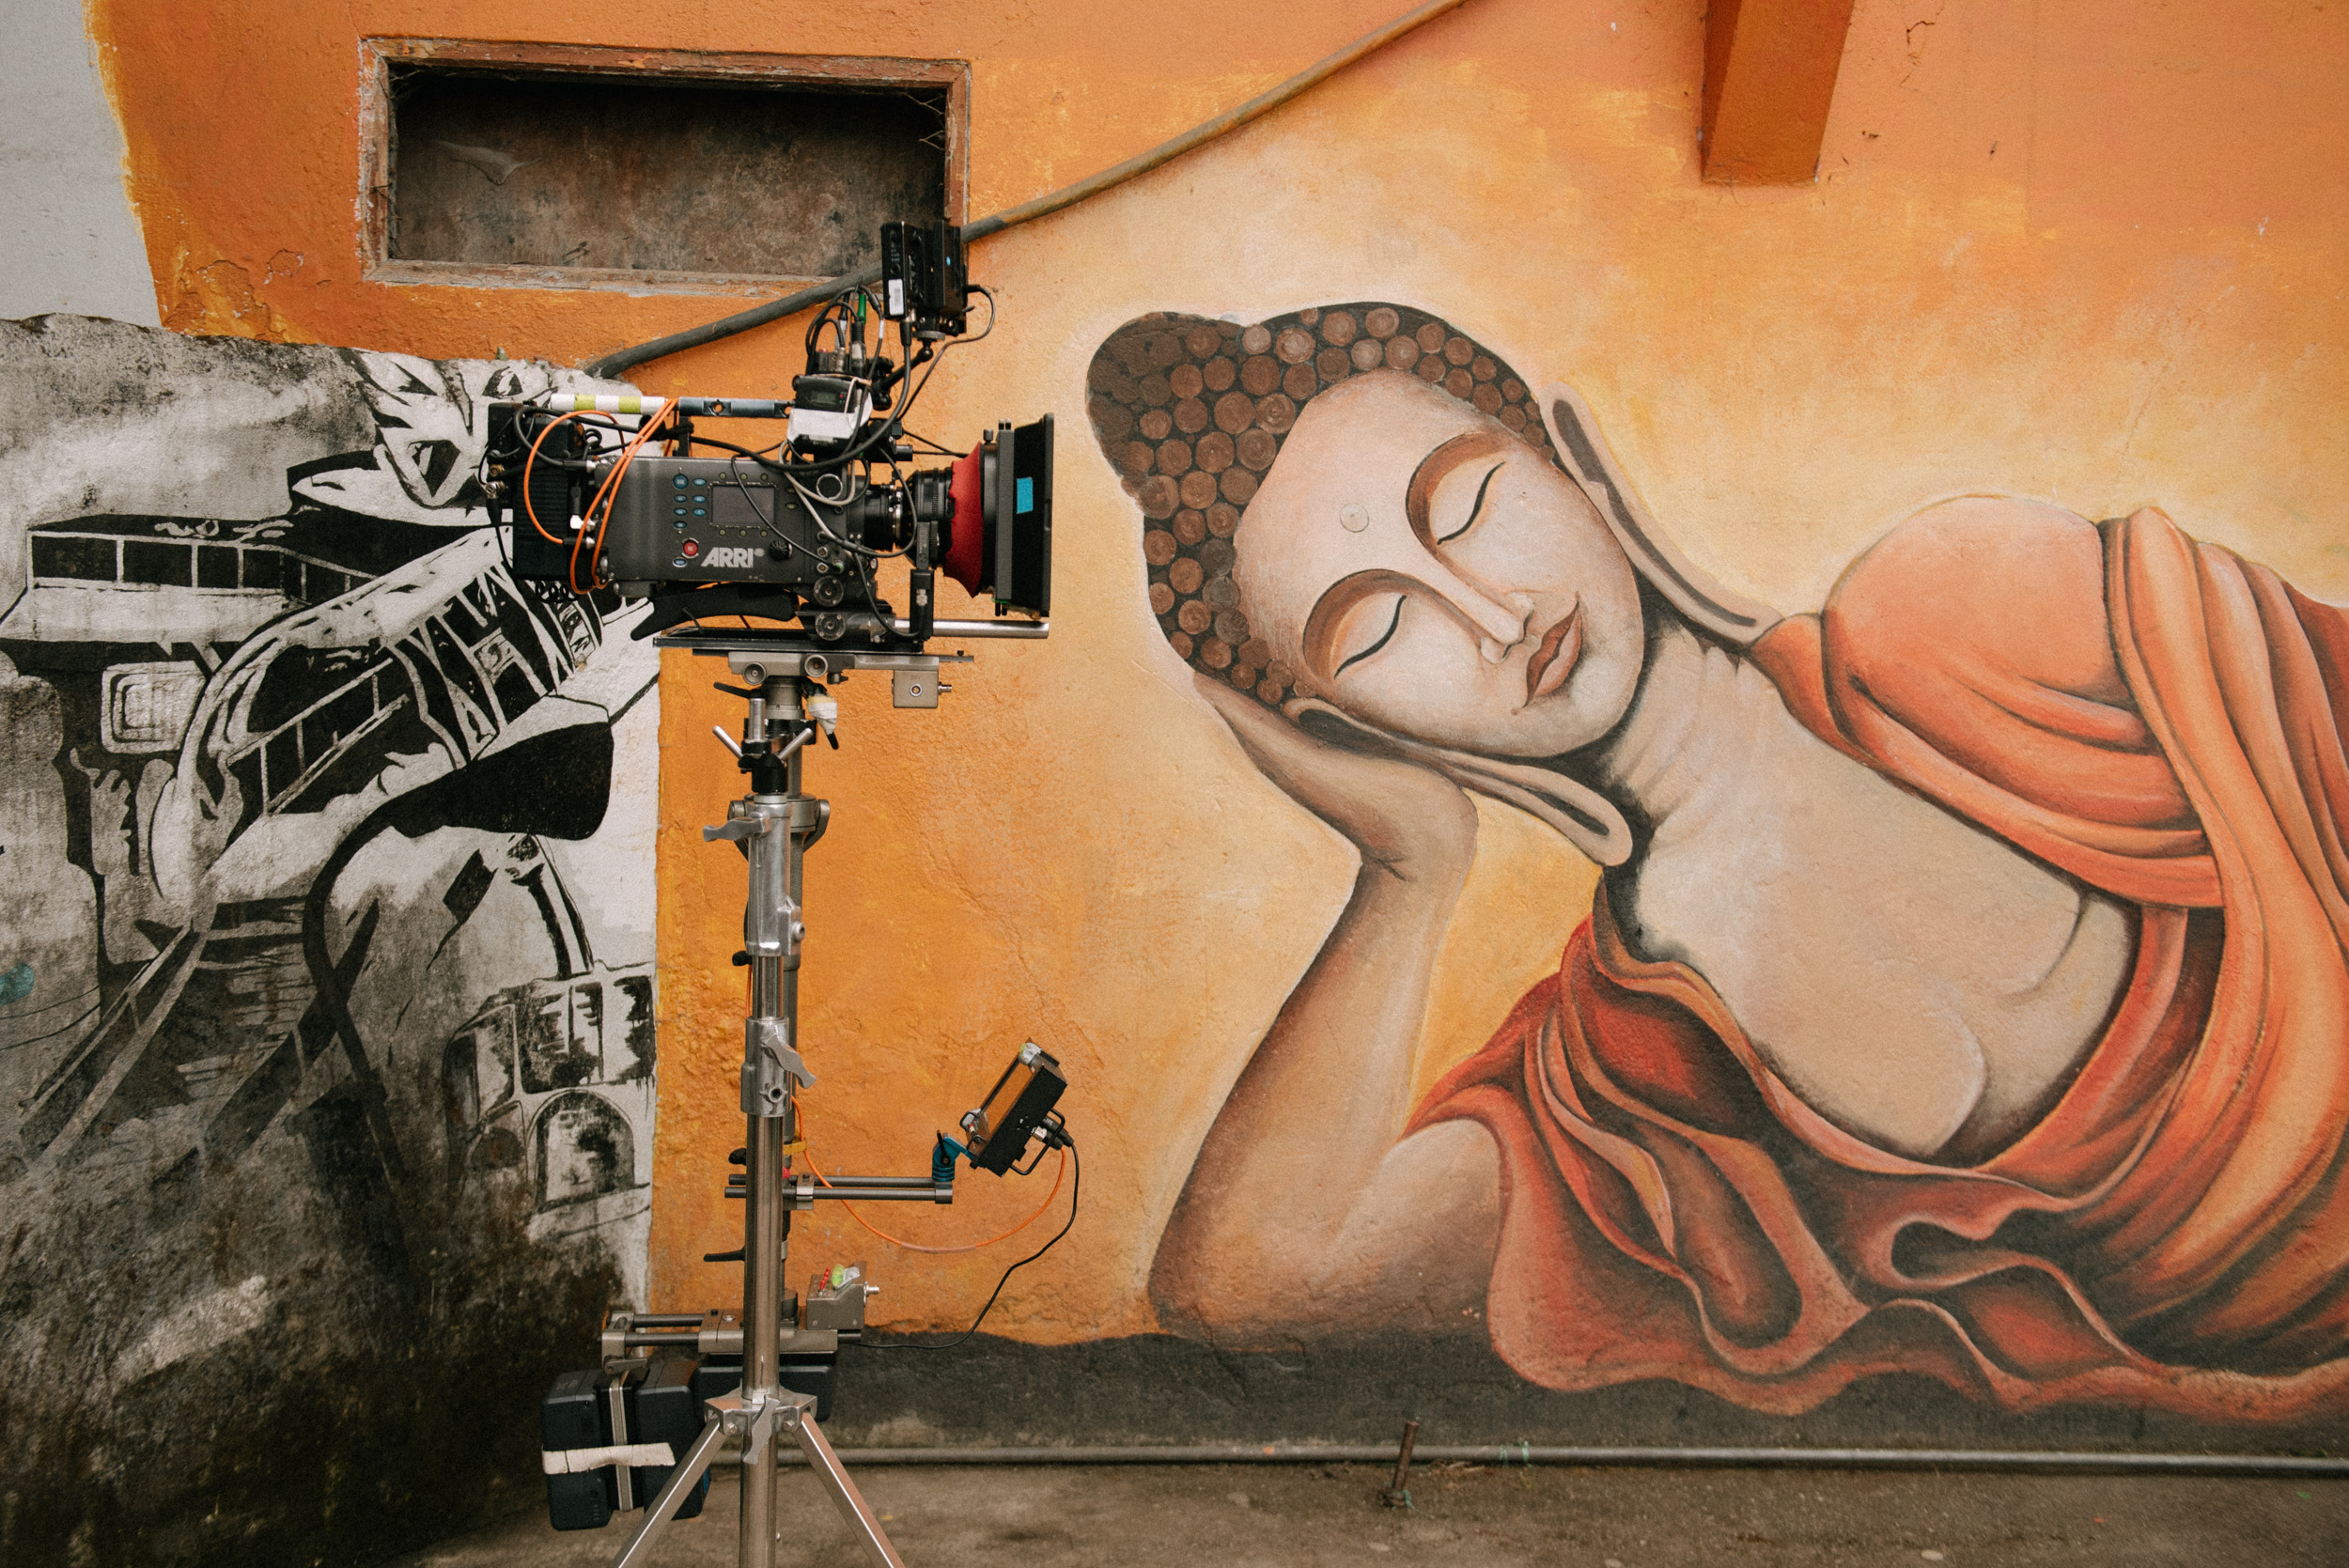
Joseph Radhik Interview | Lessons In Humility And Wedding Photography | In Frame With Gorky M Episode 1
If you’re a wedding photographer, you might not want to miss this.
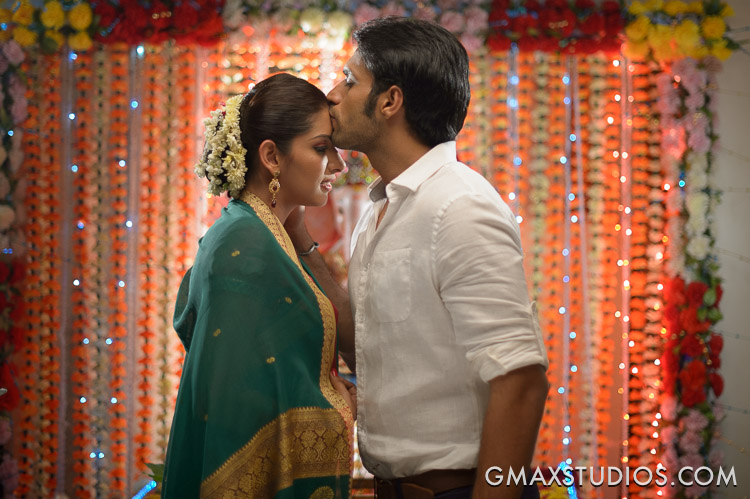
Wedding Photography has witnessed a massive revival all over the world. These days, wedding photographers can charge as much as they like. This can partly be credited to photographers like Joseph Radhik who’ve taken a different approach to photographing weddings by bringing out a previously unseen art to them. Joseph has won countless awards for his work and is the founder of Stories by Joseph Radhik, a wedding photography firm that’s been featured in magazines like Grazia, Harpers’ and People Magazine. A photographer with an entrepreneurial spirit, Joseph has managed to blow up his craft into a thriving business whilst retaining all of the creativity and passion.
Joseph is the first guest in our latest series, ‘In Frame with Gorky M’ - a half hour tete-a-tete with some of the world’s best photographers. In the video, Joseph talks about how he got into wedding photography, his personal gear and more. The full episode is embedded at the bottom of the post, you can get right to it if you like.
“I worked as a business development manager five days a week, and on a Friday I would shoot a wedding and be back in office on Monday. ”
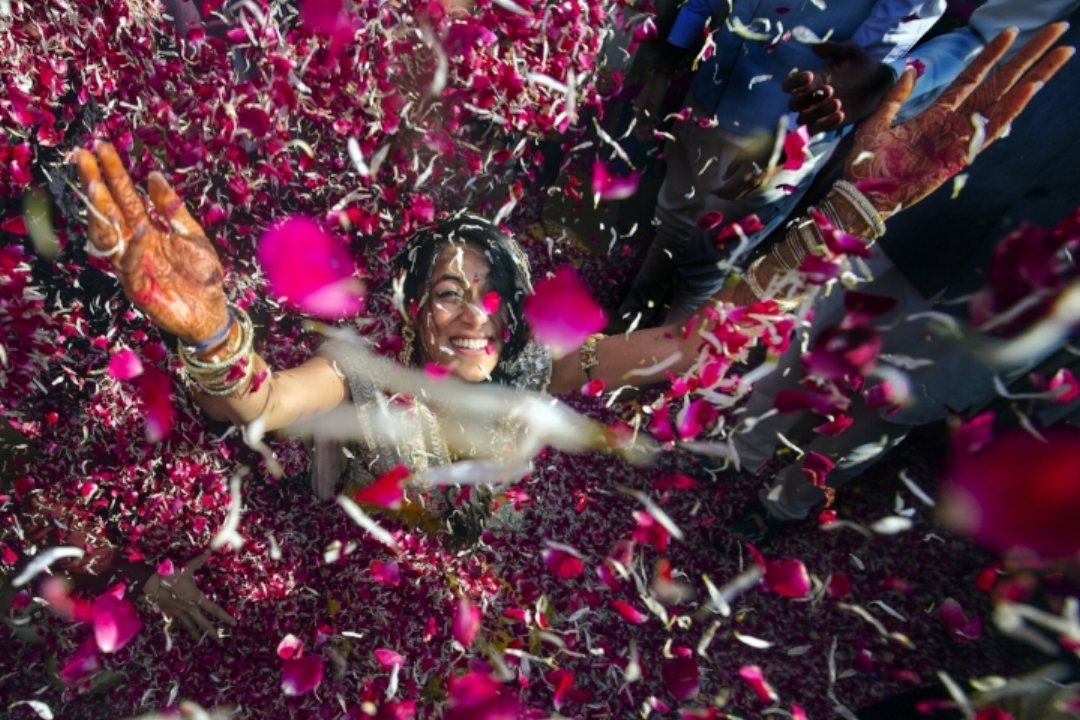
Photograph by Joseph Radhik, © Stories by Joseph Radhik
It’s this attitude and commitment that’s made Joseph the one of the prized photographers in the industry.
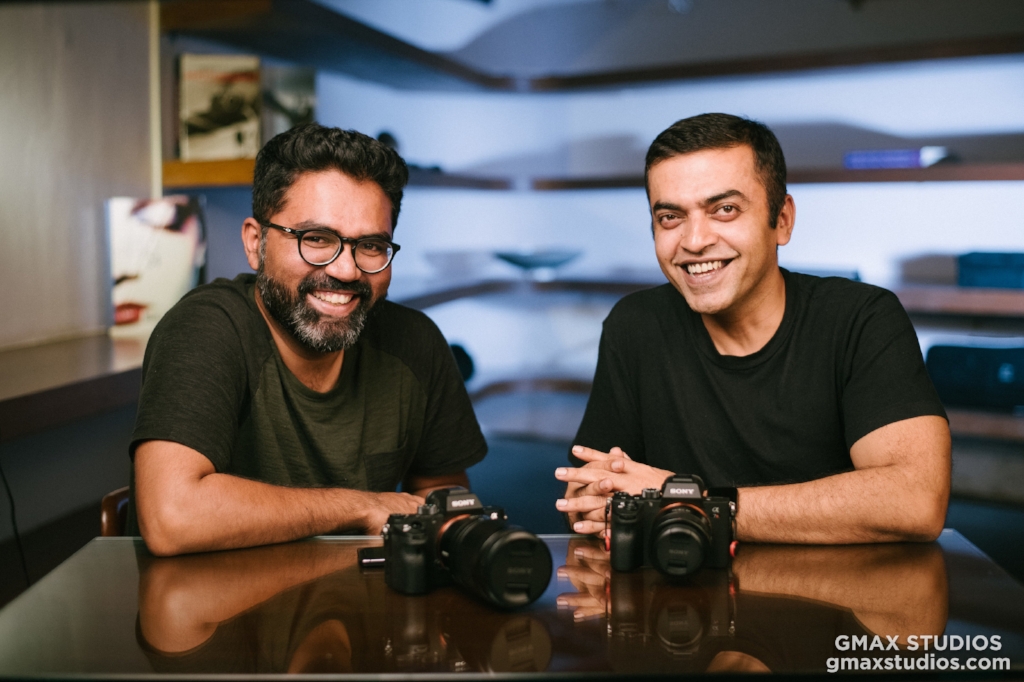
And there’s lots we’ve learned about the man these past few months, bumping into him at the Sony A7III launch in Mumbai (He’s also Sony’s Global Imaging Ambassador) and from the time he came over to talk about his passion project PEPx Photocon. He was coming straight from a photo-shoot, so he came with suitcase and all, very much, as we like to call it - in the zone. We were going to be filming our conversation in one hour, and he was going live simultaneously on his PEP Professionals app; his technicians setting up a live-stream that looked technical as hell. In those days we’d go live every Saturday, so we could understand the immense pressure. But Joseph was cool like you’d be on a Sunday morning. He was quick to figure out a solution when a problem arose, answering and hanging up calls at the pace of a stockbroker, at times, on his haunches like a camera assistant.
After seeing what Joseph’s schedule looked like, (putting together a 3-day global photography event, photographing a wedding, giving an interview and going live at the same time on his app) we learned that it’s no more just you and the camera. Photography is a big part of your life but it’s a relatively small part of your business. Most of your time’s eaten up by phone calls, production meetings, preparation and social media. It’s how you fare in those departments that determines if you’ll be remembered for picking up the camera or not.

Real photographers don’t shy away from selfies
In return for creating awareness on PEPx Photocon on our channel GMax Studios, Joseph had invited us to the event. He let us film the entire event, gave us the best seats in the house and also threw in twenty PEPx passes for our subscribers. It was because of this wonderful opportunity that we were able to chat with accomplished and globally renowned photographers such as Ira Block, Dinesh Kumble, Yuvraj Gurjar and Auditya Venkatesh.
PEPx was an unbelievable experience for a photographer. People were practicing photography the halls, students were chatting up their favorite photographers; ambassadors, acclaimed photographers, gearheads, camera companies, vloggers, motivational speakers - everybody was present. It was kind of like an Apple event, but for photographers. Joseph was speaking on all three days, and during the course of the event, we learned just how good an orator he is. His speeches are motivational and he also likes to laugh at some of his own jokes, but he kept the audiences engaged through all of it.

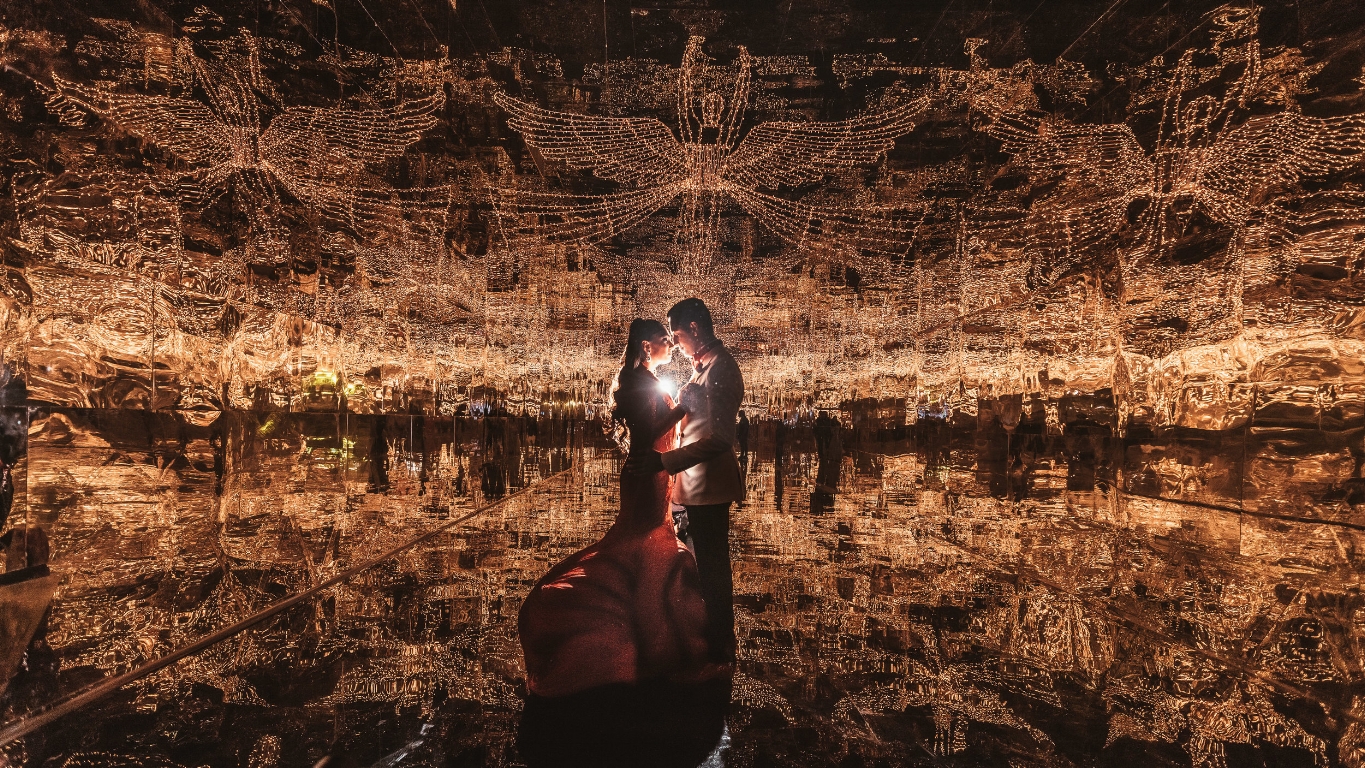
Photograph by Joseph Radhik, © Stories by Joseph Radhik
When asked about the best camera settings for wedding photography, (we know, it sounds absurd) Joseph said that the best setting is getting to the location with your camera. The theater erupted with laughter. While there were other renowned photographers speaking at the event, seeing Joseph get up on stage was always exciting, his jokes and insights being met with much laughter and applause. He was able to harvest every colloquial sentiment to make the people feel at home.
“In 2008, I googled ‘wedding photographers in India’ and it returned zero results.
I chanced upon a genre that I never knew existed.”
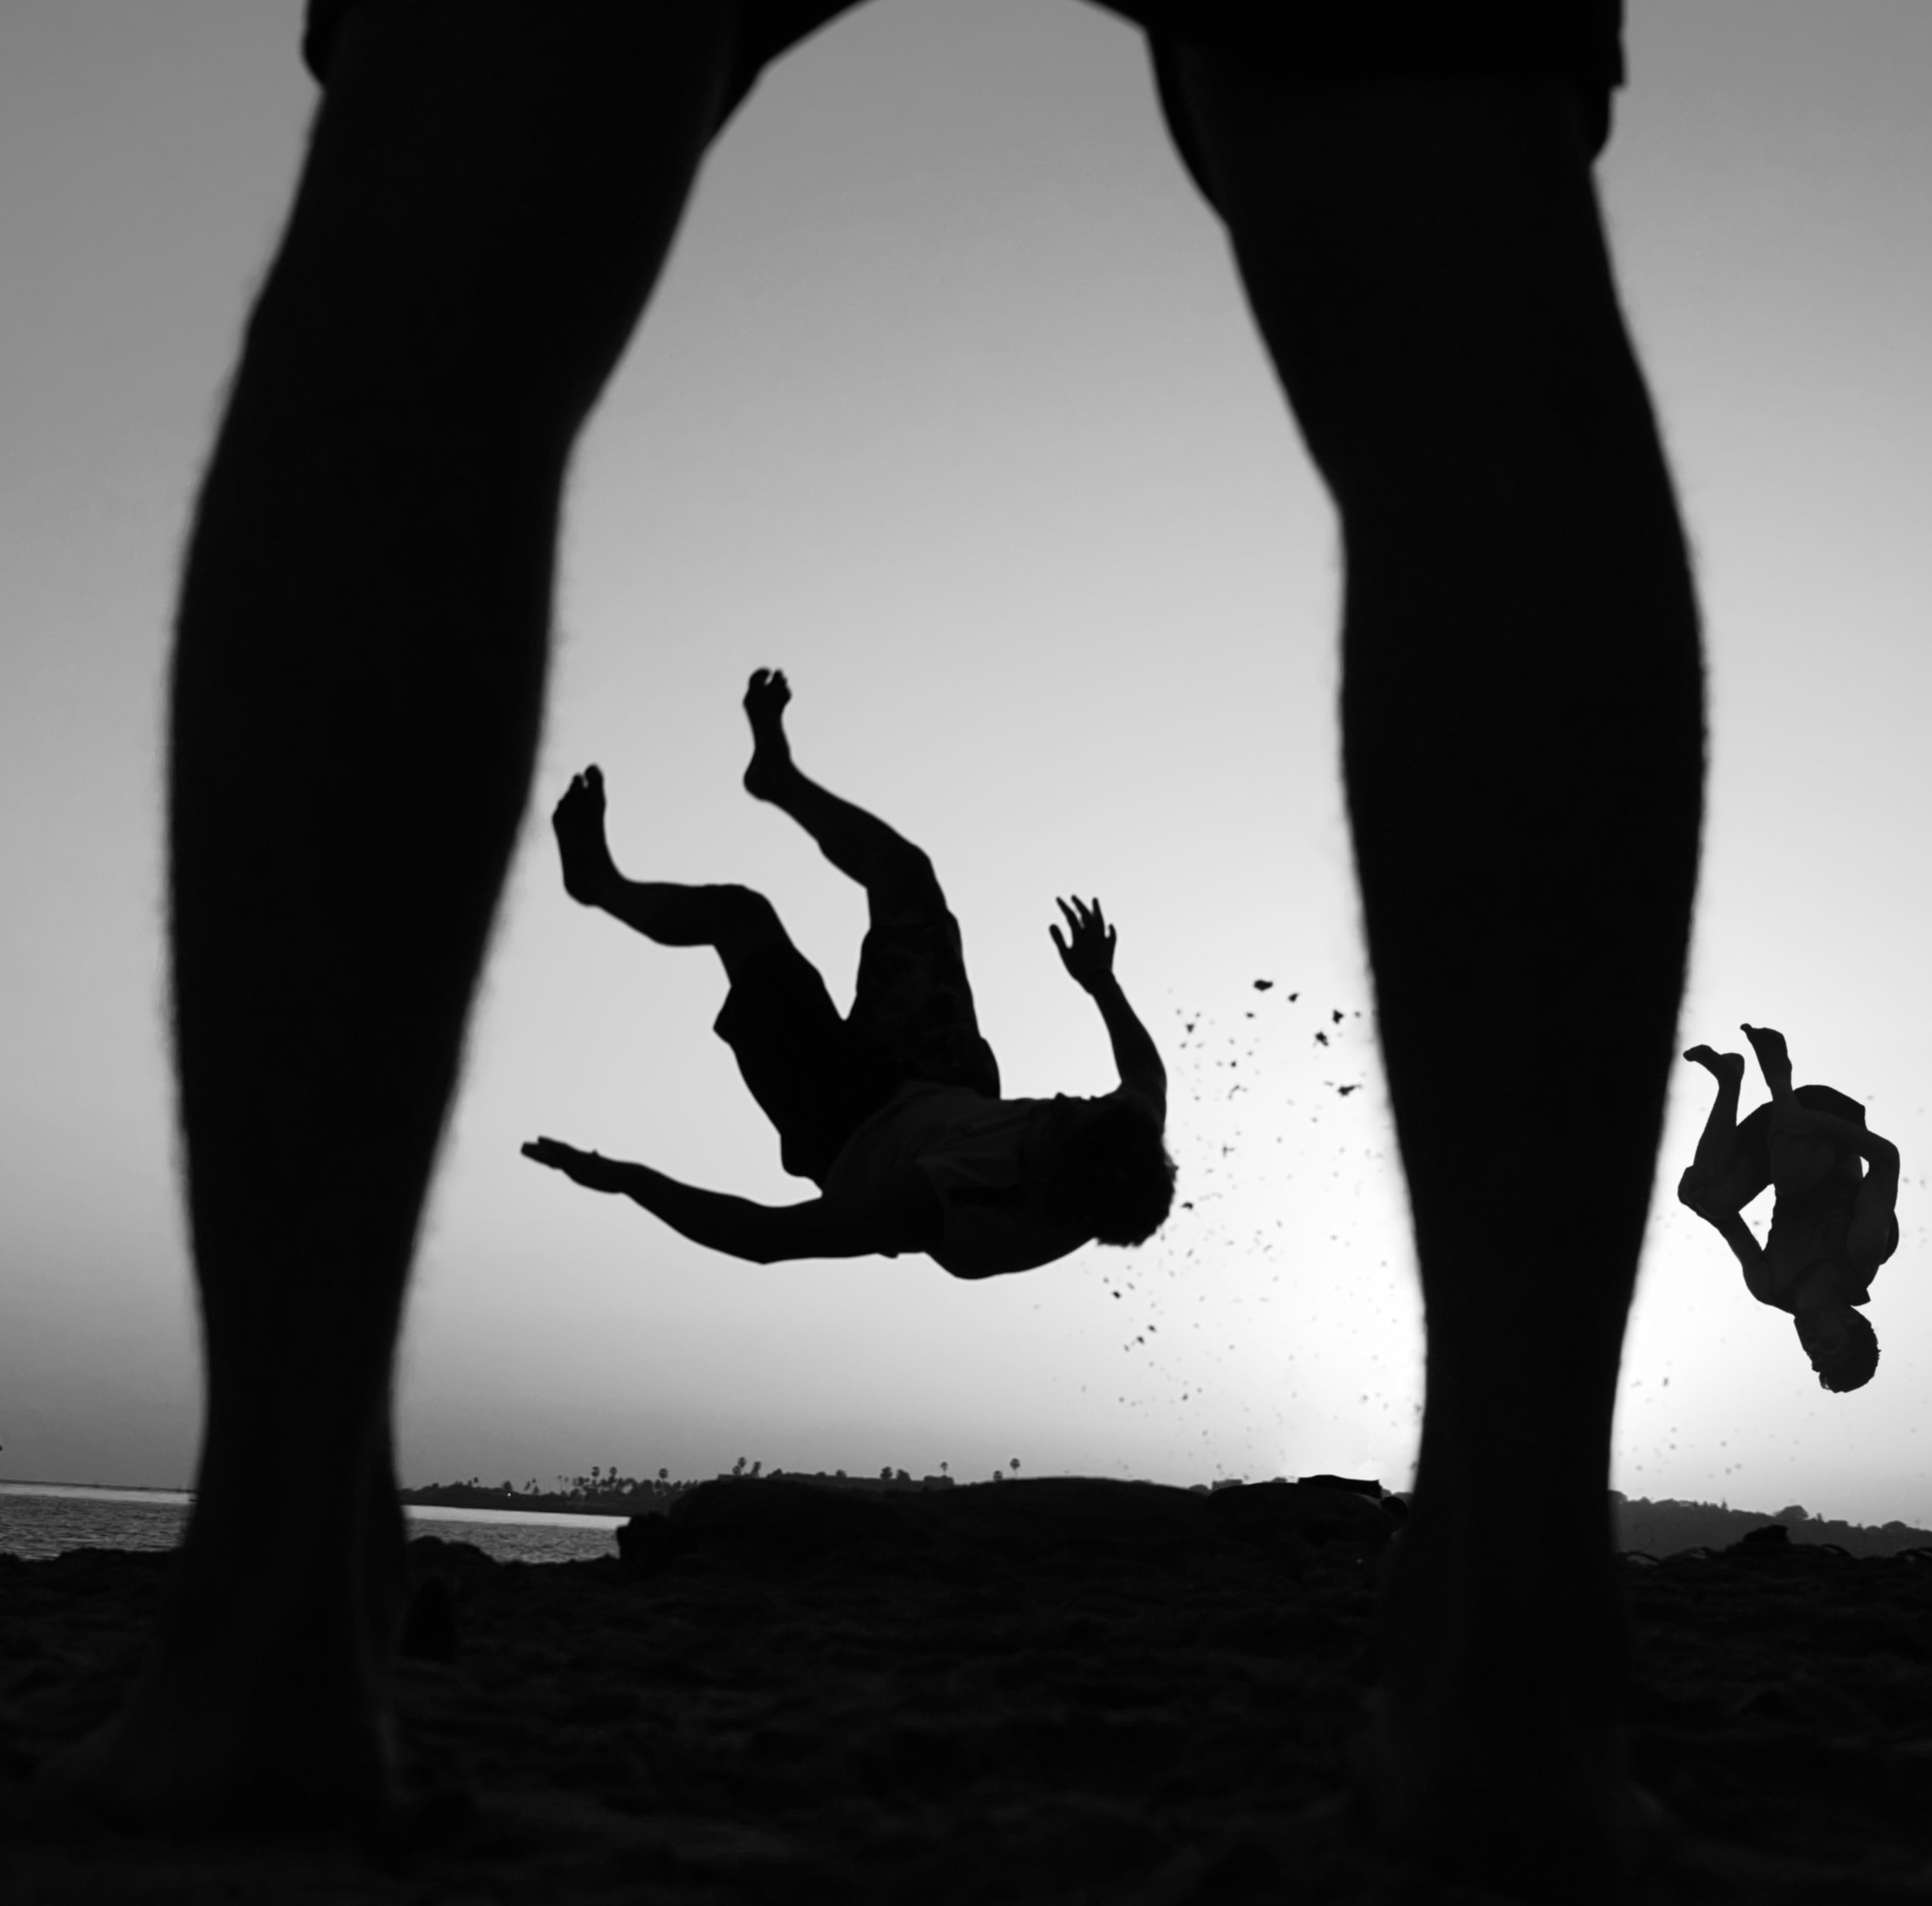
Photograph by Joseph Radhik, © Stories by Joseph Radhik
Wedding photography came to Joseph when he was looking for a photographer to shoot his sister’s wedding. At the time, he was photographing flowers and sunsets like every rookie with a D-SLR. (Scroll through some of his older photos on flickr, we’re not lying) “I chanced upon a genre that I never knew existed”, says the the three-time fearless photographer of the year, his eyes lighting up from visualizing the moment. He ended up photographing his sister's wedding, and naturally, he got good at it as he shot more and more. He even began to dress the part. In fact, his photography gear also comprises of waistcoats just so he can blend in better. “I’m working, but it’s still a wedding.” It’s a statement that’s profound because of its simplicity. It can only come from a guy who truly loves to photograph weddings.
“Wedding photography had everything that I loved. Photojournalism, beauty, light, documentary, landscapes. Weddings are also like wildlife. You need perfect timing.”

Photograph by Joseph Radhik, © Stories by Joseph Radhik
As an effort to enjoy himself more, Joseph carries only a handful of equipment - his favorite lenses, a double-camera strap (so he looks like a badass cop) and has a relatively small team helping him out with the lighting and managing of data. While his world is fairly complex, his photography is simple. It’s how he’s able to still love doing what he does despite his phone ringing off the hook. As a photographer, he’s not above shooting group photographs of the couple’s friends and family he says. The truth of that statement hits your chest. It’s a lesson in humility from the guy who shot India’s most talked-about wedding.
Watch the entire conversation between Gorky M and Joseph Radhik below. He talks about his inspirations, shares some valuable trade secrets and even lets us take a peek inside his camera bag.

How to shoot a panorama
With the help of proper techniques and post-processing software, anybody can get near-perfect panoramic shots.
You’re out with your friends, and you’re standing on top of a mountain from where the view seems great. But your camera just won’t cover it all. There’s also no space to go back, and you’re not carrying a wide angle lens. This is where panoramas come in handy. They allow you to photograph an entire scene and not just part of it.
In the old days, photographers would create panoramas on manually by panning across a scene and taking a couple of exposures on film, then printing and stitching them in a lab. Or you got yourself one of those super expensive panorama cameras like the Hasselblad X-Pan.
It was far from ideal, and it was far from easy.
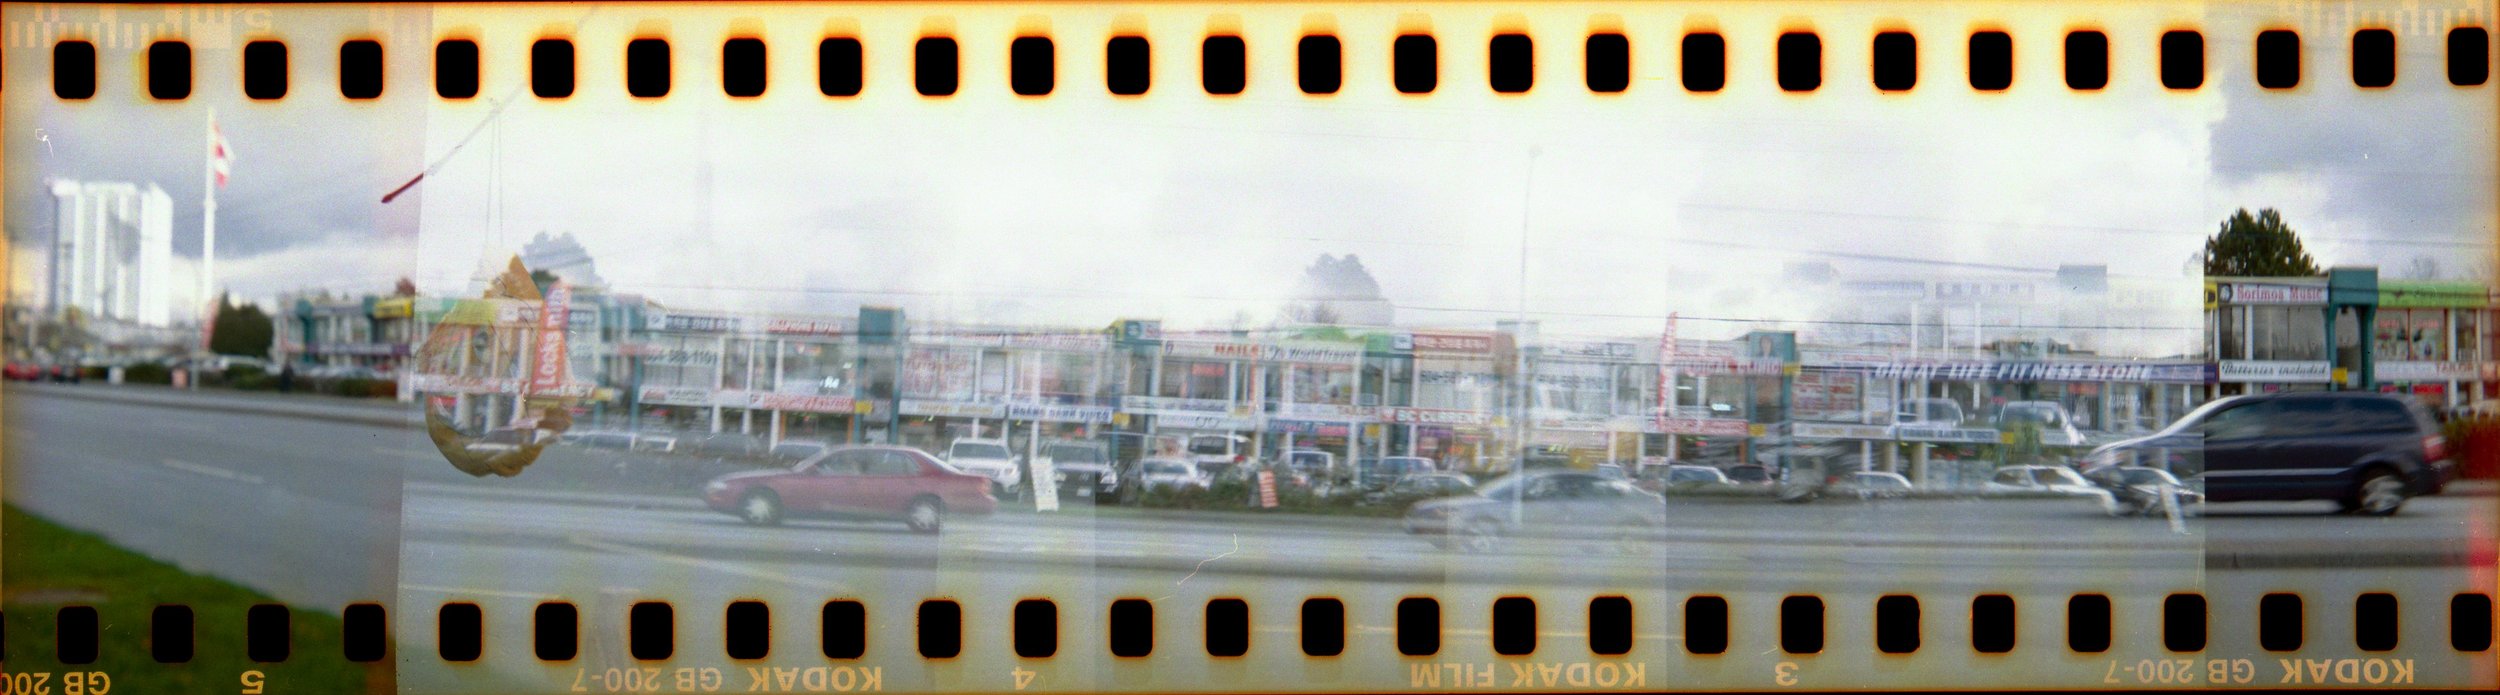
Panorama on film is very tough to achieve
But now, with the help of proper technique and post-processing software, you can get near-perfect panoramic shots. Some photographers stitch over a hundred photographs to create gigapixel panoramas.
WHAT IS A PANORAMA?
Panorama, or panoramic photography is wide-format photography in which you take multiple exposures and merge them together to create a massive picture, sometimes 180 degrees or more. Panorama was introduced by early painters who wanted to give a wider view of the scenes they were trying to project in their paintings.

Panoramic Painting By Maerten van Heemskerck
HOW DO YOU SHOOT A PANORAMA?
A panorama is created in two parts
Photographing the scene via your camera
Using post-processing software for e.g. Adobe Lightroom to merge them together
EQUIPMENT
While there are people who can shoot a panorama handheld, a tripod will allow you shoot images along one horizontal plane easily. You can also get a panoramic head or an L bracket if you’re into real estate or architectural photography. But for our purposes, a tripod should do just fine.
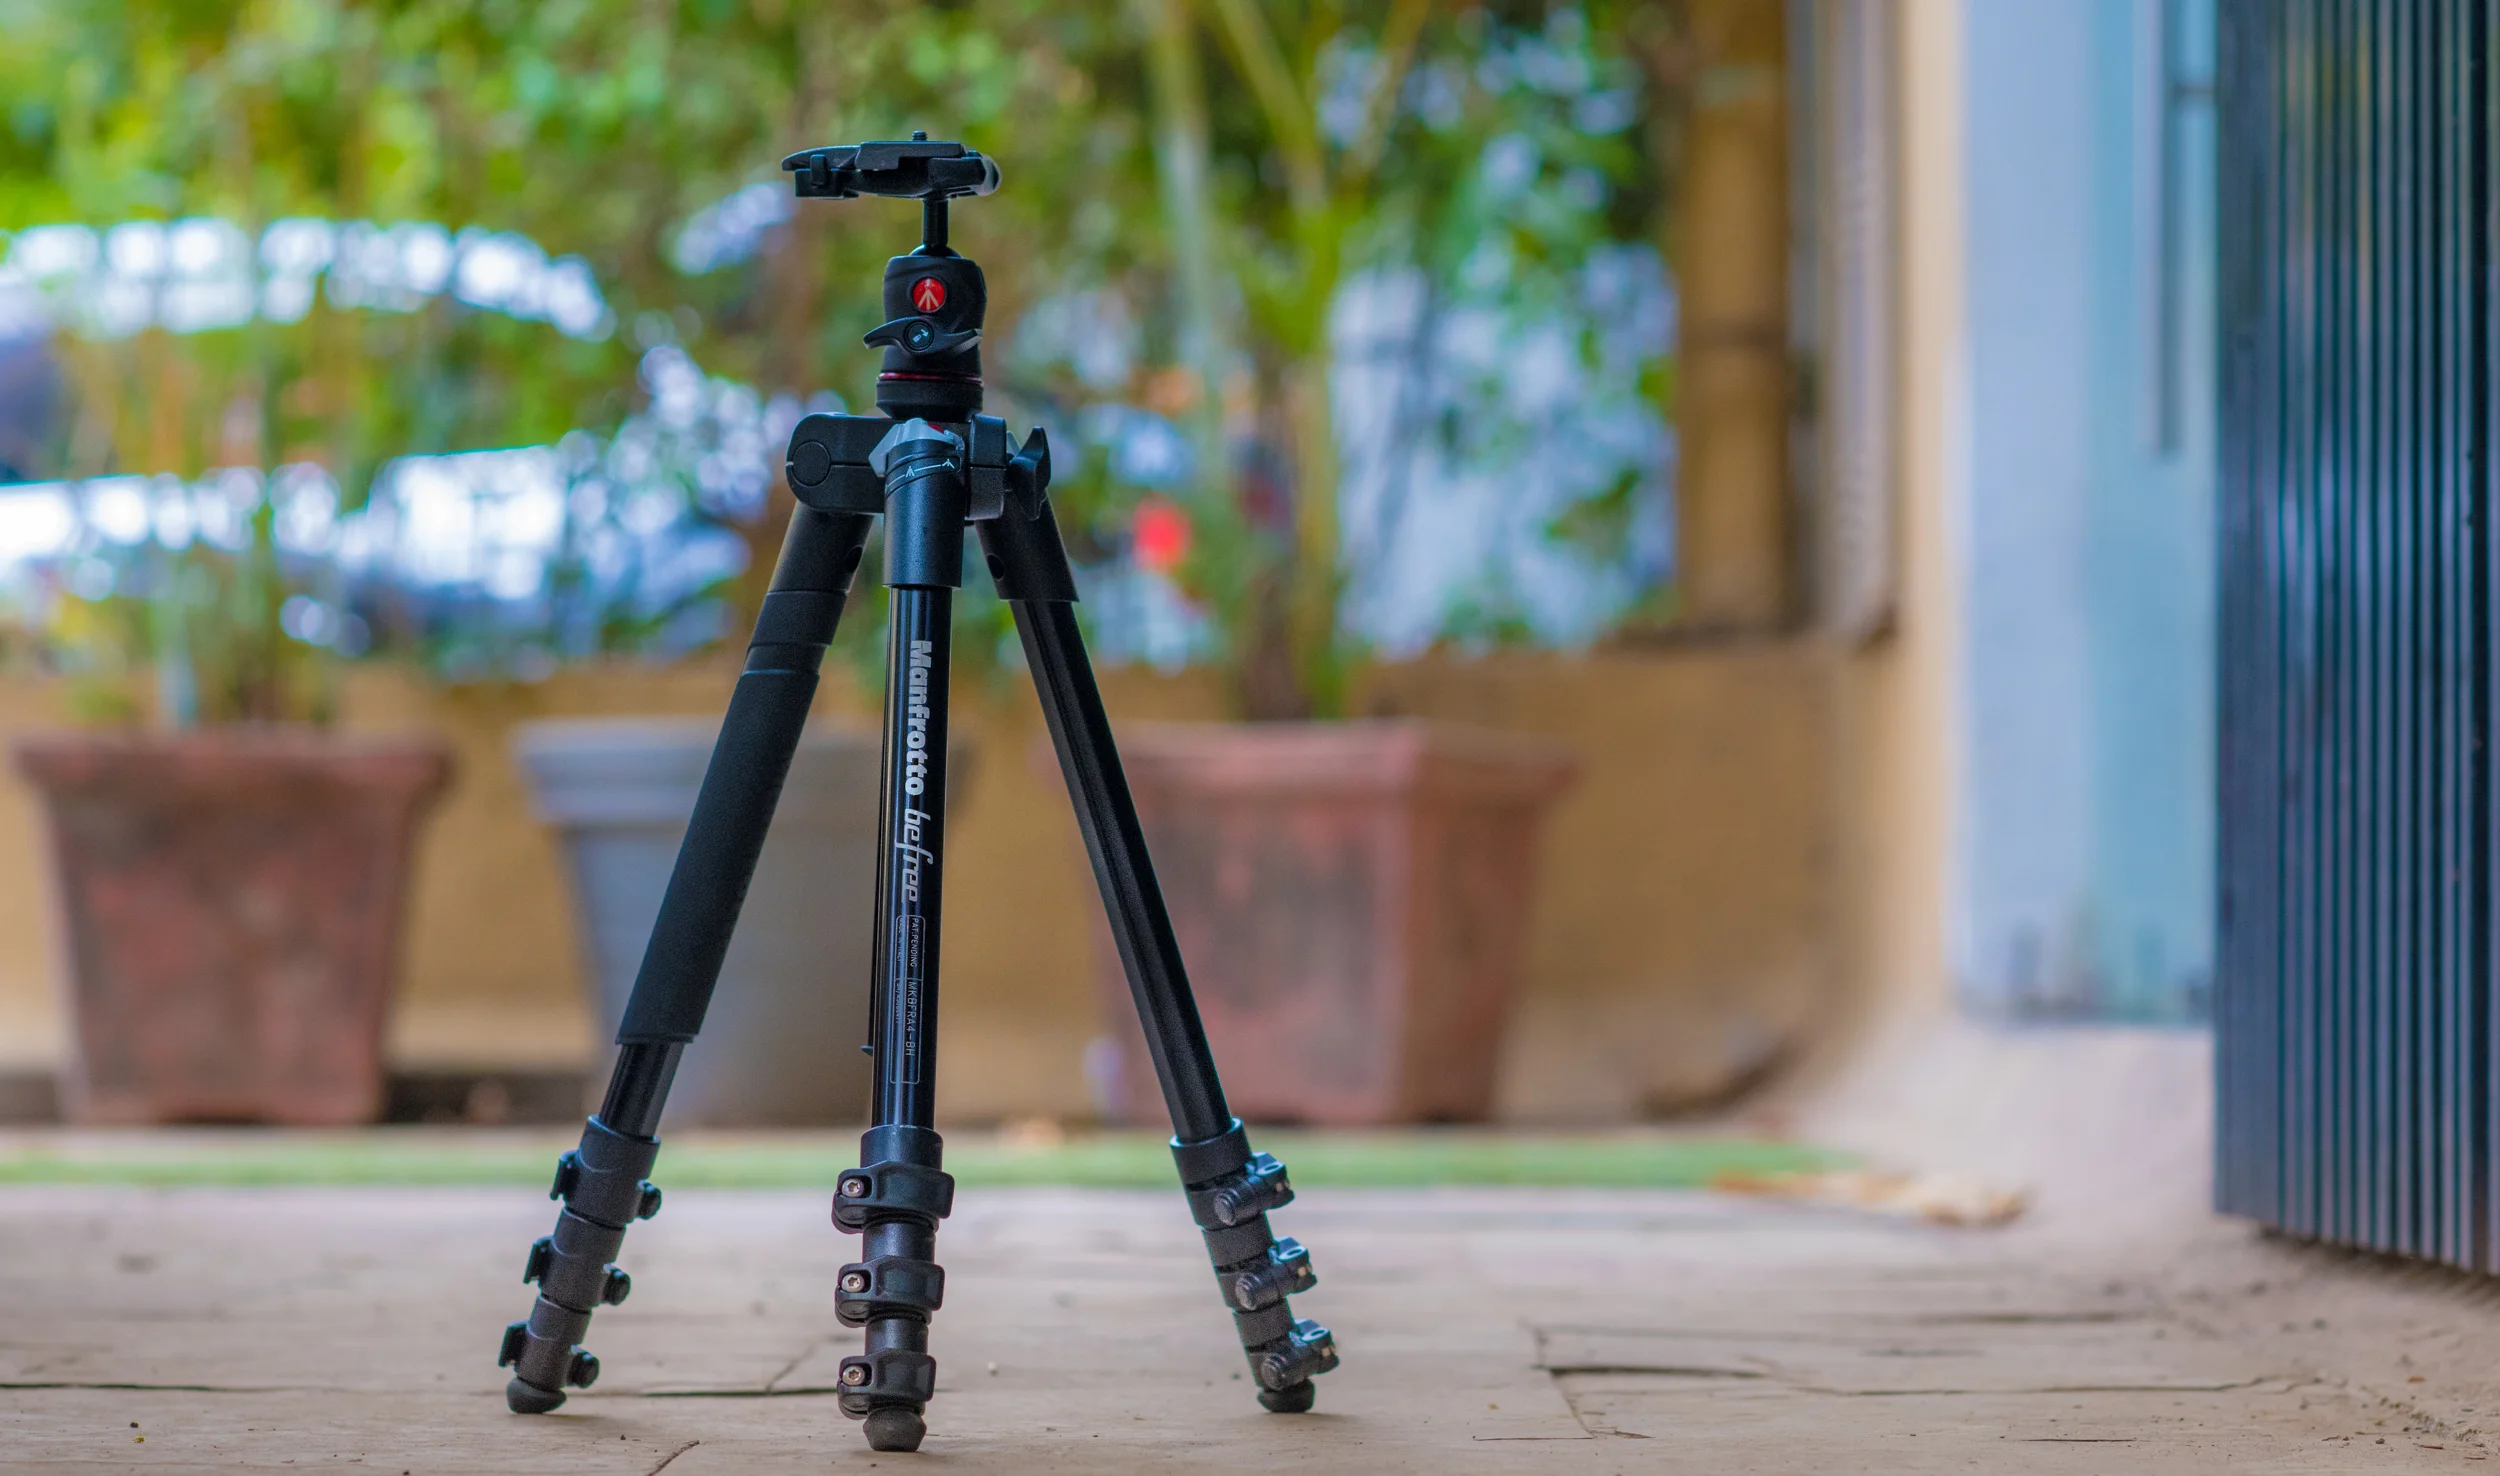
With a tripod, your images will remain level and steady
SETTINGS
Making a panorama look like one photograph is the hard part. Which is why you have to adjust settings manually. The computer in your camera doesn’t know that you’re trying to shoot a panorama, and will expose each shot differently if you left the job of setting the exposure to it.
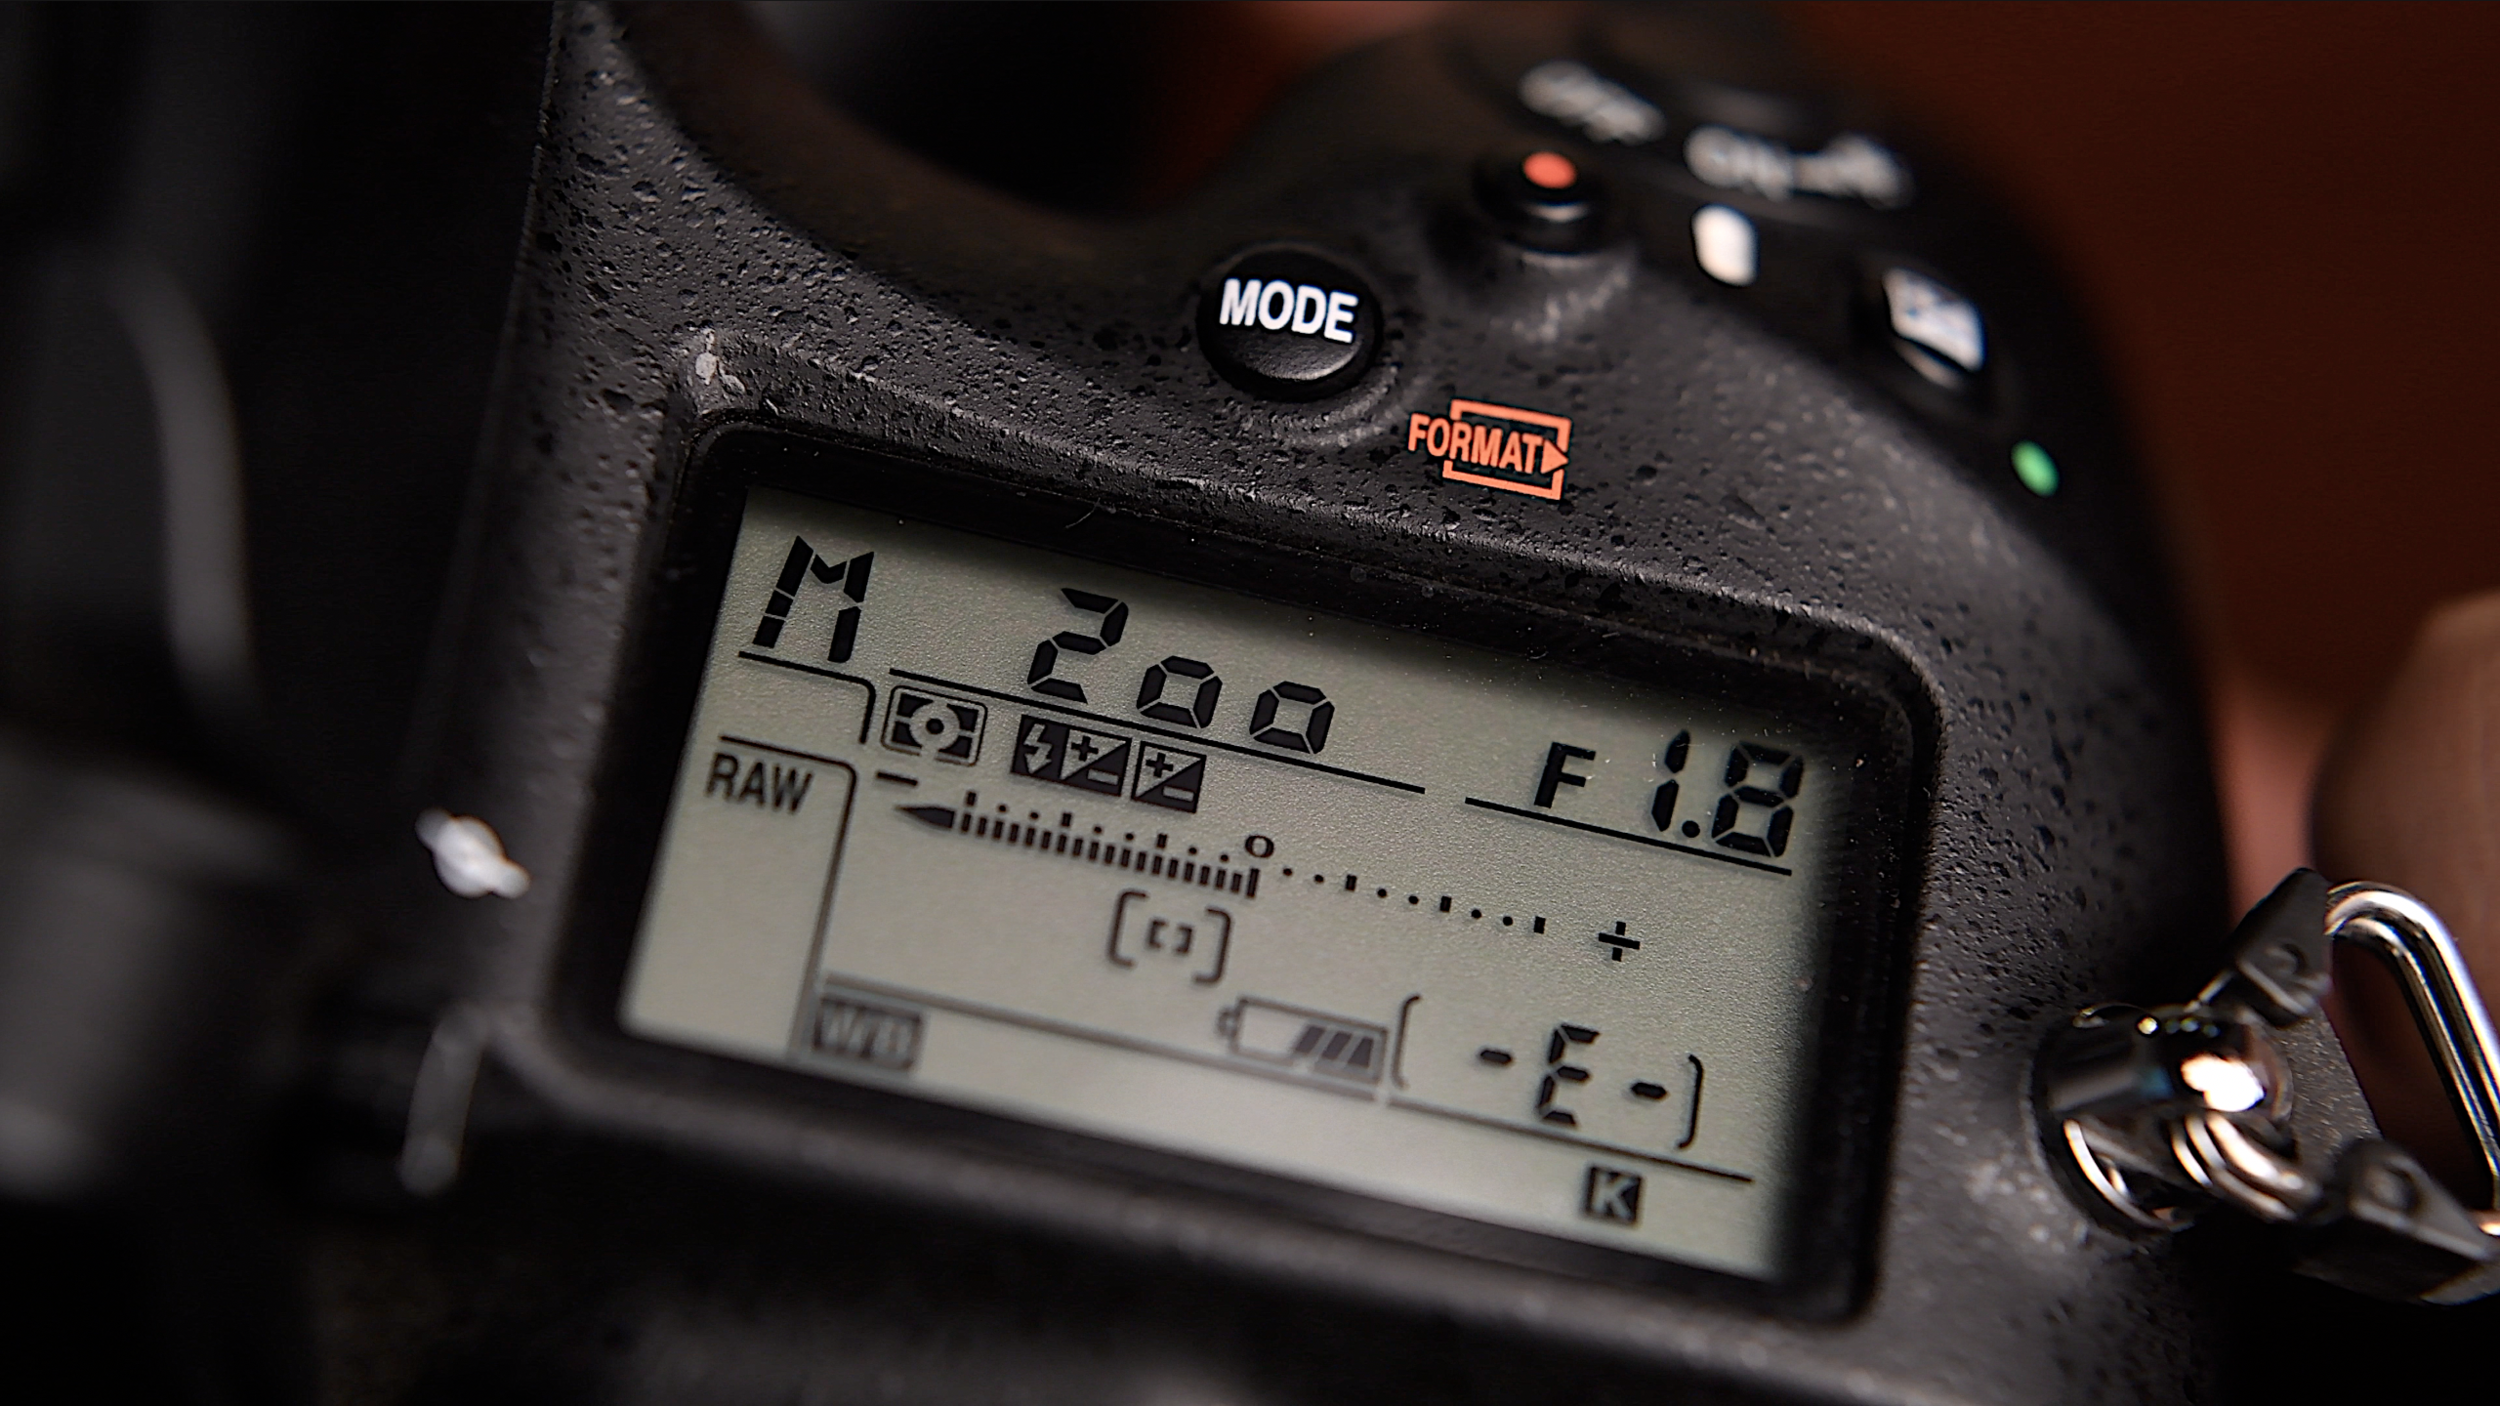
Switch your camera to manual mode and set the exposure manually to avoid varying exposures in every photograph
Focus
Focusing should also be done manually. Your focus should be set to a distant object that you're photographing or at infinity. This way, your camera won't change focus each time you take a picture.
Aperture
Because we want everything in focus, the aperture should be set to a higher f-stop, preferably f.8 or above.
Shutter Speed
Try to find a sweet spot in the center of the photograph using your camera's metering options. Take a few pictures to ensure the bright and dark areas of the photograph are exposed to your liking and not based on the automatic values suggested by your camera.
ISO
Set your ISO manually and use the same ISO for each picture.
White Balance
Because light reflects off each object differently, auto white balance could make your photograph look like a shade chart. Set and lock the white balance manually, like you did for your focus.
Shoot In RAW
Set your file format to raw, so it’s easier to correct exposure and color in post-processing. To fully understand the possibilities of shooting with a RAW file format, click here.
PHOTOGRAPHING THE SCENE
The next bit is taking the photographs. Once you’ve mounted your camera on the tripod, make sure the horizon is aligned correctly in your viewfinder.
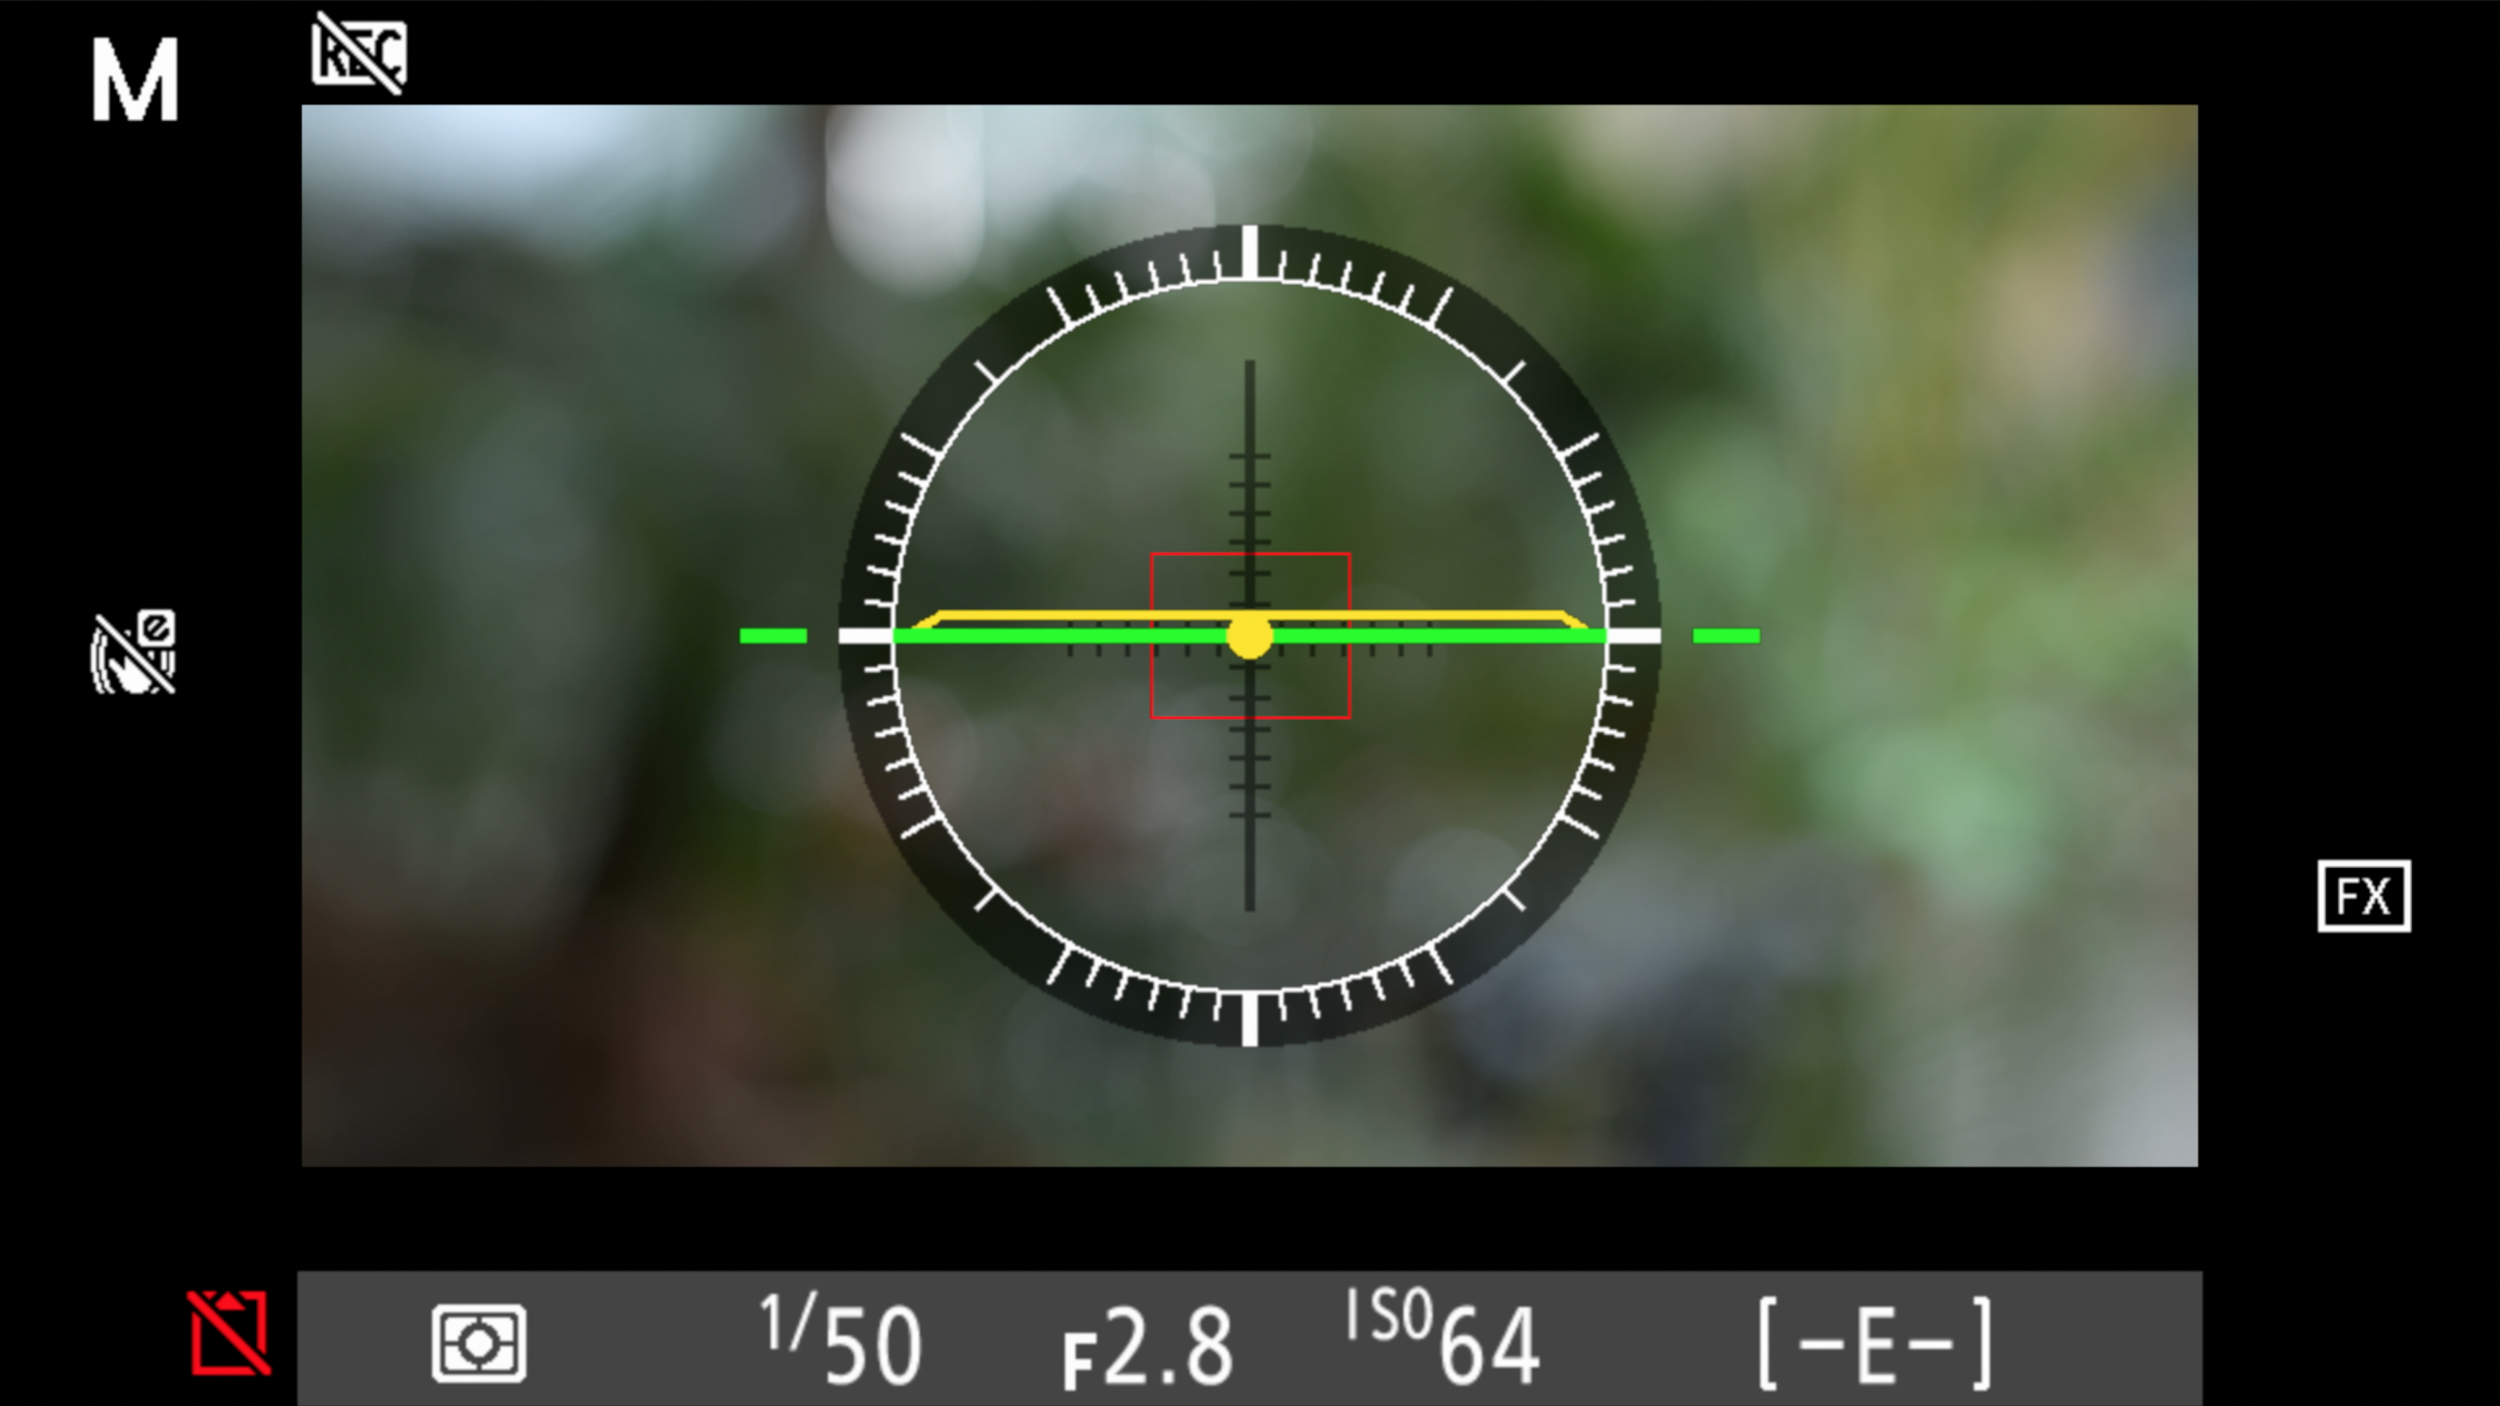
A leveled horizon brings you a step closer to getting the perfect panorama
Simply pan the camera across the scene you want to photograph and click a few pictures. Make sure that each image overlaps the other by 30% to maintain focus across the entire picture, and to make your panorama look like one image.
Watch out for wind and moving objects when taking pictures. It can spoil the evenness of your panorama. Half of it will look like it’s moving while the other half might be still.
PROCESSING THE IMAGE
The second part of creating a panorama is the processing. There are tons of free software on the web for panoramic photography such as Hugin and Image composite editor, but we personally use Adobe Lightroom to stitch the images together.
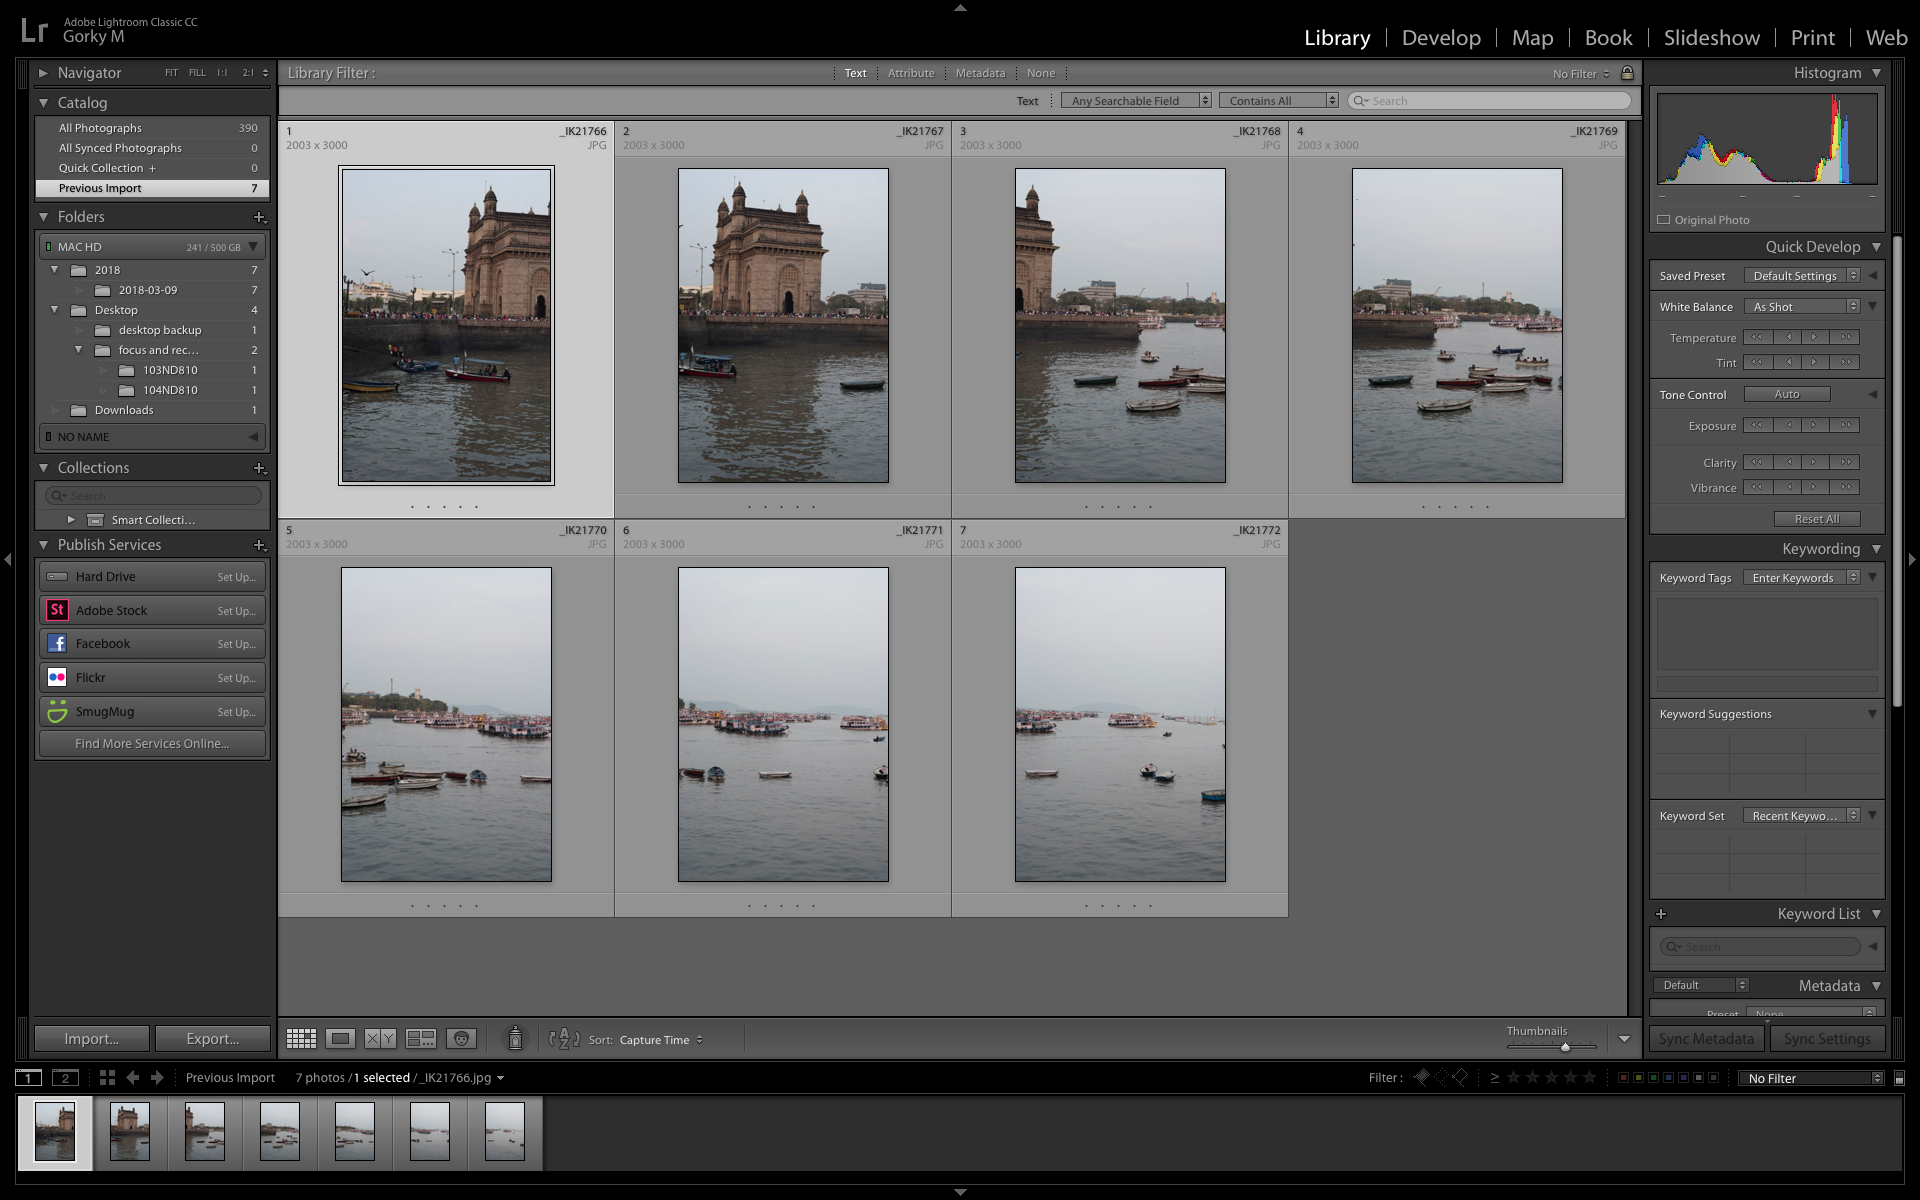
One image has to overlap the other by at least 30% for maintaining focus and seamlessness
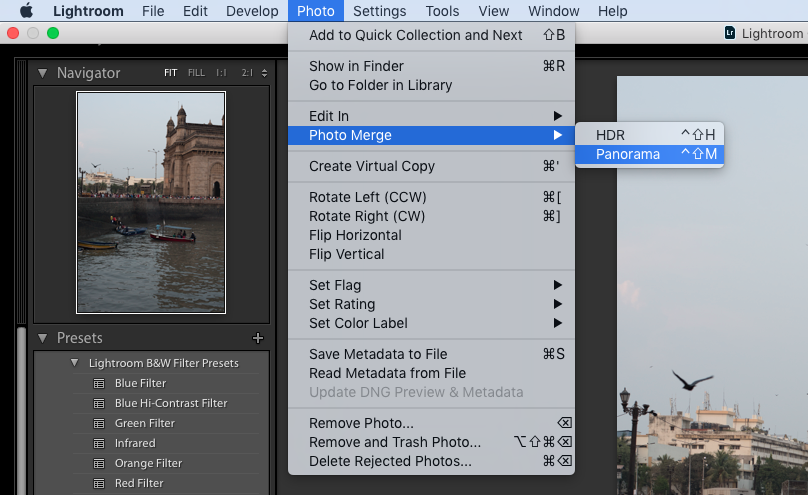
Open the images in Adobe Lightroom, then click on the ‘photo’ option and merge the images together.
You can straighten it a bit more, or crop it to your liking and that’s about it.
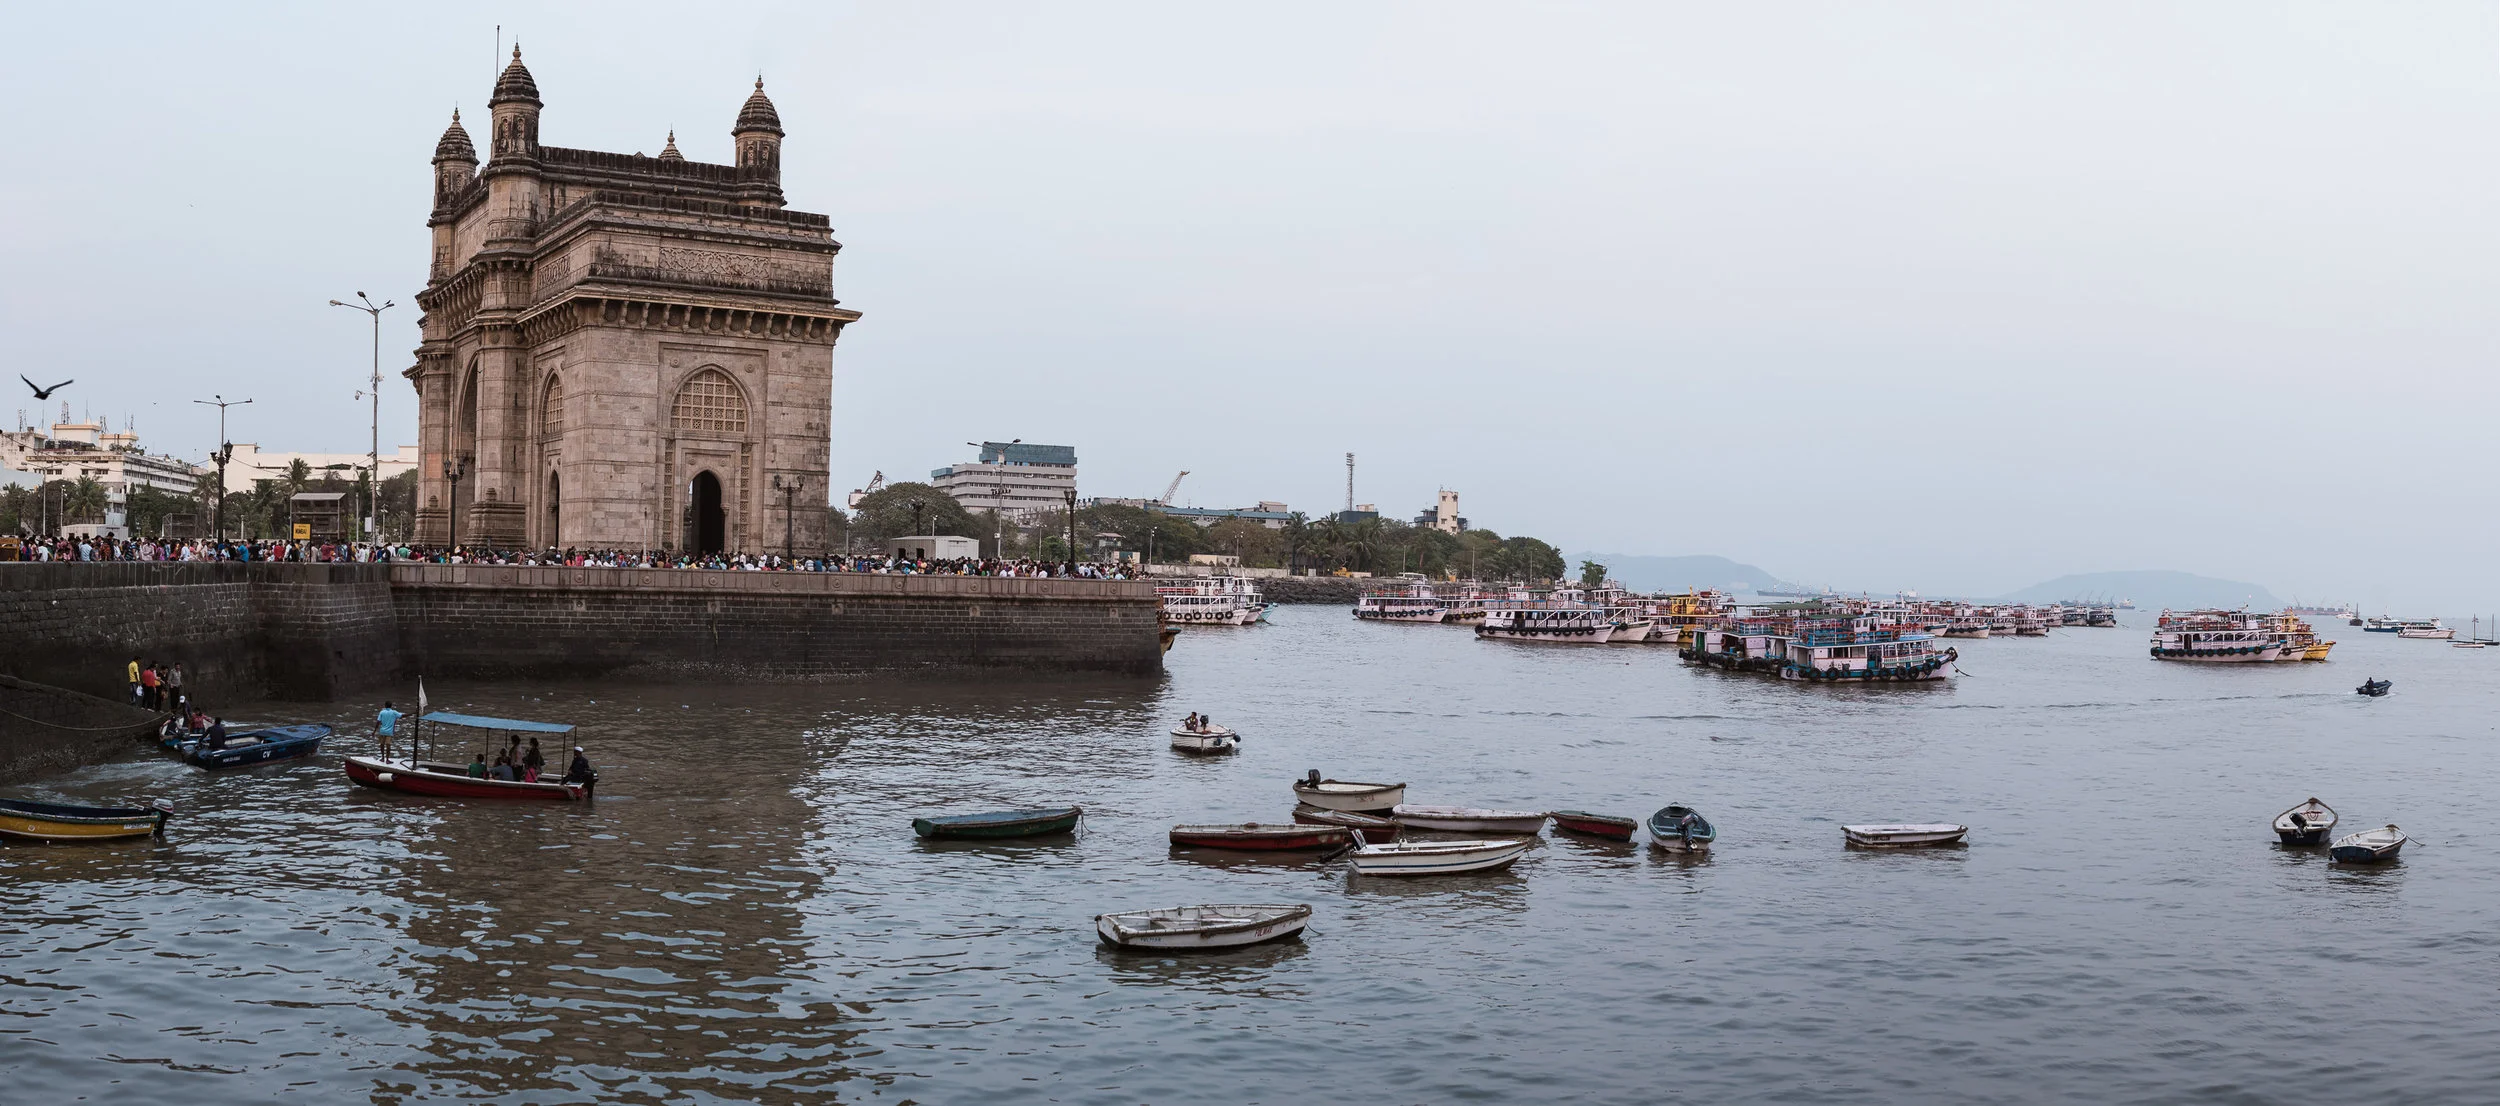
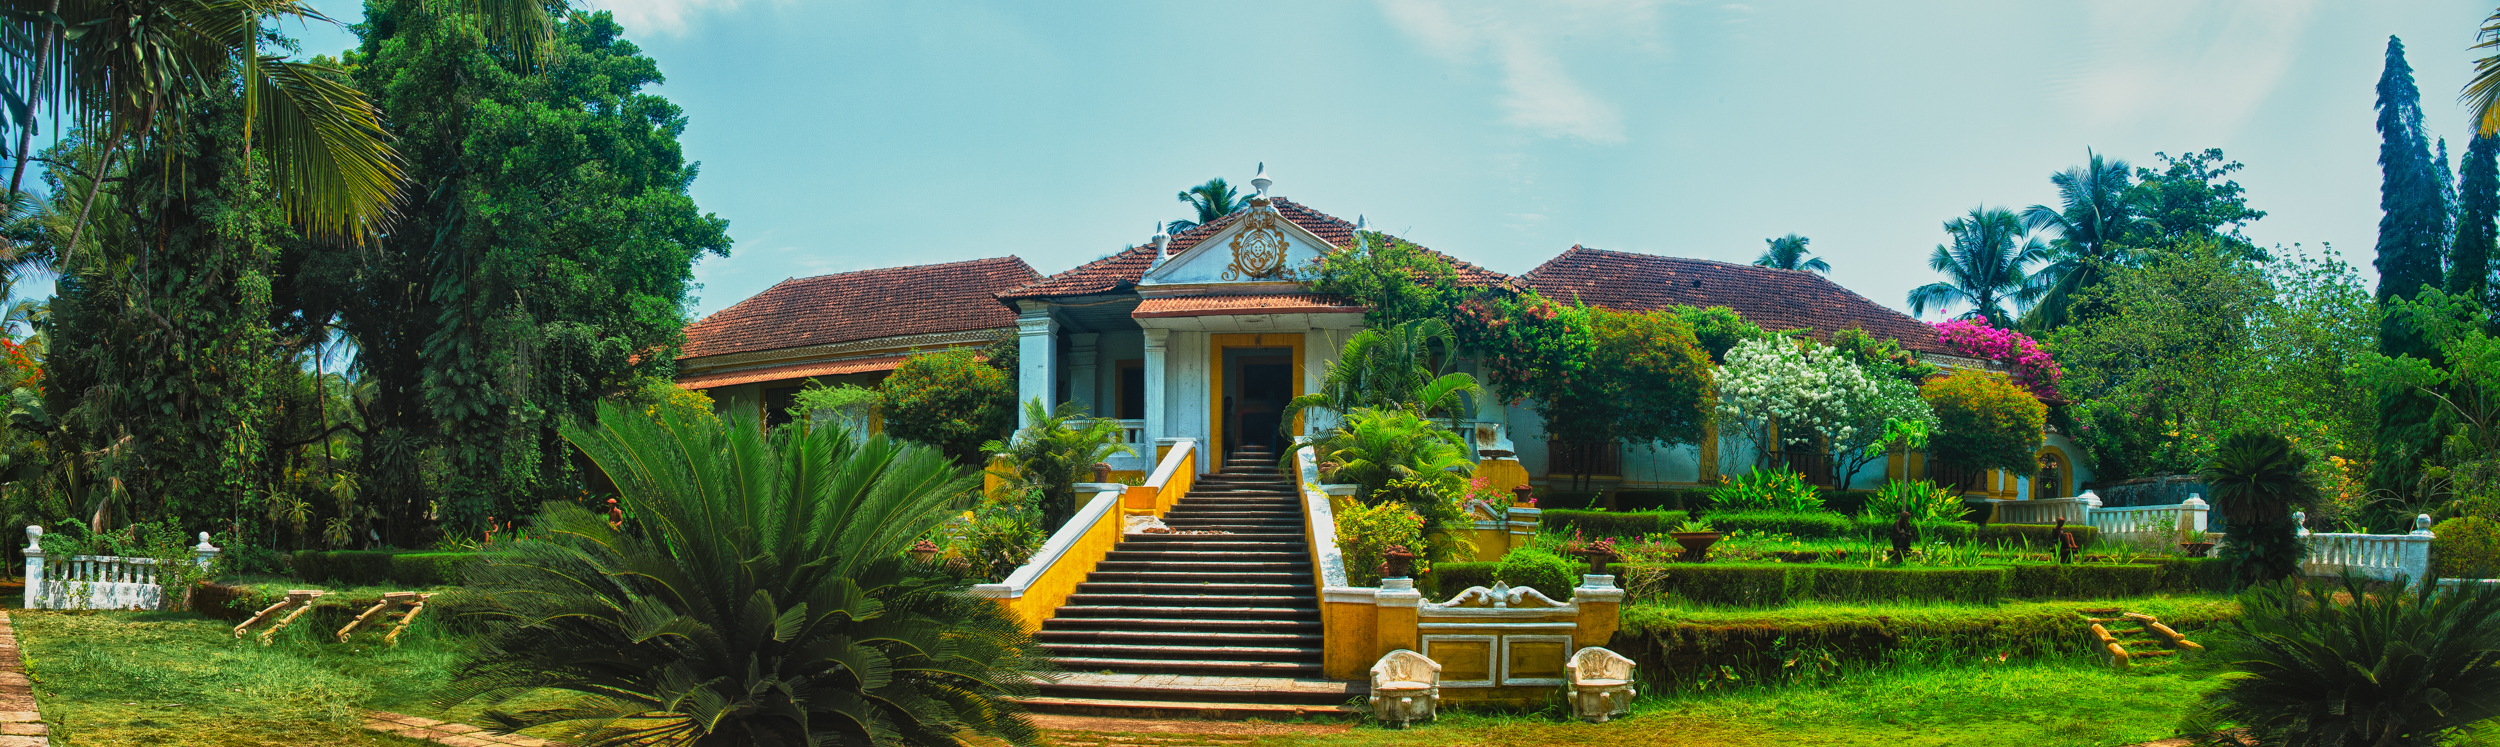
A panorama of the Gateway Of India
If you’d like an in-depth tutorial on how to create the perfect panorama, click on the video below.


How to white balance Nikon cameras

Why do a preset white balance?
The cameras made today are extremely sophisticated and they can judge pretty accurately what kind of photograph is being shot under what lighting conditions. But sometimes, you need to give them a little push so that they are able to serve you better. If you feel that your photographs are too warm or too cool for your taste, maybe it is time for you to do a custom white balance or as Nikon calls it - preset white balance. We are going to take a look at the easiest, cheapest and fastest way to white balance Nikon cameras. If you want to know about custom white balance on Canon cameras, please read this article here.
White balance is nothing but getting rid of the colour casts on your photographs by telling the camera, "Hey! This is white! Please make other adjustments accordingly!" So logically, the easiest way of doing this is by showing the camera a piece of white paper and telling it that this is white. Different cameras have different ways of measuring white under different lighting conditions, though internally the process remains the same.
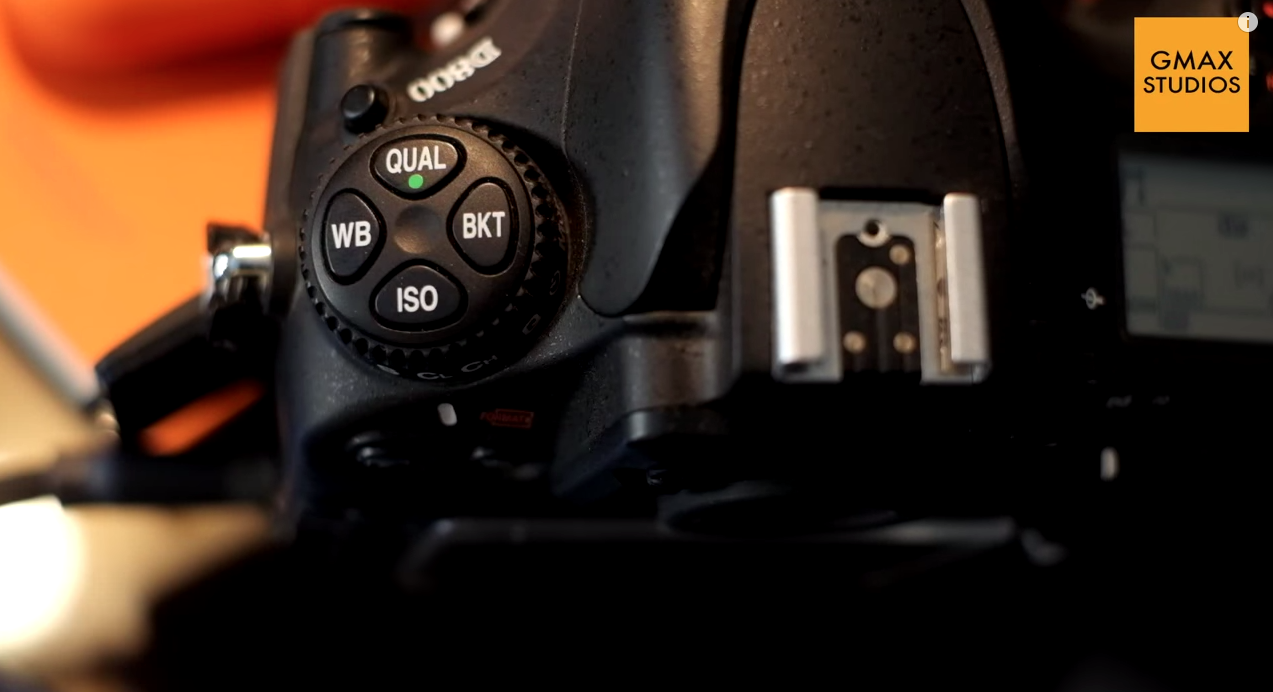
How to white balance Nikon cameras
Nikon calls this adjusting the PRESET white balance and it is done by pressing the WB(white balance) button on the camera and turning the command dial until the display show "PRE". You then release the WB button and press it again. The PRE now begins to flash. This means that the camera is in ready mode to take the new white balance setting. Now all you need to to do is put a white paper in front of the camera and press the shutter button while the PRE is still flashing. The display should read "GOOD" which means your preset white balance was successful.
Important
- The white paper should fill the entire frame - nothing else should be visible.
- If you are shooting a wide shot, zoom in to the white paper or move closer to the paper.
- Do not get the paper close to the camera as the light falling on the paper has to match the light falling on your subject. Get the camera closer to the paper instead.
- If the camera is hunting for focus, switch to manual focus. It will not make a difference if the paper is out of focus to take the white balance reading.
- If the camera displays "NO GOOD" that means that the camera was unable to get a proper reading. Check if your exposure is correct. Underexposure or over exposure might cause a bad reading.
- Make sure that the PRE is flashing when you press the shutter button.
Please watch the short video below to understand this process better. If you have any questions, please ask them in the comments and if you like the video, please subscribe to our channel by clicking here.
https://youtu.be/CL_WPm13zI0

Please ask any questions that you might have in the comments section below.

Colour grading video in Lightroom

Colour grading is a slow and tedious process. With the huge amount of software at our disposal, we can go spend hours and hours trying out various options and looks with the video before we can decide what look to finally go with. As described in our post here, there are quite a few stages to colour correct your footage and get it to the final look that you want. But what if you want to do some quick colour grading and are short of time and don't want to jump through all the hoops? Or what if you just want to quickly see a number of options before you decide the final look of your video or film?

Enter Adobe Lightroom which is primarily a photo post-processing software but can come in very handy if you are in one of the situations described above and are looking at colour grading video in Lightroom. It is even better if you have one of your favourite looks saved as a "preset" in Lightroom. One click is all you need. Take a look at the video below to see how it is done and leave us a comment if you found this useful or have some questions.
http://youtu.be/ScLaTzbm_xk
Colour correction and colour grading in video

To give a professional look to your shot footage, some amount of colour (color for Americans) correction and colour grading is important. Though quite a few people use both the terms, colour correction and colour grading interchangeably - they are in fact, two different processes altogether. So what is the difference between colour correction and colour grading in video, film or photography?

Image 1: Footage as captured. Flat and raw. Notice the low contrast and saturation.
Colour correction is the process by which you ensure that all the shots in your film or video have the right white balance, contrast and tone in every scene so that there is no major visual jump in between shots and scenes and they look like a part of the same production and not different shots assembled from different sources. The final outcome of the colour correction process is to often make the shot footage look as natural or real as possible - more so because more and more people and cameras shoot in a "flat" picture style which might not look very pleasing to the eye. In one sense, colour correction is an essential part of preparing your footage for colour grading.
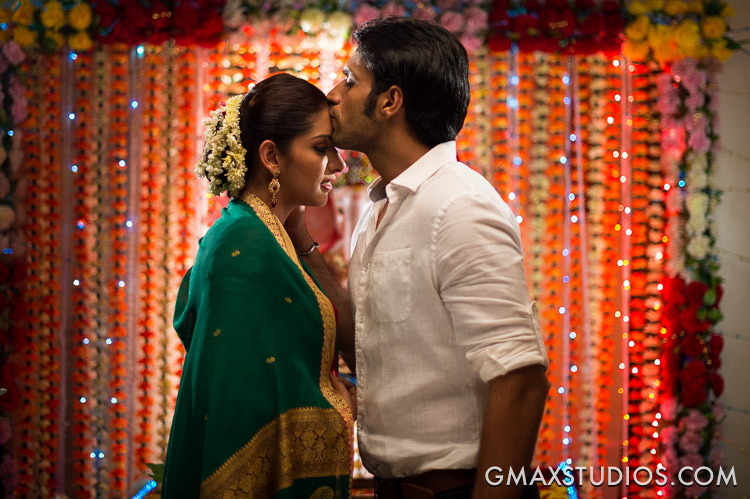
Image 2: Colour corrected footage. Nice punchy contrast and saturation.
Colour grading is applied after colour correction and is referred to the process of giving different colour tones and hues to your footage so that it creatively conveys the theme on which the film or video is based. It is largely a creative process where the creator of the piece decides that his film will look better with such a tonality. Colour grading is more about conveying a mood that suits the film and it involves manipulation of highlights, midtones and shadows to give the entire footage a different tone altogether.
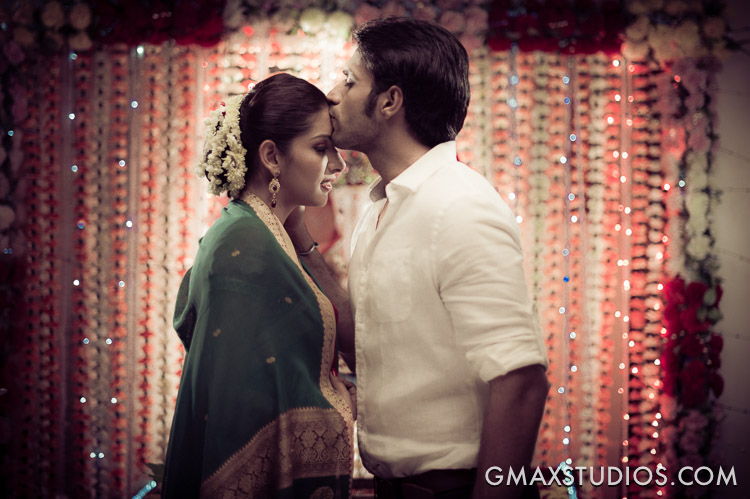
Image 3: Colour graded. Faded out the colours and diffused the highlights. Since this was a part of a scene where the protagonist is remembering his dead wife the grading helped give the footage a dreamy feel.
Correction before grading is a nice way to remember the difference between the two and while on the subject, take a look at out video below that is perhaps the easiest, quickest and cheapest way to colour correct and grade your footage. Take a look and leave a comment if you have further questions. Also, please subscribe to our YouTube Channel by clicking here.
http://youtu.be/ScLaTzbm_xk

Using Black Rapid Camera Strap with Arca Swiss plate
How to use Black Rapid Camera Strap with Arca Swiss base plate
The problem
Using Black Rapid Strap with Arca Swiss plate.
If you are a fan of Black Rapid camera straps like me and use an Arca Swiss compatible ball head as well - then you might think that you have a problem. I really wanted to use the Black Rapid strap with my Arca Swiss plate without going though the trouble of removing the plate each time. I never though it would be possibleAt least, until I came across the Acratech Swift Clamp, which lets me use both together.

using the black rapid strap with arca swiss plate
The solution
It is a beautifully crafted clamp that lets you use your Black Rapid camera strap with any Arca Swiss compatible ball head without changing the plate. The link being the Arca Swiss camera plate that fits on both.

using the black rapid strap with arca swiss plate
So I can use my Black Rapid strap with my Arcatech ball head as well. It was making me very uneasy to think that I would have to give up using either one of them because changing the camera base plate in the middle of a shoot just does not make sense.
The Acratech Swift Clamp is so wonderfully crafted that one almost does not feel like using it. It is true craftsmanship but it comes with a price and I mean literally. At about 150 USD it is not a cheap buy but I am very happy with my purchase.

The Acratech swift clamp
Following is a short video to demonstrate how both of them work together. I hope to put up a video of it in the field pretty soon. Take a look.
Please share this article with your friends if you found it useful.

Subscribe to GMax Studios YouTube channel


Shooting a TV pilot with Canon 5D Mark II
Shooting a television pilot with Canon 5D
We had bounced off an idea to Channel V (India)but things looked kind of shaky because we could not get the feel of the story across. Girl who wants to be a boxer... high school romance... song and dance... boxing ring... We decided to shoot this in order to get the feel across. Shot in a day on one location with minimal budget. The only things that we put up were the exhaust fan and boxing ring and bag.
I decided to shoot this on Canon 5D Mark II because I wanted to. But the question was how to shoot a professional video with a DSLR. I had never shot any video professionally on a DSLR (this was in 2010)and was itching to do so and this was my opportunity. The footage is straight out of camera as we did not have a budget for colour correction. Each setting we tweaked the picture controls, shot a bit of footage, transferred it to the laptop and reconfigured the picture control if needed. Everything was totally on the fly.
Take a look at the video below and tell us what you think. Please subscribe to our channel by clicking here.
Subscribe to GMax Studios YouTube channel
Sony F35 Cinealta test
Testing the Sony Cinealta F35
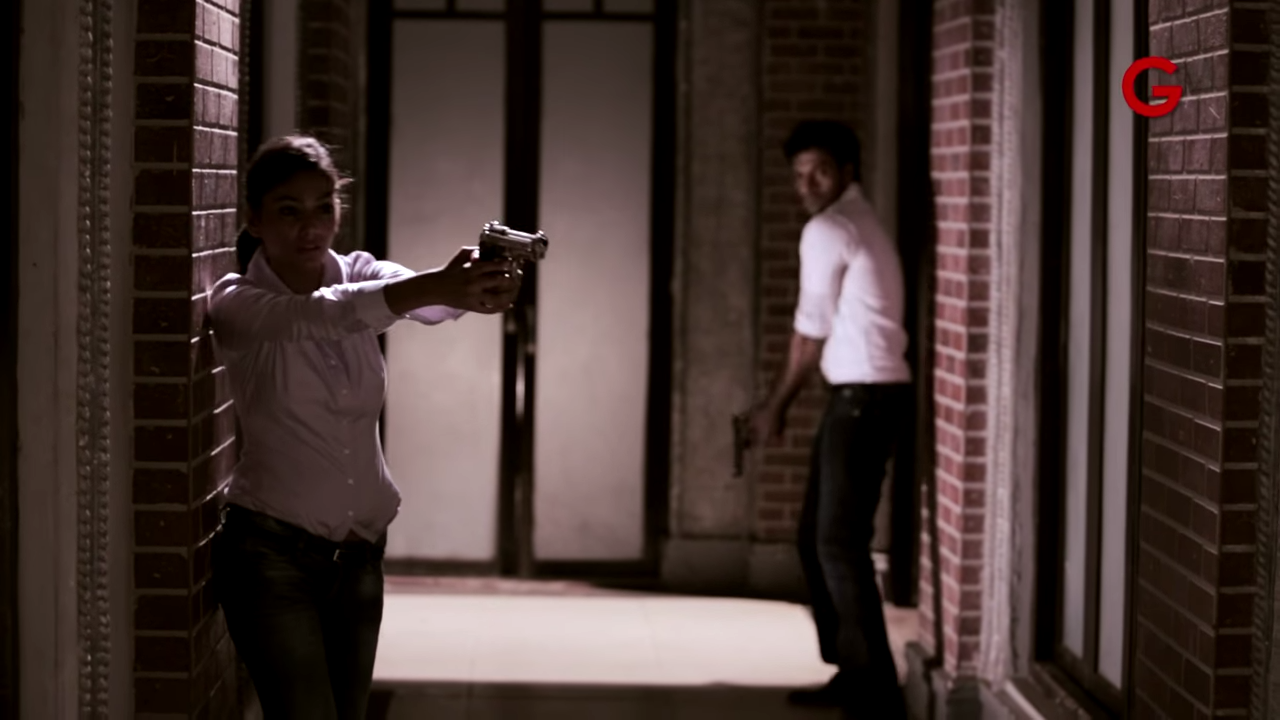
Sony F35 Cinealta test - Not much to this except that this was a test designed and lit to see the low-light performance of the Sony F35, which I was planning to use in one of my TV productions.
Learn photography
The camera performed exceptionally well and the final pilot of the show was actually shot on this.

How aperture affects photos |Depth of field
When you learn photography, it is easy to get confused between the various modes on the camera.
I shoot on A aperture priority mode on my camera 99% of the time (see Aperture).The main reason I do this is because I don't shoot too much of action and sports and thus find no reason to switch to S, shutter priority mode. I also like to control my depth of field or DoF as it is known. In easy terms, depth of field refers to how blurred out your background is, compared to the focus point. This is controlled by the aperture.
How aperture affects photos - Depth of field
To demonstrate this point, enter "The GMAX Team":
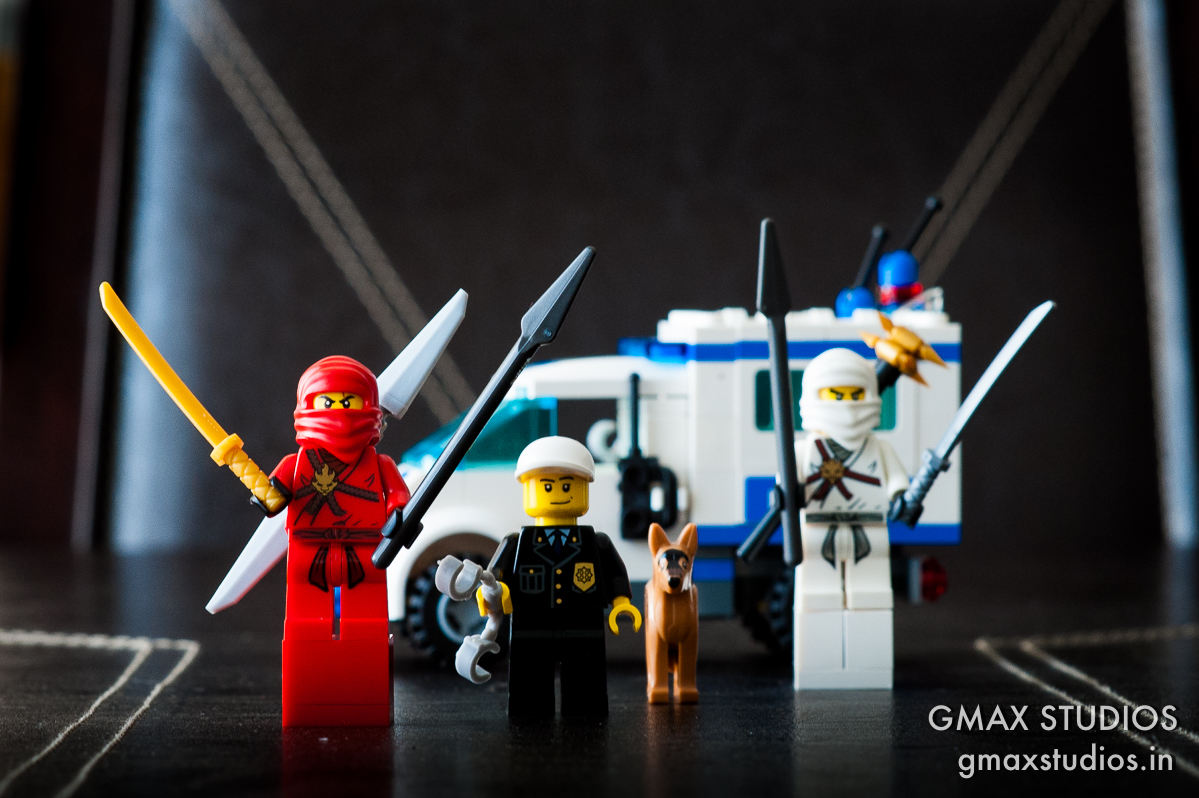
I shot the image below on an aperture setting of 1.8 on my camera. The camera automatically set the shutter speed to 1/160th of a sec.
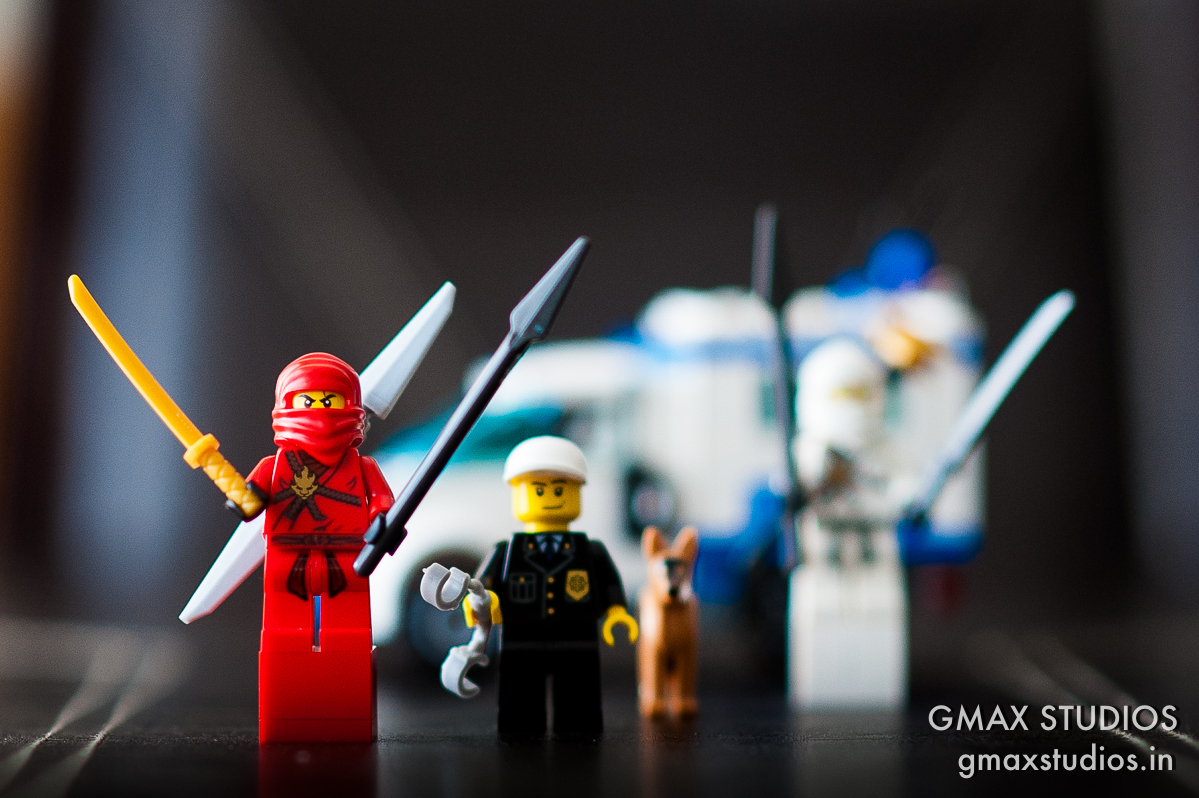
The focus is on Kai, the red Ninja. Notice, that though the difference between the team members is only inches - they have been arranged slightly one behind the other - the policeman, appears to be blurred. The focus gently blurs from Kai, to the policeman's handcuffs and the dog Tommy and Zane, the white Ninja are completely blurred.
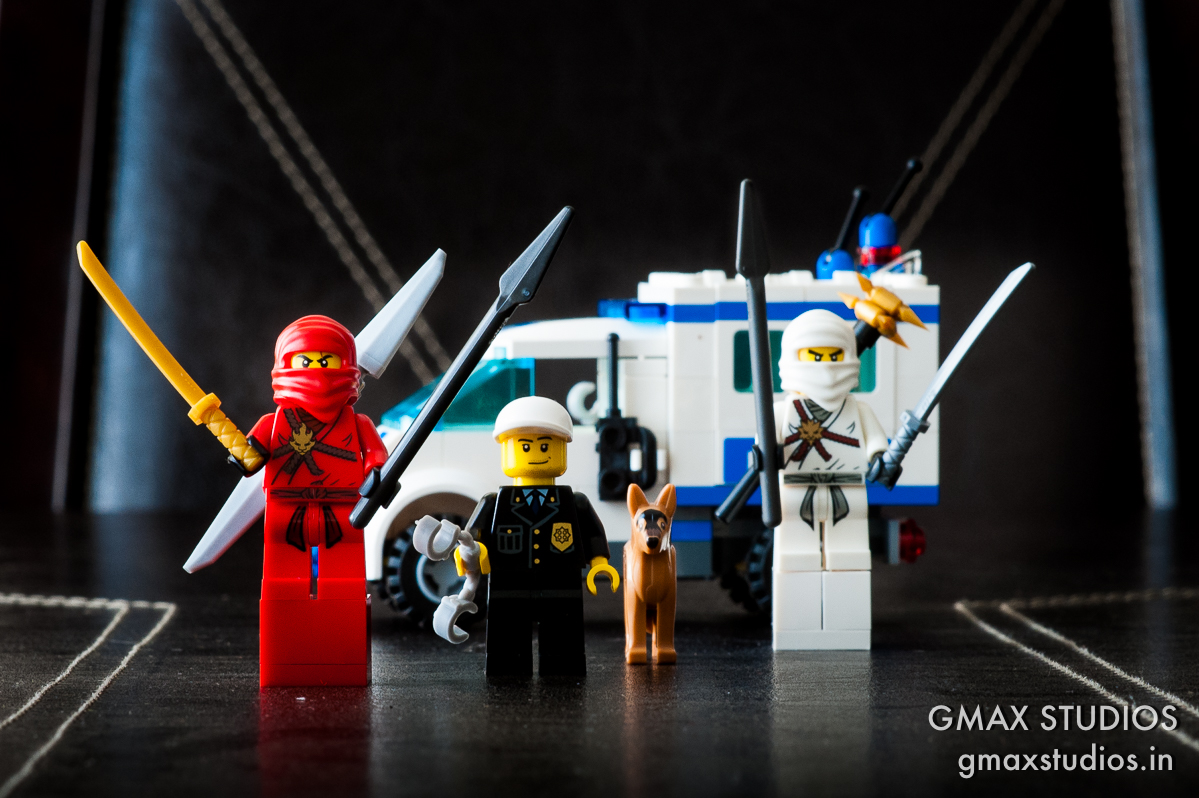
For the next shot I changed the aperture setting to f4. The background is gradually beginning to come in focus. The policeman is happy now.
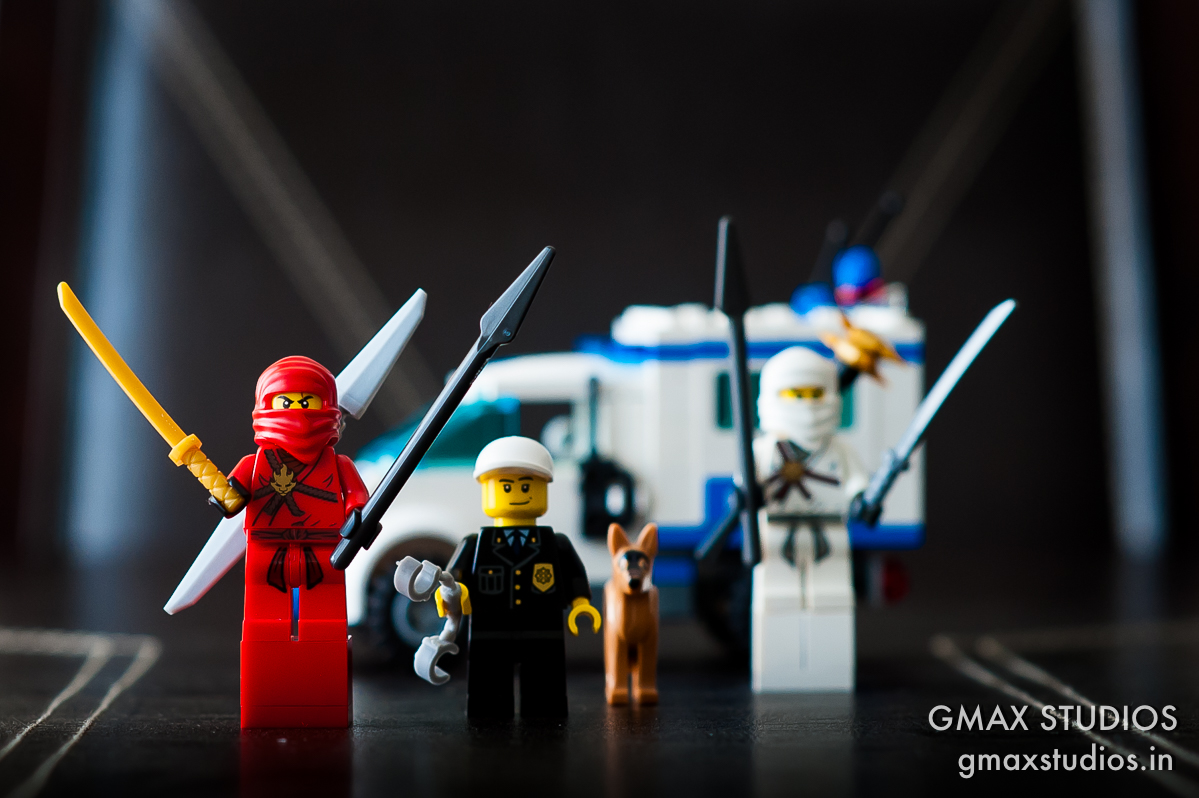
If we make the aperture even smaller by closing it down to f11, the background is almost completely in focus. The eyes of the white Ninja are almost sharp too. You can also make out the form of the chair at the dining table. which was not the case at all when we were shooting at f1.8. Also notice how the stitching on the dining table is in focus BEFORE and AFTER the focus point.
For comparison, here is the first image shot at f1.8 again:
Thumb Rule:
The higher the number of the aperture, more of the background will be in focus. This can be summarised by the graphic below.
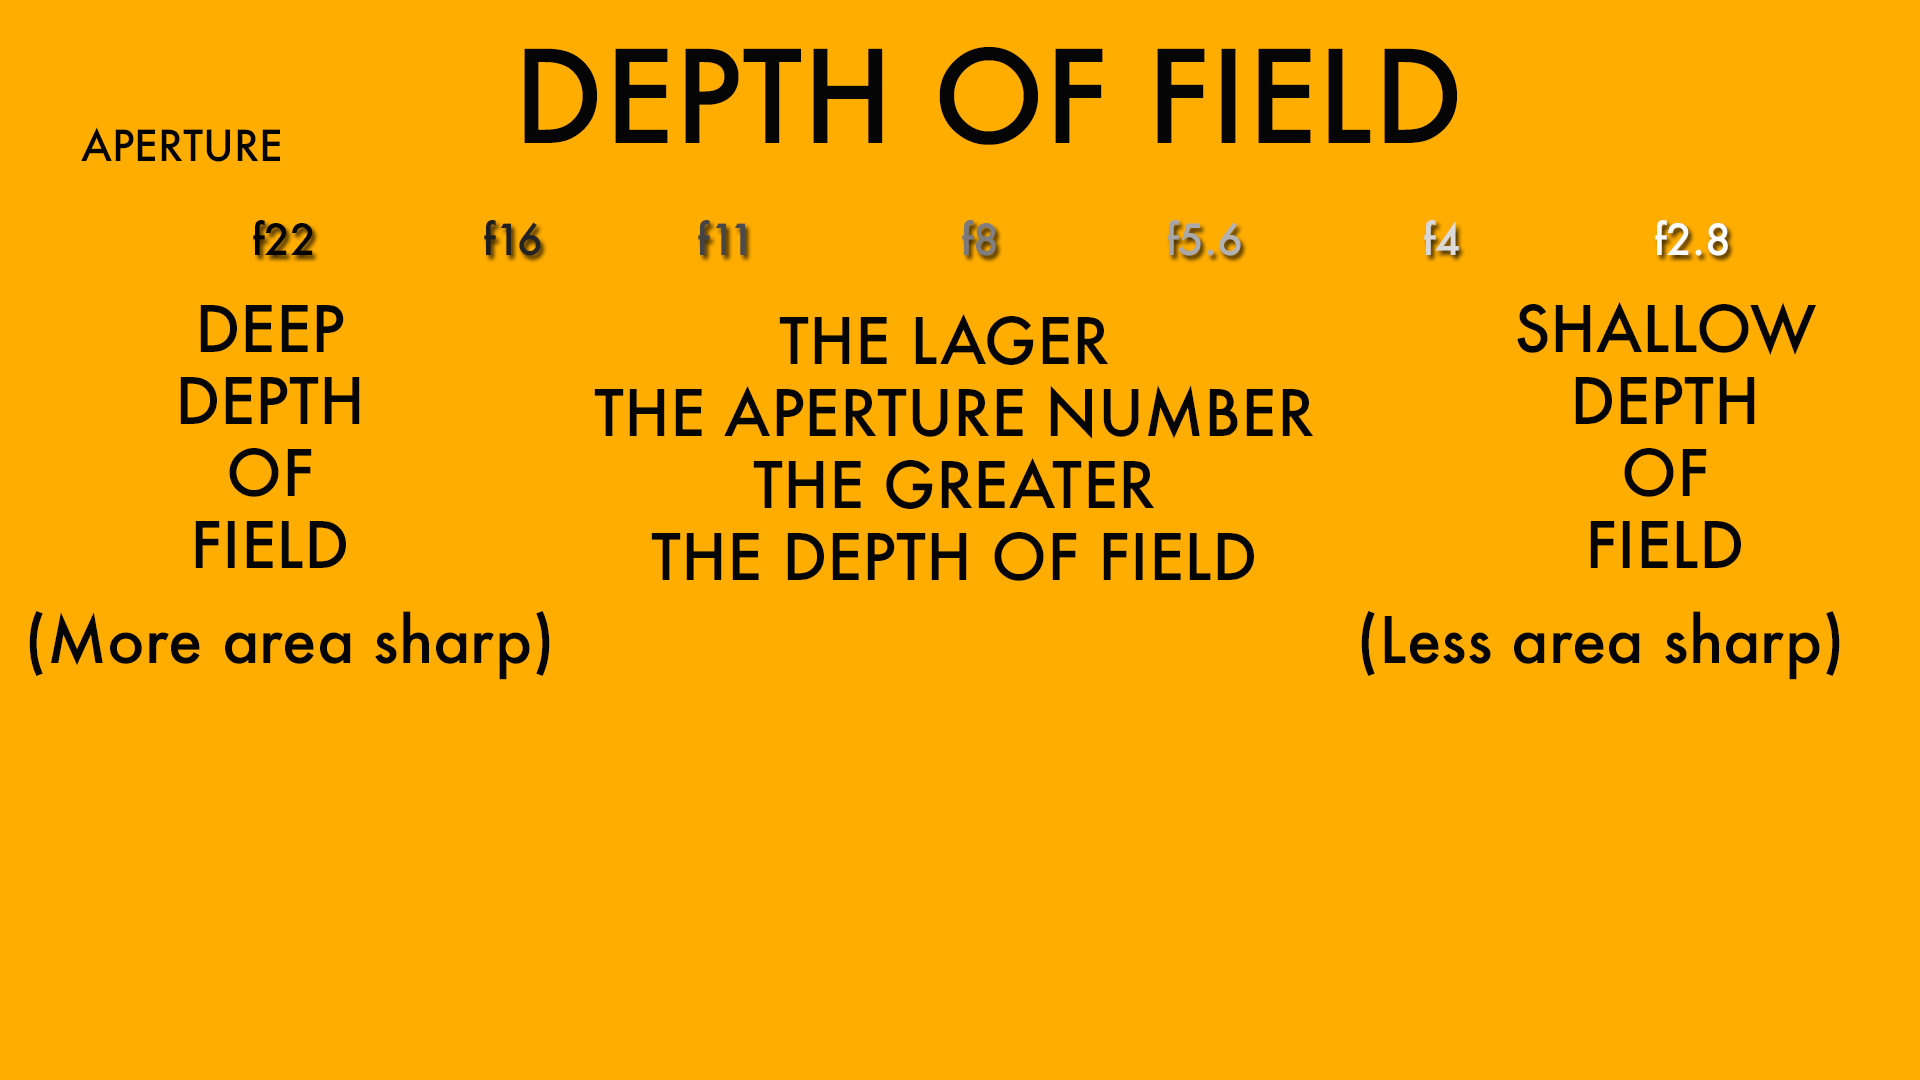
You can download a hi-res version of this graphic to your computer or smartphone by adding us to your Google Plus circles. Also watch the video below to understand this concept better and see a practical demonstration of how aperture affects photos and depth of field. If you like the video, please consider subscribing to our channel by clicking here.
https://youtu.be/q3SvCAlgFLw
Shoot me your questions in the comments or leave your suggestions as to what articles or videos would you like to see next.