5 Wildlife & Macro Photography Tips For Beginners By Photographer Yuwaraj Gurjar | In Frame With Gorky M, Episode 3
Wildlife photographer Yuwaraj Gurjar shares some important tips for those looking to get into wildlife photography and macro photography.
In the third episode of our latest photography series, ‘In Frame With Gorky M’, one of India’s authority figures on wildlife and macro photography, Yuwaraj Gurjar, sits down with filmmaker and photographer Gorky M - and shares some very important tips and secrets for beginners or those looking to get into wildlife photography and macro photography full-time. Be sure to note these down before going out to photograph.
You Cannot Pursue Wildlife Photography Full Time
Wildlife photography isn’t one of the commercial or the most glamorous photography genres out there. While there is a niche and a demand for it, it is also important that you’re taking up commercial assignments to keep yourself afloat. Wildlife photography is a fascinating genre, but not a high-income genre in photography unless you’re an established wildlife photographer.
Do Your Homework & Come With The Right Gear
According to wildlife photographer Yuwaraj Gurjar, preparation for a wildlife photography expedition begins three to six months in advance.
Going to wildlife sanctuaries and conservatories and photographing animals and birds is fine, but you must read up on your subjects before photographing them. It is important you know how to work your camera and you have the right lenses for photographing the birds and the wild animals you might see. Read the rules, regulations, and brochures of the safari or national park you’re visiting to avoid breaking any laws or committing any offenses, and talk to local guides and figure out where you might find a particular bird or an animal, so you’re in the vicinity when there is an opportunity to photograph them.
READ: Photography Tips From National Geographic Photographer Ira Block!
Having A Love For Nature Is The Bare Minimum
Be prepared to get down and dirty when you’re out in nature. © Yuwaraj Gurjar Photography
Those who pursue wildlife photography and the various genres that it encompasses such as nature, animals, flora and fauna, landscapes, birds, macro - have a genuine love for mother nature. You must ask yourself if you’re passionate enough about it. There will be times when you have to climb hills, photograph in the rain, climb down ditches and unsavory places to photograph, which requires a level of patience and dedication that isn’t always possible. This is why it’s important that you are passionate enough about wildlife photography and only then will you be able to make somewhat of an impact with your work.
There Is Already A Lot Of Work On Tigers and Elephants
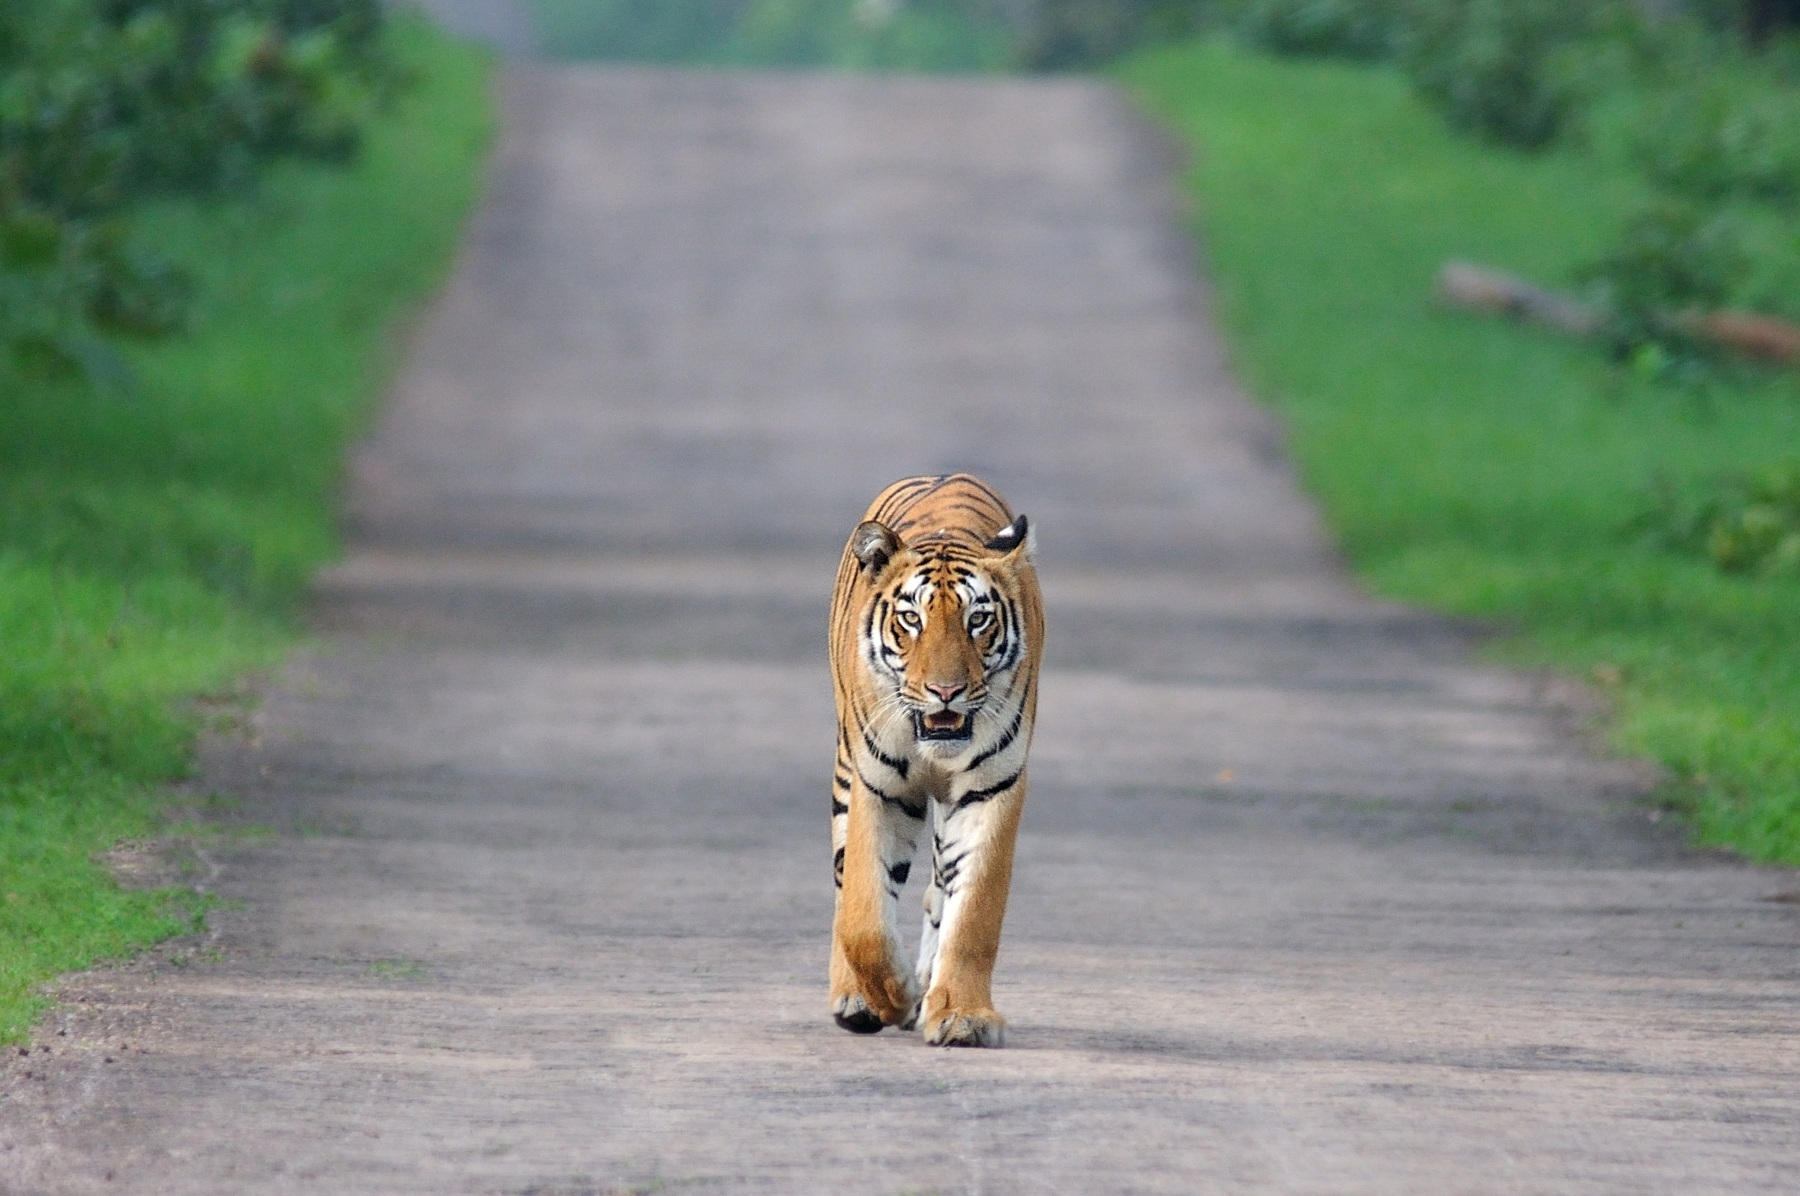
An Indian Tiger Photographed by © Yuwaraj Gurjar Photography
Don’t be discouraged by this, we’re simply saying this so you’re aware. Established wildlife photographers have already done a lot of work on Bengal Tigers, Indian Elephants and Dolphins etc. So make sure, if you’re photographing similar species, that you look at it from a different perspective - so your work is able to stand out. There are also many species that people aren’t looking into. They could be unique to the area you live in, or a variation on the species that are already out there. “People are still discovering new birds in the Himalayas,” says Yuwaraj Gurjar. Maybe you could try Macro photography - where there’s a higher chance of finding something new or coming across a rare species.
Macro shot of a Vine Snake gulping a Frog, © Yuwaraj Gurjar Photography
Macro Photography is a versatile genre of wildlife photography where there are tonnes of species to photograph and new things to find.
Travel With A Group Or An Experienced Professional
Even accomplished photographers prefer to travel in a group on a wildlife photography excursion, says Yuwaraj Gurjar. Image © Yuwaraj Gurjar Photography
This really matters. If you’re looking to learn the ropes of wildlife photography or macro photography, it is better if you travel with an experienced wildlife photographer so you learn more quickly than you would on your own. The cost of a wildlife safari also becomes more manageable when divided between 4-6 people. Not to mention that it is also a safety concern, so traveling to jungles and forests in groups or with local guides becomes essential. The local guides are usually chatty, and if you were to engage them in conversation, they would be more than willing to help you and give you an idea of the species or animals that live in a particular habitat.
And that’s not all. There are many more insights and little tips to help you start your journey as a wildlife photographer in the video below. Yuwaraj Gurjar also has advice on which lenses and camera gear to use for wildlife photography. Be sure to subscribe to us on YouTube if you want to watch more videos like the one below.
Presenting Episode 3 of the series - In Frame with Gorky M. In this episode, Gorky M. speaks with accomplished wildlife and macro photographer Yuwaraj Gurjar. Yuwaraj Gurjar is one of India's best wildlife photographers and one of the authority figures on macro photography worldwide.
Nikon Noct 0.95 58mm lens
NIKKOR Z 58mm f/0.95 S Noct Lens from Nikon. While this was just a dummy - we got a taste of what is in store!
NIKKOR Z 58mm f/0.95 S Noct Lens
We got our hands on a model of the Nikon Noct 0.95 58mm lens at the studio, courtesy Nikon India. While the weight is not exactly the same as it will be in the final release but the dimensions are the same as they will be upon final release.
Let me start off by saying - it is HUGE! Till now you have probably only seen standalone photographs of this lens and they nowhere give you an idea of how big this lens is going to be.
The Nikon Noct 0.95 58mm
It dwarfs both the Nikon 85mm 1.4 and the Nikon 105mm 1.4 lenses in size and to be honest, I quite never expected it to be this big.
Considering that there is a small collar around the lens - Nikon knows this!
NIKKOR Z 58mm f/0.95 S Noct Lens - Nikon Side by side with the Nikon 85mm/1.4 lens
The Noct display or the lens information panel which will confirm aperture, focus distance and depth of field - right on the lens.
Comparison with Leica Noctilux 50mm 0.95
I use the Leica Noctilux 50mm 0.95 on almost a daily basis and to be honest, I find that lens to be pretty big and heavy (by Leica standards anyway!) I don’t know but subconsciously I was thinking that the Nikon Noct would be somewhat the same size. How mistaken I was and I did realise immediately that a focal length of 58mm means that the iris would have to be almost 9mm bigger to make a f0.95
Nikon Noct 58mm vs Leica Noctilux 50mm (Both ).95) size comparison
ADDITION FEATURES OF THE NIKON NOCT:
When the lens releases it also promises some extra features like:
Dust, dirt and moisture repellent flourine coating
Arneo coat and Nano Crystal coating For the first time, Nikon has combined two anti-reflection coatings to combat ghosting and flare from multiple directions—new ARNEOCoat for vertical incidental light and Nano Crystal Coat for diagonal incidental light.
A large diameter ground aspherical lens element which will remove aberration correction.
Since this is going to be a manual focus lens, it also promises a “high precision” focus ring.
There is also Fn (function) button the lens which along with the intuitive control ring will increase the ease of usability of the lens.
Also, there is a small display - the lens information panel which will confirm aperture, focus distance and depth of field - right on the lens.
With all of this? I wonder what the lens will be priced at? Any ideas? Leave your thoughts in the comments.
Ira Block Interview | Photography wasn’t easy then, it isn’t now | In Frame with Gorky M Episode 2
The world in photography has changed. “There’s a lot less demand for in-depth stories these days”, says Nat-Geo veteran Ira Block.
The world in photography has changed. Print journalism is dying, and so is the photographer who would rummage the earth for stories. Today, there are more photographs taken in a single day than an entire year prior to the smartphone era. While smartphones and social media platforms have given people a place to showcase their work, it is now difficult to separate the good from the bad like never before. A hobbyist with a financial reservoir can now photograph the Northern Lights on a holiday and submit it as his or her ‘work’.
And publications aren’t willing to spend money to acquire images because people are willing to give them for free just to get published.
“There’s a lot less demand for in-depth stories”, says American Photographer Ira Block. And while that’s true, it doesn’t bother him as much. To prove it, he has over 330,000 followers on Instagram. Ira has also recently published a book documenting a country’s fascination with a mainstream sport in ‘Cuba loves Baseball’
Cuba loves Baseball, available now on amazon. Photograph by © Ira Block
Ira starts of by saying that photography wasn’t easy back then, and it isn’t now.
“When you find something you love, (something) that you want to do, those are the things that are usually difficult to get money out of. ”
Ira Block has been behind the lens since the 70’s. Born in a time of great imagery and when the photographer was the one bringing stories to the world, Ira prefers the term ‘Cultural Documentarian’ over documentary photographer. While he does have a bunch of commercial work to his credit, a lot of Ira’s work revolves around culture and people.
Caravan of Bactrian camels resting in South Gobi Desert, Mongolia. Photographed by Ira Block ©www.irablock.com
Over the years, Ira has photographed a ton of memorable stories for the National Geographic magazine, the National Geographic Traveler and National Geographic Adventure (not to mention the countless photographic expeditions commissioned by the magazine). A Sony Artisan of Imagery, Ira also conducts several workshops around the year mentoring aspiring photographers in the art of telling stories through the camera.
In a career spanning several decades and still counting, Ira’s photographed countries that are known for their tourism opportunities as well as some of the most remote locations in the world.
Japanese explorer Naomi Uemura at the North Pole, photographed by Ira Block © Ira Block
Ira Block likes to distinguish recurring visits to each country by at least a couple of years so he can can document the changes first-hand through his lens. Surprisingly, this was Ira’s first visit to India. He was speaking at Indian Photographer Joseph Radhik’s event - Pep Summit, where GMax Studios’ commander-in-chief Gorky M, managed to catch up with him. And we’d love for you to hear that conversation, the second episode of our latest series, ‘In Frame with Gorky M.
In Frame with Gorky M is a half hour conversation featuring some of the world’s best photographers. If you haven’t seen the first episode featuring Joseph Radhik, you can see that video here.
In a candid conversation with Gorky M, Ira Block talks about the uncertainty and confusion in the world of photography right now. Ira and Gorky M also reminisce about the good old days of shooting film.
Was the switch from film to digital easy for you, and do feel nostalgic about working with film?
I switched from film to digital in 2004. When I first switched, I was nervous. I remember one of the first stories I was doing (with a digital camera), I had to go to Malaysia to photograph. I basically shot it with digital and I also shot it with film because I was so nervous. As I progressed, I thought that digital was great. I had multiple copies of my images, I could email or send pictures around the world. It’s something I couldn’t do with film.
I do miss shooting with film though, especially black and white. Maybe someday I’ll go back to it.
You have taken exceptionally well to social media, especially Instagram. Did that take a mental leap or did you go in all guns blazing?
The world in photography is totally changed. Not just photography, but everything in the world has changed because of the digital age. I realized I didn’t want to be a dinosaur. With social media and digital platforms, I embraced it. I thought, let’s make this work for me.
And it has worked for Ira. He posts regularly, and he also writes about his experiences in his blog. If you haven’t checked it out, it’s highly recommended. It’s the photographic word of God.
Each social media platform has a different aspect ratio for pictures. Do you keep that in mind when you’re taking pictures?
It does cross my mind (when I’m taking a picture), that I want to make it the right size, the right feel for Instagram. But then I realize that if I get a really nice image, I can’t use it for something else. It's not the right style. I can’t make a print (of it). I get torn at times.
What’s your typical gear, now that you’ve switched to mirrorless cameras?
I’m using the Sony mirrorless cameras, which are pretty small and lightweight. Typically, I carry two, maybe three (camera) bodies. I usually have three zoom lenses with me. The wide zoom, the mid-range zoom and a long zoom. With digital, you don’t want to change lenses that much because of dust on the sensors. Back in the days of shooting film, I’d have two or three cameras around my neck. These days most of my stuff (images) are done between 24-105 mm.
Tell us a little about the kind of gear you carried back in the day
I remember going through the airport with 10-12 cases of equipment. And now, with digital (cameras) being able to pump up the ISO’s to a higher number, I carry less lights. There are smaller lights that are transportable and easy. Those days of carrying equipment and having assistants and getting that stuff on airplanes was always iffy.
Tell us about the importance of accumulating personal work, as a professional photographer
If you really want to be a good photographer, and if you really love photography, you need to have personal projects. With commissioned work, you can’t be as creative, you’re being told what to do by the client. Personal work is where all your creativity is, where you can try out new things, develop a new style. You’re not worried about what the client is going to say. I think personal projects are very important.
Ira Block spent three years documenting Cuba’s culture in his book, ‘Cuba Loves Baseball’. Photograph by © Ira Block
Point out some of the primary differences that you see between photographers in your generation versus some of the younger photographers today
When I look at some of the newer photographers today, I sometimes get the feeling that they’re not going to work as hard. Because of what you can do in post production, a lot of people think “I don’t have to get it right now, I’ll do it later”. I came from a generation of “you have to get it right in the camera.” For me, the joy of photography is being in the moment and not being in front of a computer screen.
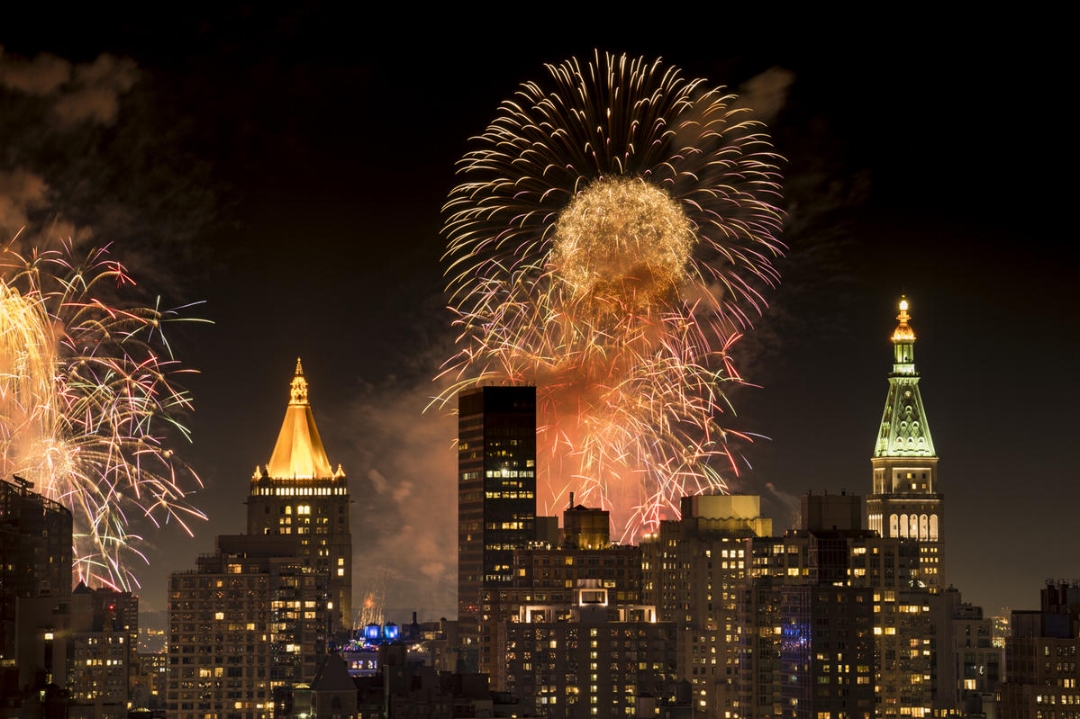
Fireworks galore on the 4th of July. New York City, 2017. Photograph by © Ira Block
Who are some of the photographers that have inspired you over the years?
Henri Cartier Bresson is one of the classic photographers that everyone looks up to. His reportage, his decisive moment was an important changing point in the world of photography. When I started doing color, it was Ernst Haas - the German photographer. He took color and made imagery out of it; using color as an art-form in itself. And then there are some early Nat-Geo photographers. There’s guys like Wynn Parks and Bill Allard - a friend of mine who’s a great photographer. These are photographers that I look up to.
Ira continues to talk about his style of photography, his choice of composition and some very important assignments he worked on during the episode. He also stresses on the importance of having a regular income that doesn’t always come from photography.
Watch the entire episode with featuring Ira Block below
In the episode, Gorky M speaks with National Geographic Photographer and Cultural Documentarian Ira Block. Ira has shot multiple photographic stories for the National Geographic Magazine including Nat Geo Traveler and NatGeo Adventure. Ira is also a Sony Artisan of Imagery and conducts multiple photography workshops around the world.
Joseph Radhik Interview | Lessons In Humility And Wedding Photography | In Frame With Gorky M Episode 1
If you’re a wedding photographer, you might not want to miss this.
Wedding Photography has witnessed a massive revival all over the world. These days, wedding photographers can charge as much as they like. This can partly be credited to photographers like Joseph Radhik who’ve taken a different approach to photographing weddings by bringing out a previously unseen art to them. Joseph has won countless awards for his work and is the founder of Stories by Joseph Radhik, a wedding photography firm that’s been featured in magazines like Grazia, Harpers’ and People Magazine. A photographer with an entrepreneurial spirit, Joseph has managed to blow up his craft into a thriving business whilst retaining all of the creativity and passion.
Joseph is the first guest in our latest series, ‘In Frame with Gorky M’ - a half hour tete-a-tete with some of the world’s best photographers. In the video, Joseph talks about how he got into wedding photography, his personal gear and more. The full episode is embedded at the bottom of the post, you can get right to it if you like.
“I worked as a business development manager five days a week, and on a Friday I would shoot a wedding and be back in office on Monday. ”
It’s this attitude and commitment that’s made Joseph the one of the prized photographers in the industry.
And there’s lots we’ve learned about the man these past few months, bumping into him at the Sony A7III launch in Mumbai (He’s also Sony’s Global Imaging Ambassador) and from the time he came over to talk about his passion project PEPx Photocon. He was coming straight from a photo-shoot, so he came with suitcase and all, very much, as we like to call it - in the zone. We were going to be filming our conversation in one hour, and he was going live simultaneously on his PEP Professionals app; his technicians setting up a live-stream that looked technical as hell. In those days we’d go live every Saturday, so we could understand the immense pressure. But Joseph was cool like you’d be on a Sunday morning. He was quick to figure out a solution when a problem arose, answering and hanging up calls at the pace of a stockbroker, at times, on his haunches like a camera assistant.
After seeing what Joseph’s schedule looked like, (putting together a 3-day global photography event, photographing a wedding, giving an interview and going live at the same time on his app) we learned that it’s no more just you and the camera. Photography is a big part of your life but it’s a relatively small part of your business. Most of your time’s eaten up by phone calls, production meetings, preparation and social media. It’s how you fare in those departments that determines if you’ll be remembered for picking up the camera or not.
Real photographers don’t shy away from selfies
In return for creating awareness on PEPx Photocon on our channel GMax Studios, Joseph had invited us to the event. He let us film the entire event, gave us the best seats in the house and also threw in twenty PEPx passes for our subscribers. It was because of this wonderful opportunity that we were able to chat with accomplished and globally renowned photographers such as Ira Block, Dinesh Kumble, Yuvraj Gurjar and Auditya Venkatesh.
PEPx was an unbelievable experience for a photographer. People were practicing photography the halls, students were chatting up their favorite photographers; ambassadors, acclaimed photographers, gearheads, camera companies, vloggers, motivational speakers - everybody was present. It was kind of like an Apple event, but for photographers. Joseph was speaking on all three days, and during the course of the event, we learned just how good an orator he is. His speeches are motivational and he also likes to laugh at some of his own jokes, but he kept the audiences engaged through all of it.
When asked about the best camera settings for wedding photography, (we know, it sounds absurd) Joseph said that the best setting is getting to the location with your camera. The theater erupted with laughter. While there were other renowned photographers speaking at the event, seeing Joseph get up on stage was always exciting, his jokes and insights being met with much laughter and applause. He was able to harvest every colloquial sentiment to make the people feel at home.
“In 2008, I googled ‘wedding photographers in India’ and it returned zero results.
I chanced upon a genre that I never knew existed.”
Wedding photography came to Joseph when he was looking for a photographer to shoot his sister’s wedding. At the time, he was photographing flowers and sunsets like every rookie with a D-SLR. (Scroll through some of his older photos on flickr, we’re not lying) “I chanced upon a genre that I never knew existed”, says the the three-time fearless photographer of the year, his eyes lighting up from visualizing the moment. He ended up photographing his sister's wedding, and naturally, he got good at it as he shot more and more. He even began to dress the part. In fact, his photography gear also comprises of waistcoats just so he can blend in better. “I’m working, but it’s still a wedding.” It’s a statement that’s profound because of its simplicity. It can only come from a guy who truly loves to photograph weddings.
“Wedding photography had everything that I loved. Photojournalism, beauty, light, documentary, landscapes. Weddings are also like wildlife. You need perfect timing.”
As an effort to enjoy himself more, Joseph carries only a handful of equipment - his favorite lenses, a double-camera strap (so he looks like a badass cop) and has a relatively small team helping him out with the lighting and managing of data. While his world is fairly complex, his photography is simple. It’s how he’s able to still love doing what he does despite his phone ringing off the hook. As a photographer, he’s not above shooting group photographs of the couple’s friends and family he says. The truth of that statement hits your chest. It’s a lesson in humility from the guy who shot India’s most talked-about wedding.
Watch the entire conversation between Gorky M and Joseph Radhik below. He talks about his inspirations, shares some valuable trade secrets and even lets us take a peek inside his camera bag.
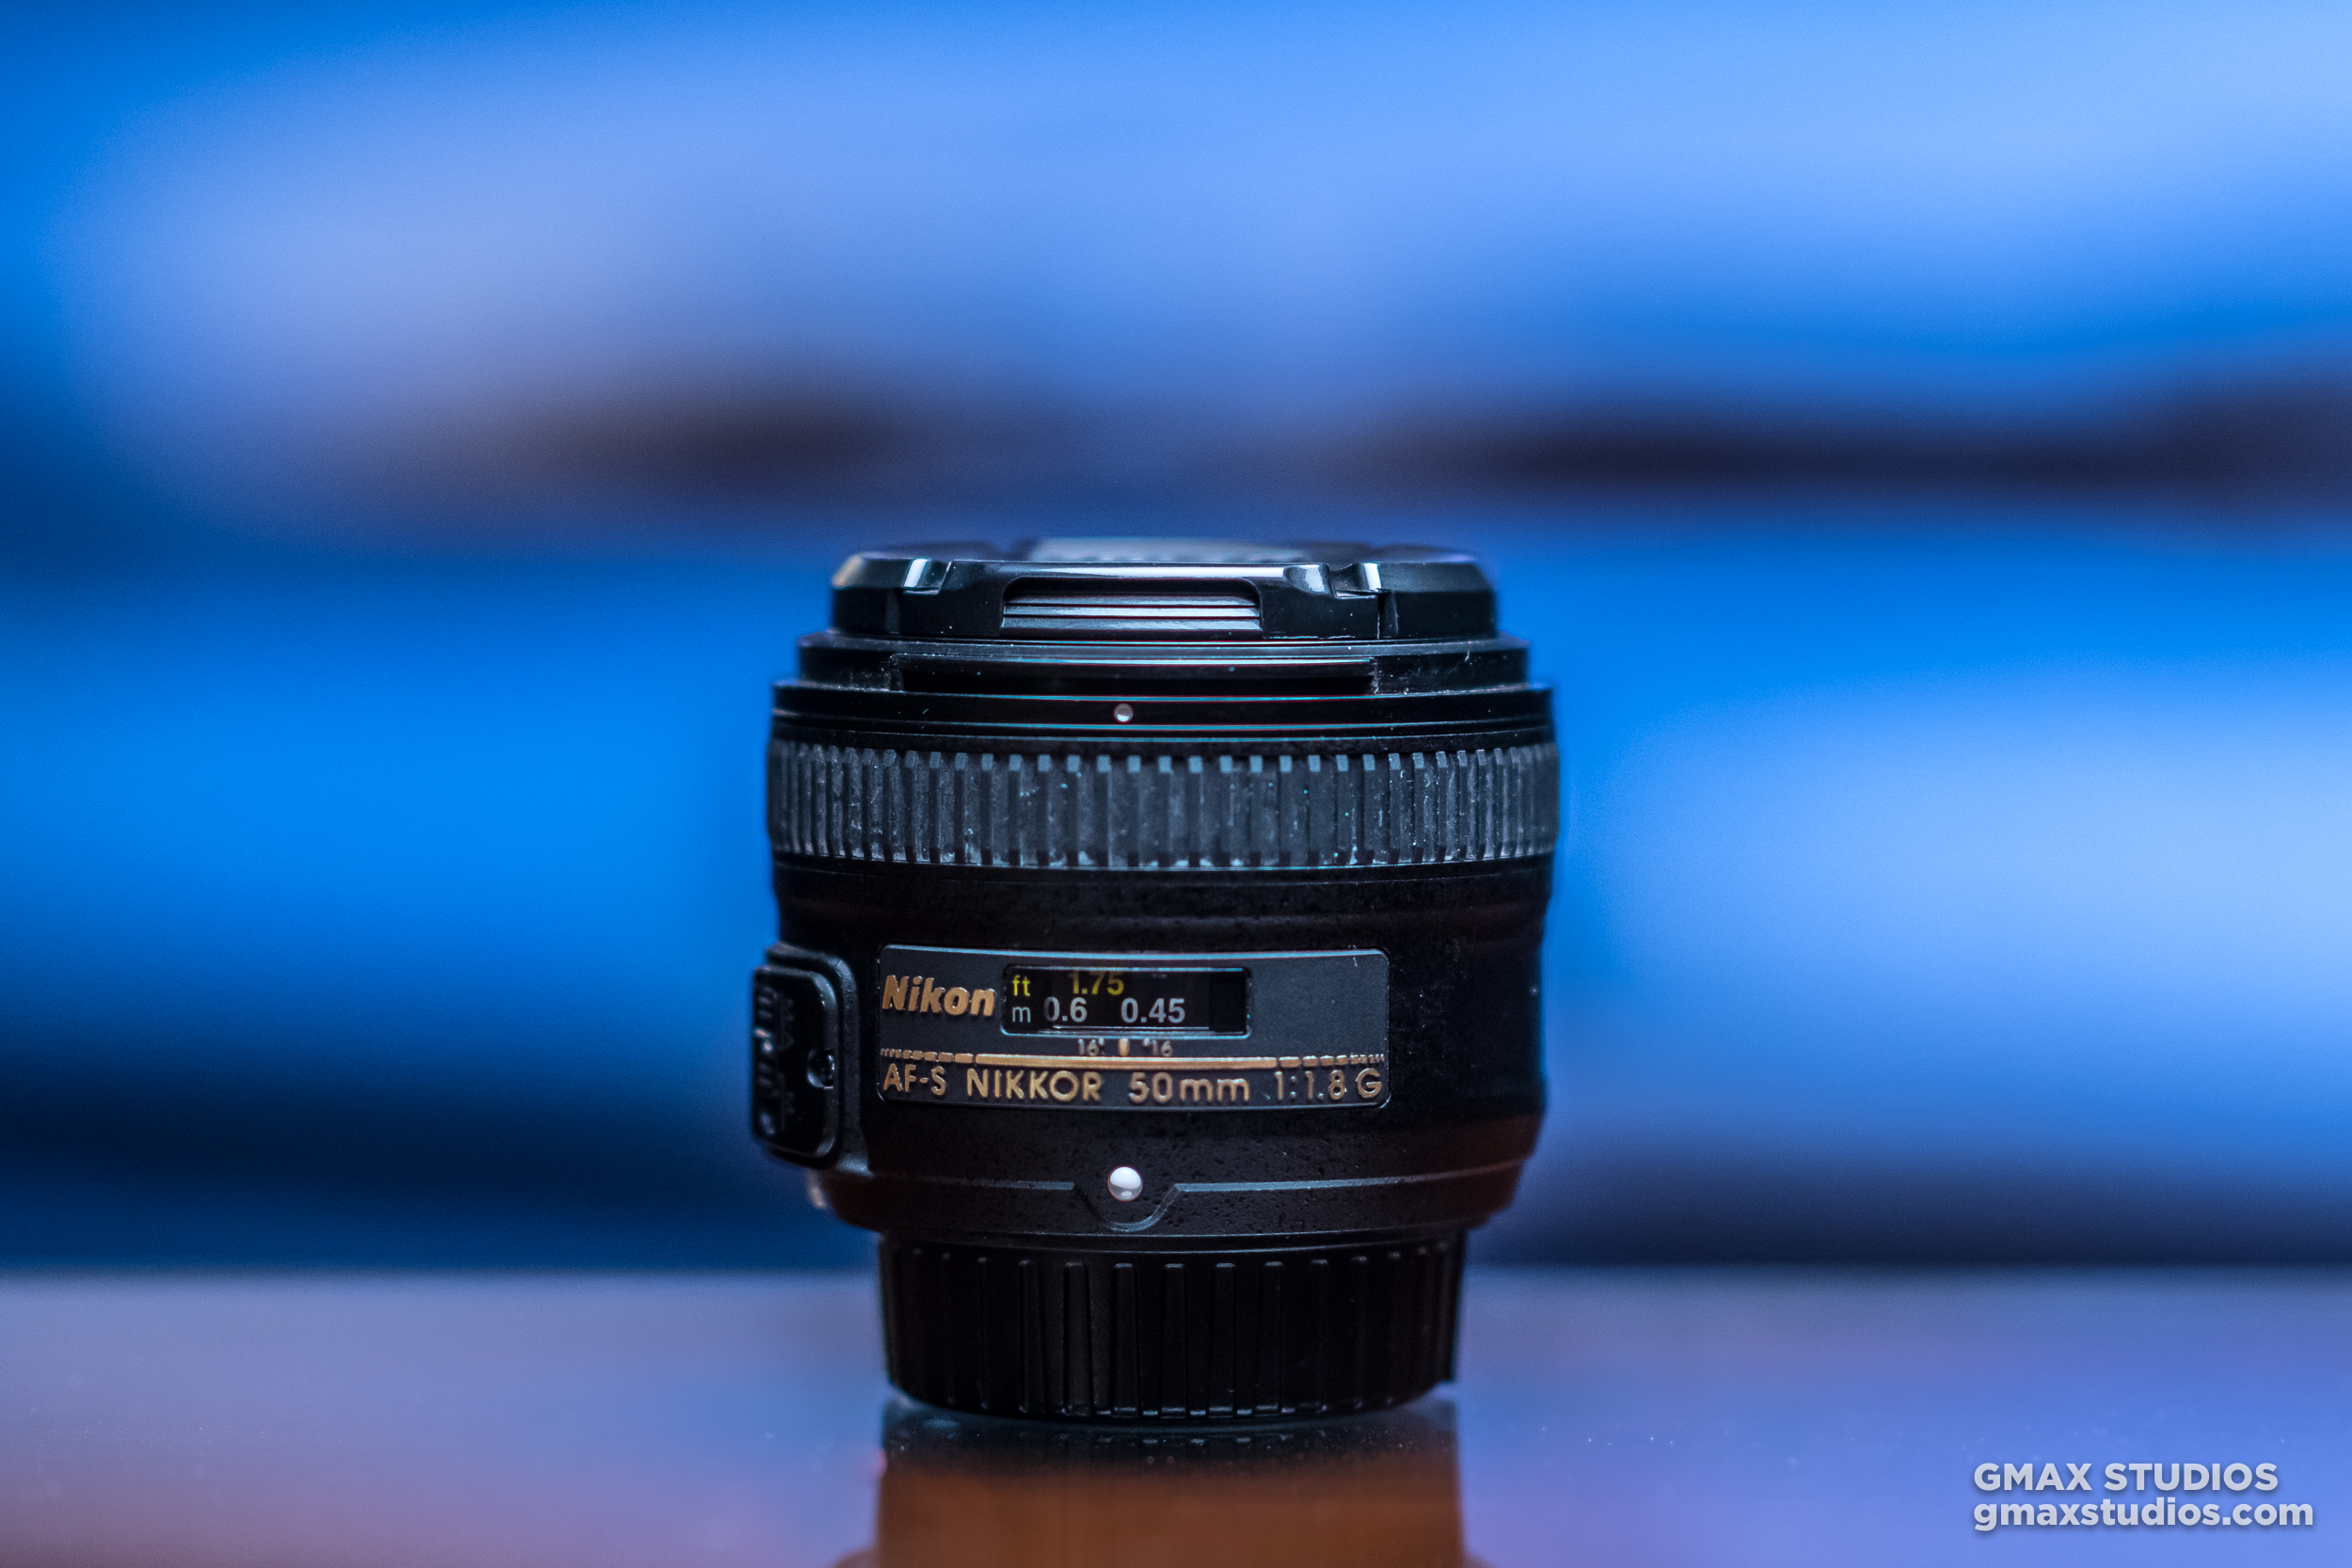
Why is the 50mm 1.8 lens the best lens in the world and why should you buy it!
It’s been a while since you’ve had this DSLR but your photos just don’t stand out. They seem to be missing something. You can change that today.
It’s been a while since you’ve had this D-SLR but your photos just don’t stand out. They seem to be missing something. That finesse. That x factor. That punch.
That ‘D-SLR look’ you’ve seen on Instagram.
Mind you, If you’re not getting the kind of shots you want, it could make you fall out of love with photography. At the end of the day we do things to get results. And if you’re putting in the time and you don’t think it’s yielding anything substantial, it can turn you off big time.
Here’s what happens. You’re getting great natural light on your subject. You might even think that the picture has a kind of mood. You compose your shot, hold your breath and click the shutter release button. Nice.
Later, you see the image on your computer and you can’t believe it’s the same picture. It looks ordinary. You scratch your head and go, “I thought I’d get quality images with a D-SLR.”
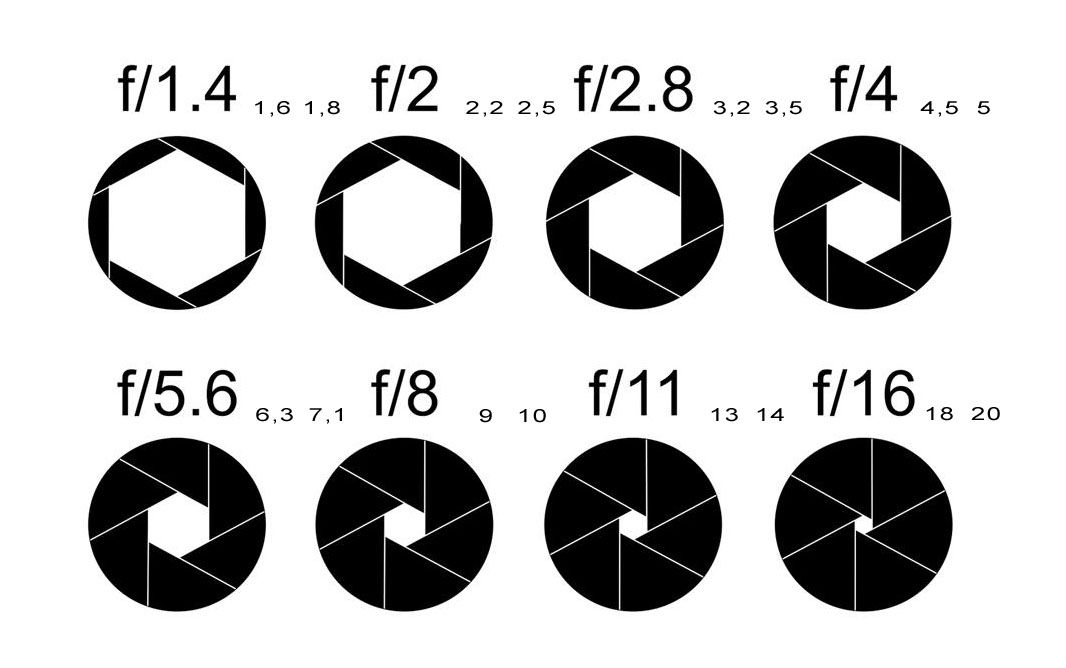
But here’s the thing. Image quality and sharpness often depends on the kind of lens you’re using and its aperture (aperture is the opening of the lens, which is denoted by the f number. For example, f.4 or 5.6.) The lower that f number is, the wider the aperture will be.
A wider aperture allows more light to enter the lens, and this allows your camera to render focus areas much better.
The 18-55 kit lens that comes “free” with your D-SLR may seem good enough to start with, but it has an aperture range between f/4 and f/5.6
If you’re looking for beautiful bokeh, sharper image quality, a 50mm prime lens with a 1.8 aperture is a great lens to buy.
Background blur has mostly to do with your aperture
The 50mm 1.8 prime lens is also called a ‘nifty fifty’ because of how nifty or useful it is to photographers. It's light, cheap and almost every camera company makes it. It's also a fast lens, (lenses with wider apertures are called fast lenses) which means you can shoot at higher shutter speeds, and you don’t need to bump up the ISO too much. In terms of quality, the nifty fifty is best bang for your buck.
Here are a few reasons why we think it’s a great lens.
The nifty 50 is the personification of “good things in small packages”
It’s Light and Easy to Carry
Weighing between 150 to 200 grams, the 50mm 1.8 will have your shoulders thanking you for it. It fits right in to any camera bag, and you can take it anywhere without attracting much attention. If you had to pick one lens to travel with - this would be the one.
It’s Versatile
The nifty 50 is the Johnny Depp of camera lenses. It can practically be used in every genre of photography. Portraits - check. Landscapes - check. If you’re into street photography, it’ll be hard to top the functionality of this lens.
Everything Looks Right
A 50mm lens is also called a normal lens. At a focal length of 50mm, its field of view is similar to what the human eyes perceive. Everything looks as it should, there’s not much distortion like in the case of wide lenses or the feeling of distance when you take a photograph using a telephoto lens.
It’s a Fast Lens
Like we mentioned earlier, fast lenses allow you to shoot using high shutter speeds - which means less camera shake resulting in sharper photographs. You can shoot in low light conditions easily. So feel free to step-out past 6 pm and photograph as much as you want, and the next time your friends come over for a party and whip out their samsung, tell them to put it aside because you have them covered.
It’ll Give You That D-SLR Look.
Chin up. You’ll finally get that D-SLR look you’re after. By that we mean pictures that have a shallower depth of field, where the subject is separated from its background to a greater degree. We all love those blurred backgrounds, don’t we? Well, the depth of field depends on your aperture and it isn’t a trick some photographer came up with.
Increased Sharpness
The 50mm lens is incredibly sharp. If you’ve been shooting with zoom lenses, the sharpness you’ll get from a prime lens will surprise you.
You'll have no trouble taking fashion or commercial shots with the 50mm 1.8 lens.
It’ll Make You a Better Photographer
Yes that's correct. If you’re used to taking photographs with a zoom lens, it’s quite possible that the constant zooming in and out might have pampered you a little bit. Because you can zoom in or out whenever you want you don’t work as hard, like you would with a prime lens that has a fixed focal length.
A prime lens isn’t a wide lens and it isn’t a telephoto lens. It’s somewhere in between. Which means you’ll have to travel back and forth to frame your subject correctly. This will teach you how to compose, get creative and think out of the box.
Photograph by Himanshu Singh Gurjar
If you’re still not convinced - check out this video on the nifty 50. It’s quite likely that it’ll become your favorite lens in the world too. Leave us a comment if you have any questions.
Full-Frame Or Crop Sensor Camera, Which One Should You Buy?
There's a lot of debate on the internet, on which sensor size is the best. Let's find out which is better and why.
There's a lot of debate on the internet, on which sensor size is the best. On one end, you have the purists who swear by the full-frame. On the other, many professionals say that it's just another way to spend money, and you can mimic the image quality of a full-frame with a crop sensor, which the average person can't make out.
We'll save you time and tell you right now that no sensor size is the 'best' and that it depends largely on the usage.
What is a full-frame camera?
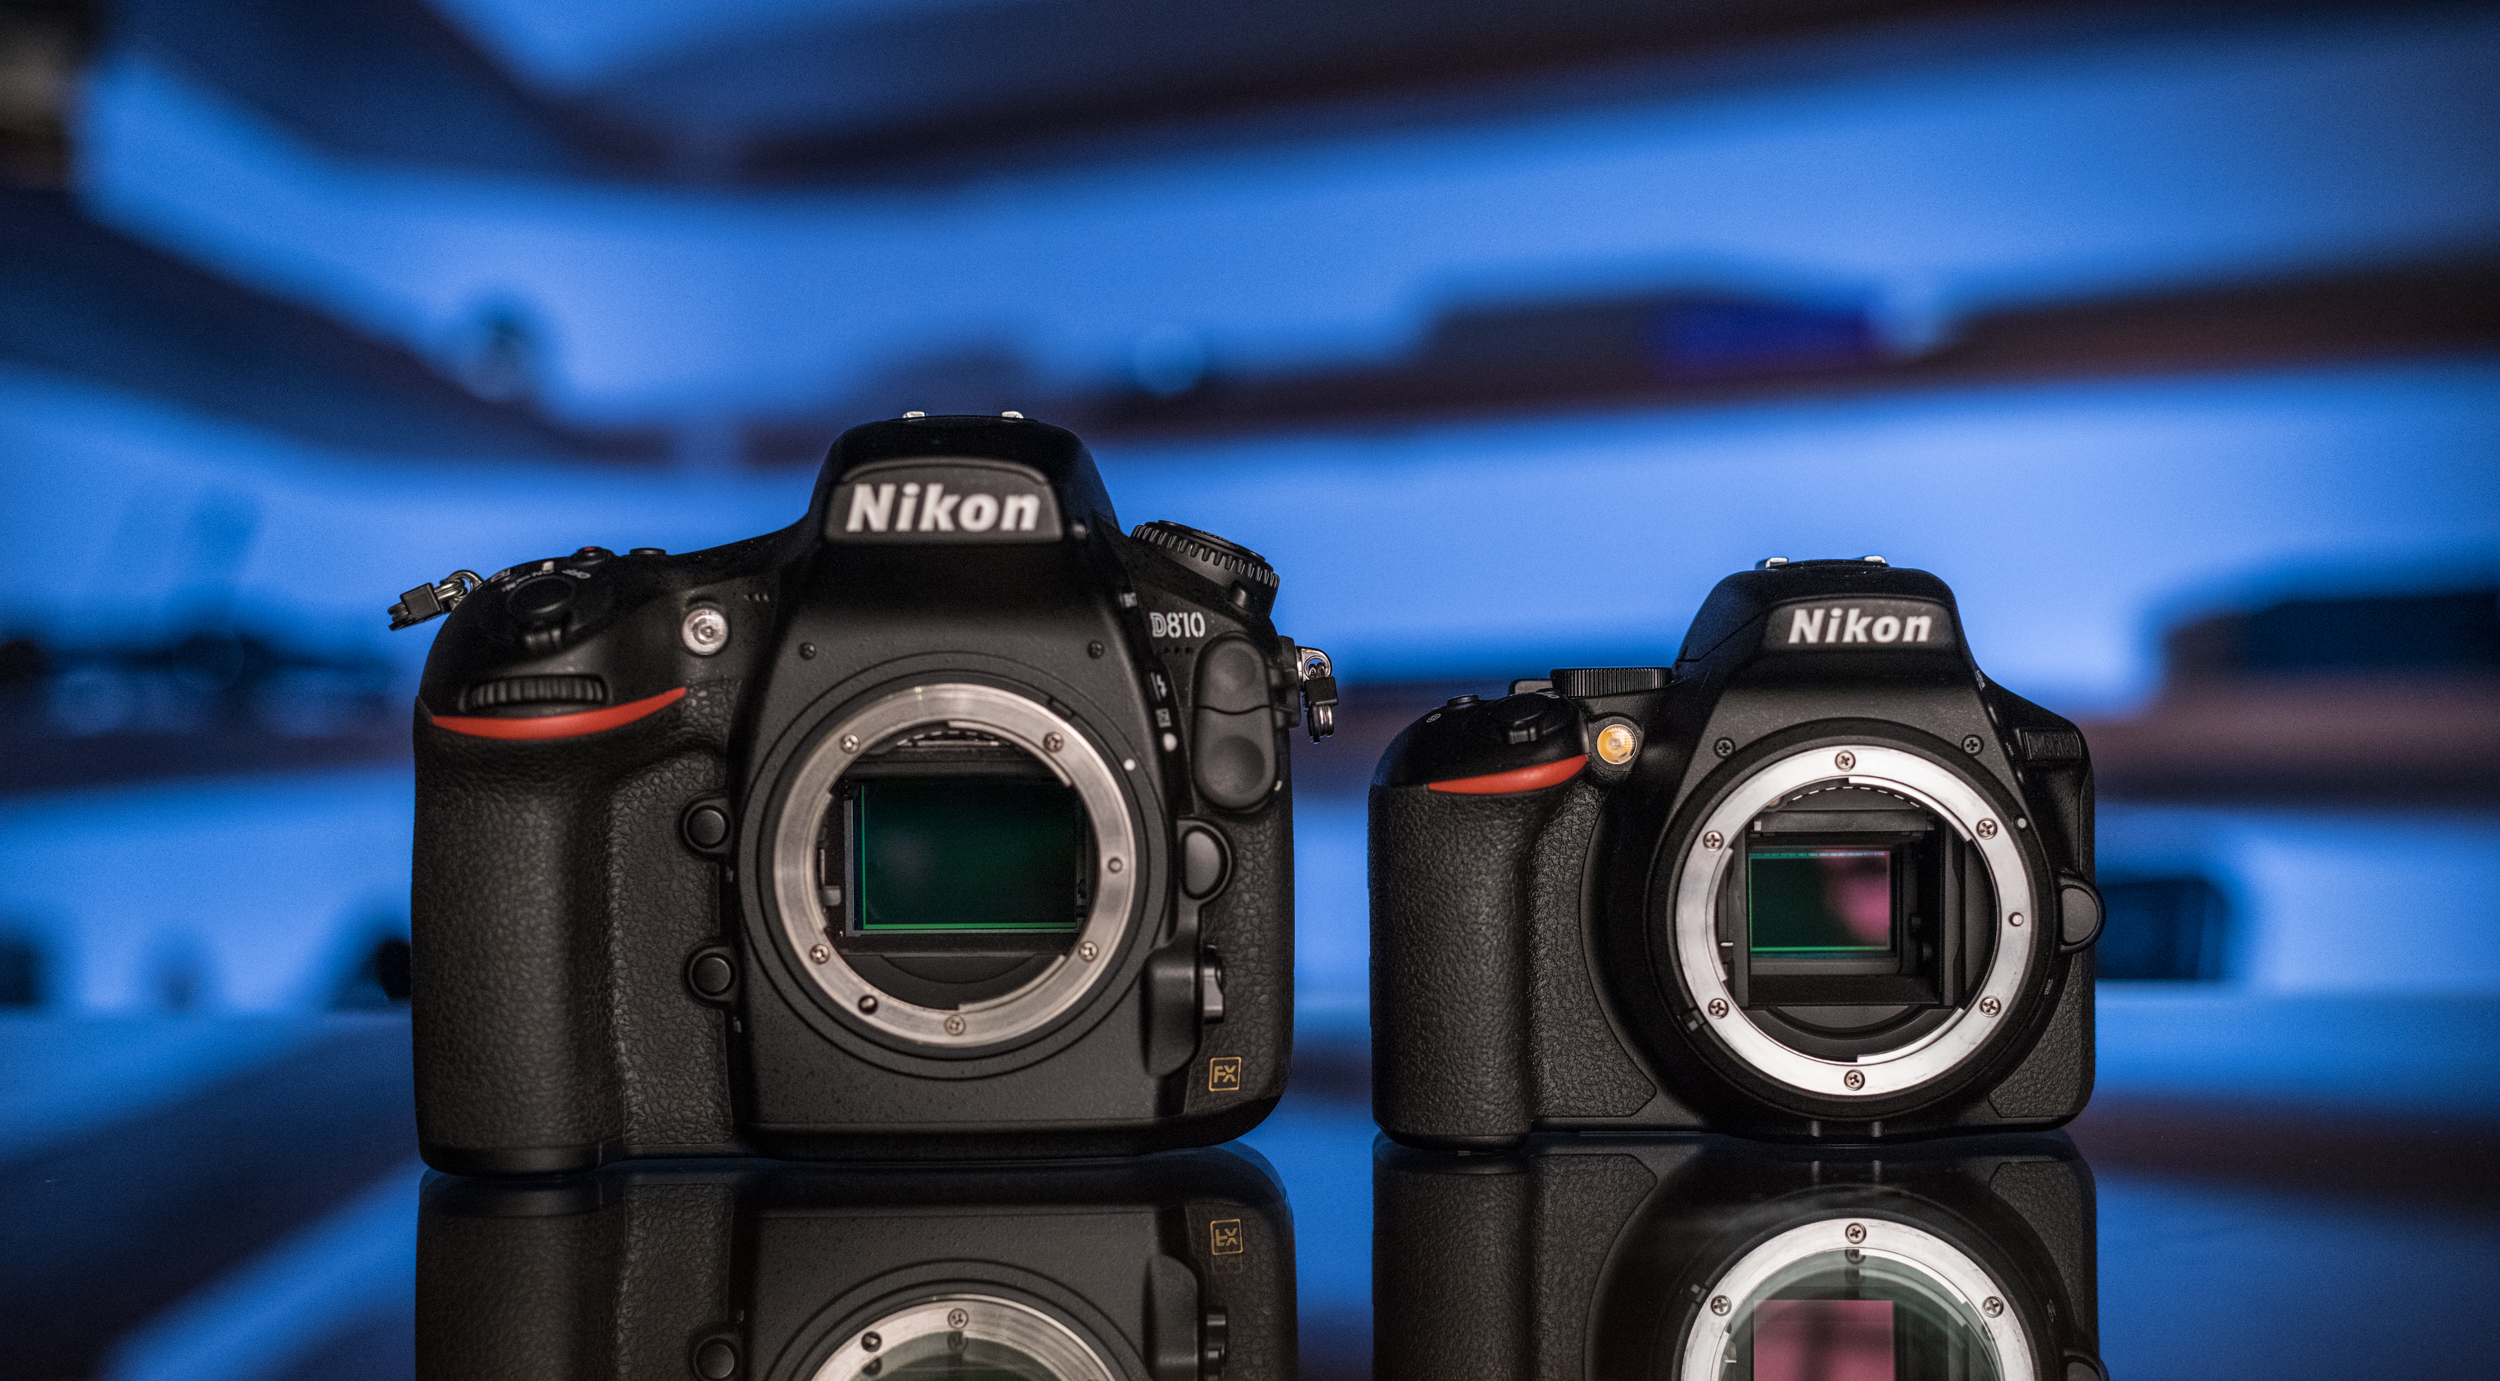
A 'full-frame' camera is a camera with a 36x24mm sensor size, just like the photography film cameras that had a 35mm sensor.
Full-frame cameras became popular during the golden era of film cameras, mainly because of their ease of use and portability as compared to medium and large format cameras. People like photographers and photo-journalists who carried equipment around their necks all day, were delighted to have this much lighter format, and embraced it with open arms.
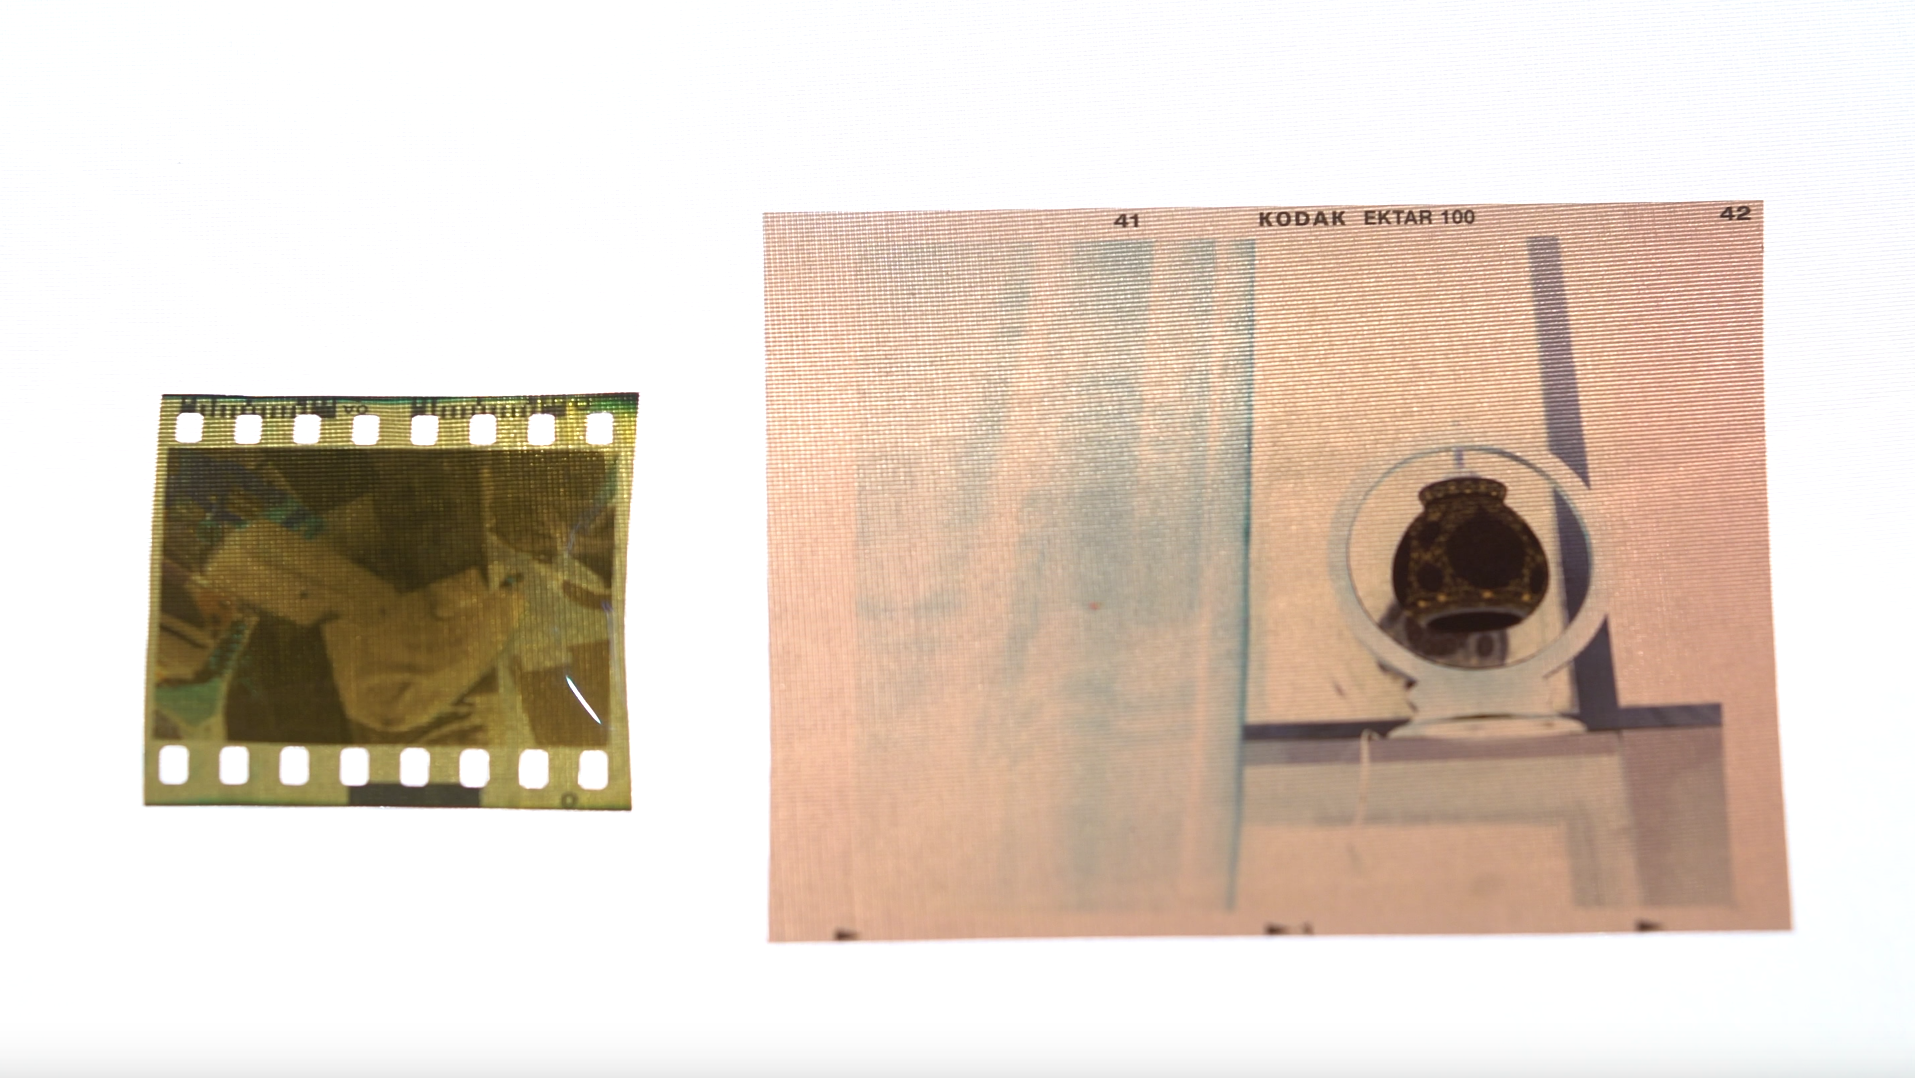
A standard 35mm film negative vs a medium format negative on the right. One can only imagine what it was like for photographers who had to carry such huge devices.
Digital cameras emerged on the scene only around the start of the millennium. The Nikon D1 came out in 1999 and Canon released their first digital camera, the EOS D30 in the year 2000. Due to limitations in technology at the time - their sensors were pretty small, and the lenses that photographers were used to were those of full-frame sensors. The D30 launched at 3.1 megapixels, and Nikon's D1 was at 2.7 megapixels. That was a massive step down from what the photographers were using at the time. It left photographers longing for full-frame cameras that were digital. Canon released the first full-frame digital camera, the 1DS in 2002, and Nikon announced the D3, their first full frame digital camera only in 2007. By that time, Canon had already taken over the market. But that's a story for another article.
Due to its immense popularity, the 35mm camera became the point of reference as far as photography is concerned. But a full-frame camera was extremely expensive, and remains relatively expensive till date, but still is the coveted choice for almost every photographer. Why is that?
Field Of View
One of the big advantages of using a full frame camera, is its large field of view.
A large field of view is necessary for Landscape Photography.
More Light Capacity And Noise Control
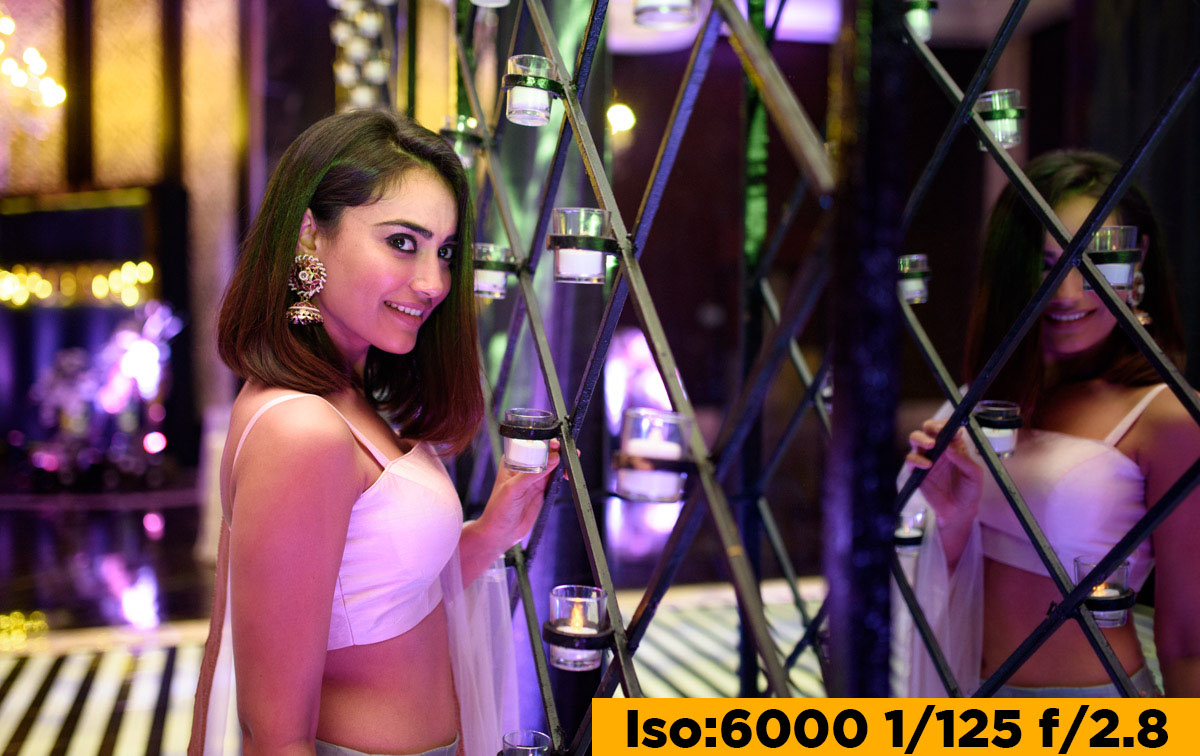
A larger sensor means bigger pixels, which means that it can capture more light. For instance, a 12 megapixel full-frame sensor will absorb more light when compared to the 12 MP APS-C sensor, simply because the area on a full-frame sensor is more. A bigger pixel is also capable of handling the incoming light much better, and this allows you to shoot using a higher ISO pretty easily. The end result is less noise and cleaner looking images.
A full frame sensor's image quality and sharpness don't budge when shooting at high ISO.
Dynamic Range
The dynamic range of a camera is the extent to which it can capture shadows and highlights in a scene. Full-frame cameras are endowed with a better dynamic range, and are capable of capturing every little detail - the blackest blacks, the whitest whites and pretty much everything in between. A higher dynamic range translates into more image detail.
Full-frame cameras give you more depth in an image, due to their high dynamic range.
Richer Colors
Bigger pixels in full-frame cameras also capture more colors easily. You can increase vibrancy and get more natural looking colors straight out of your camera.
Focal Length Remains The Same
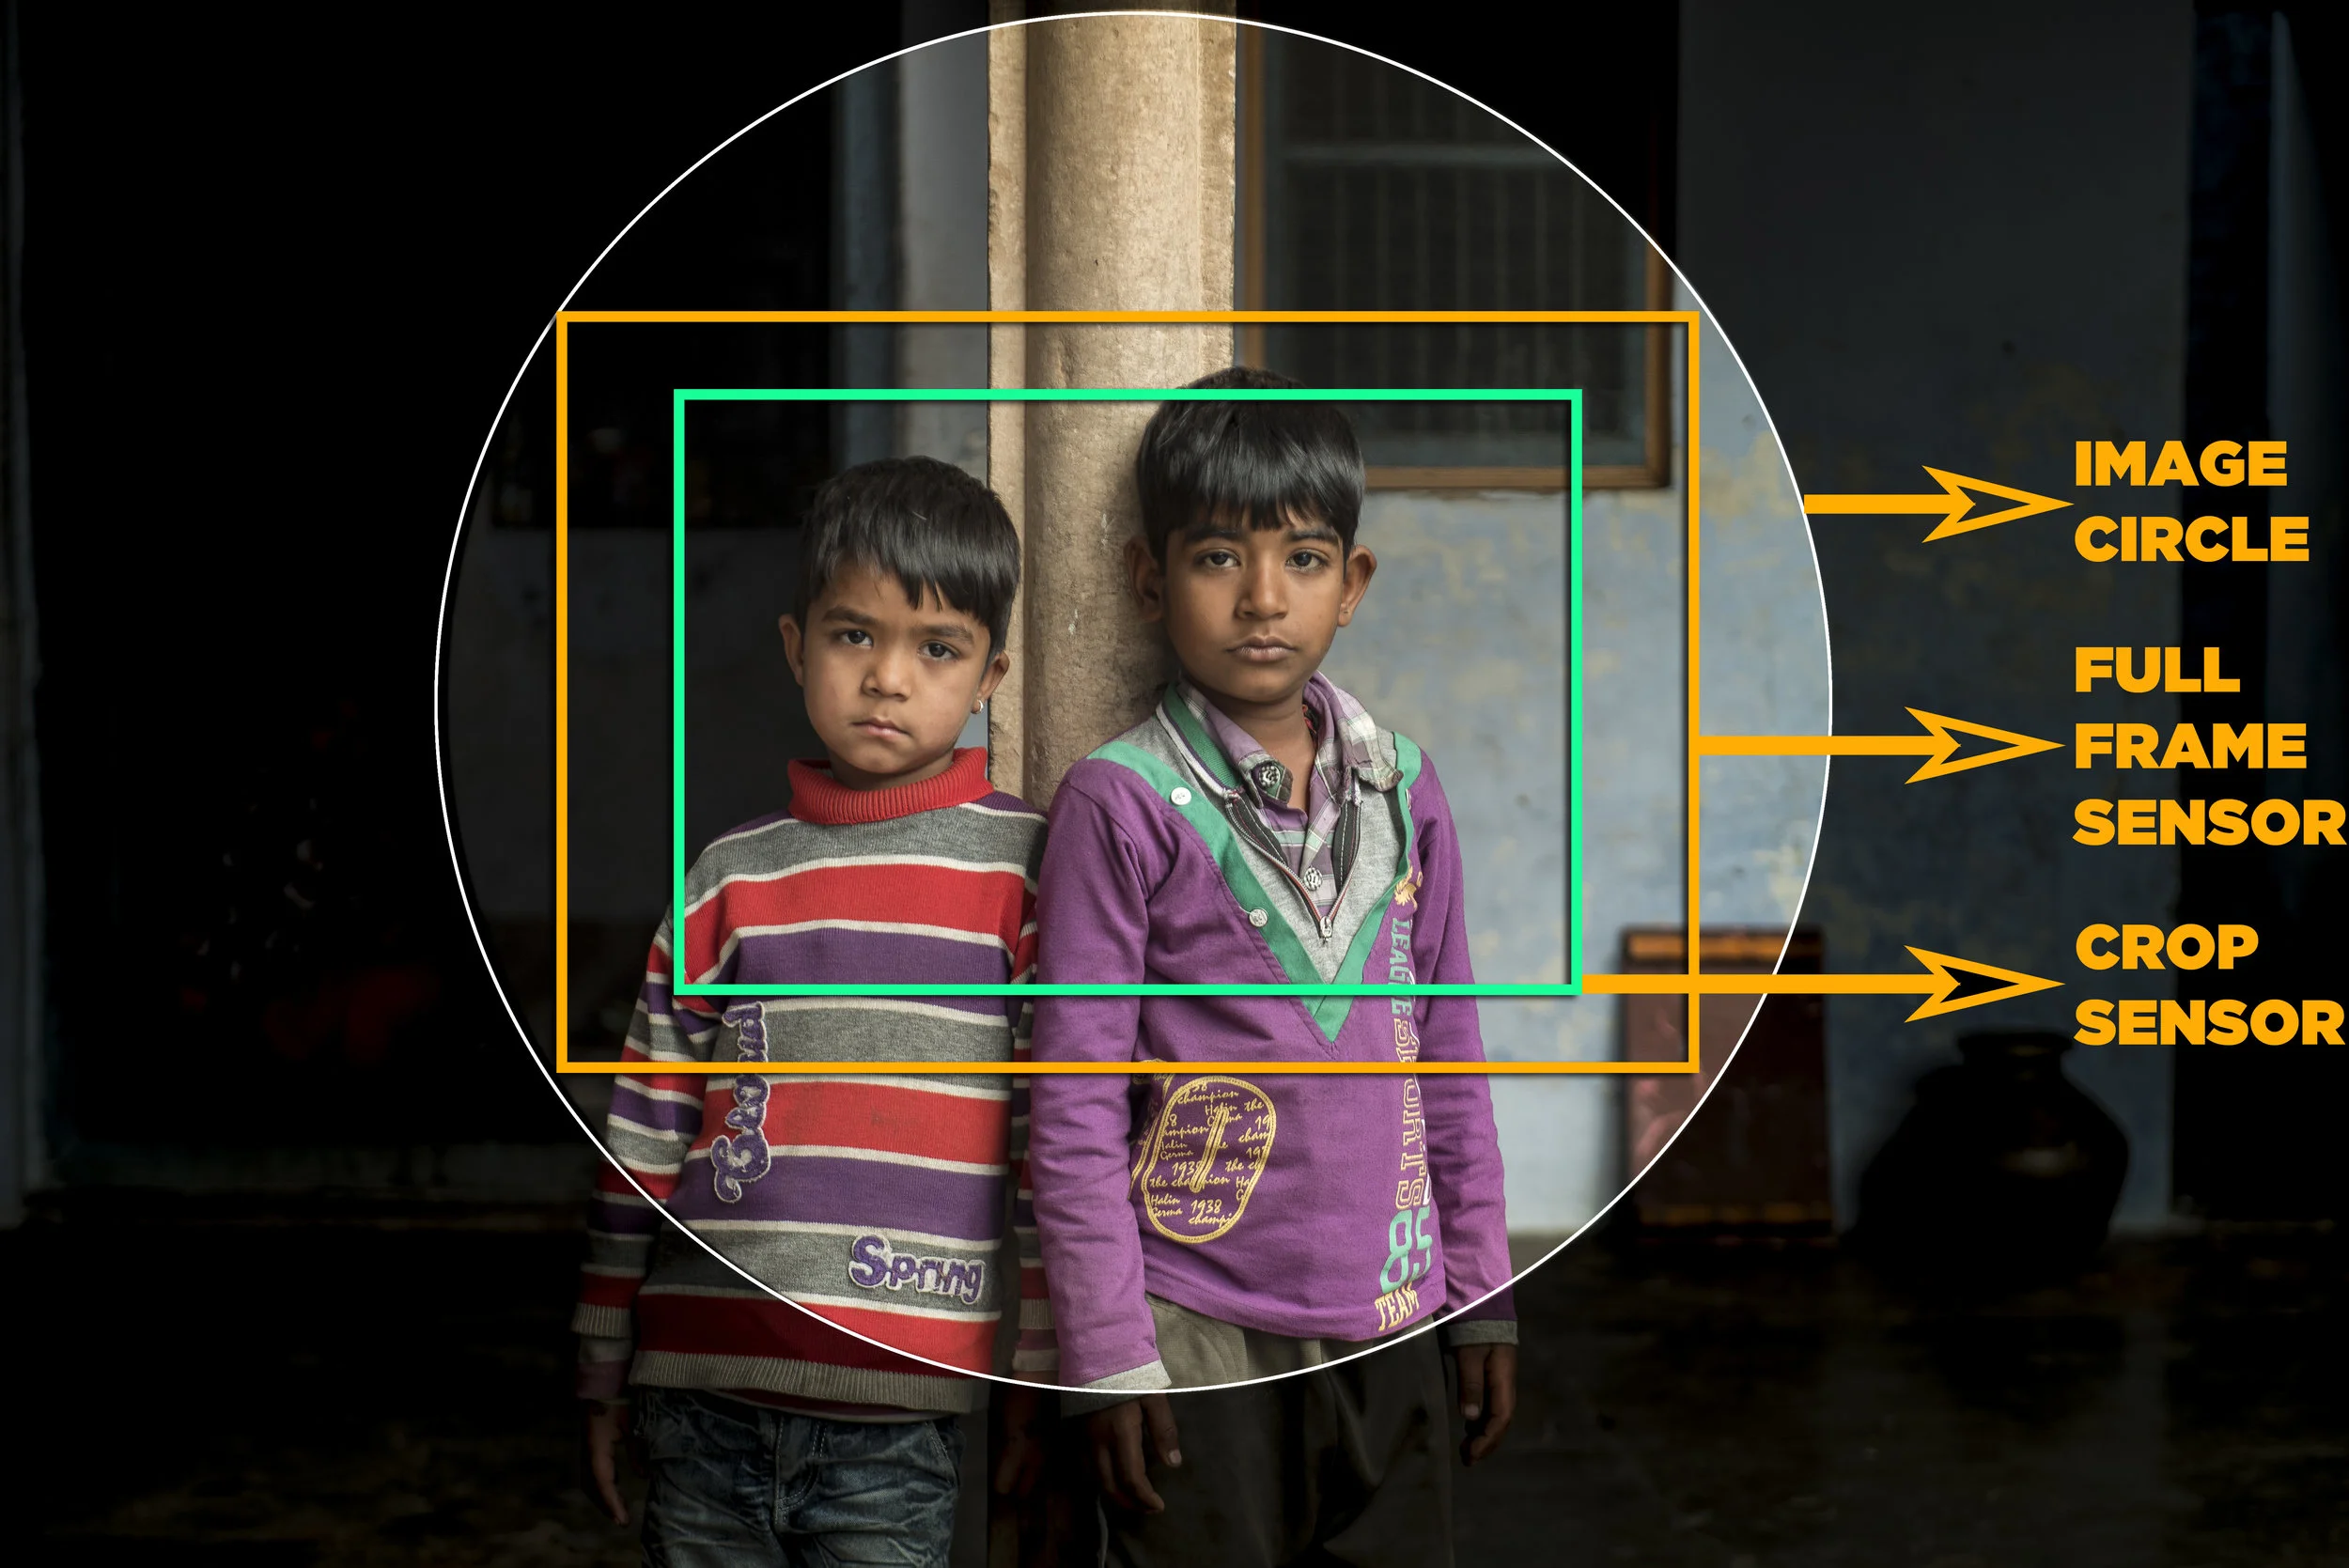
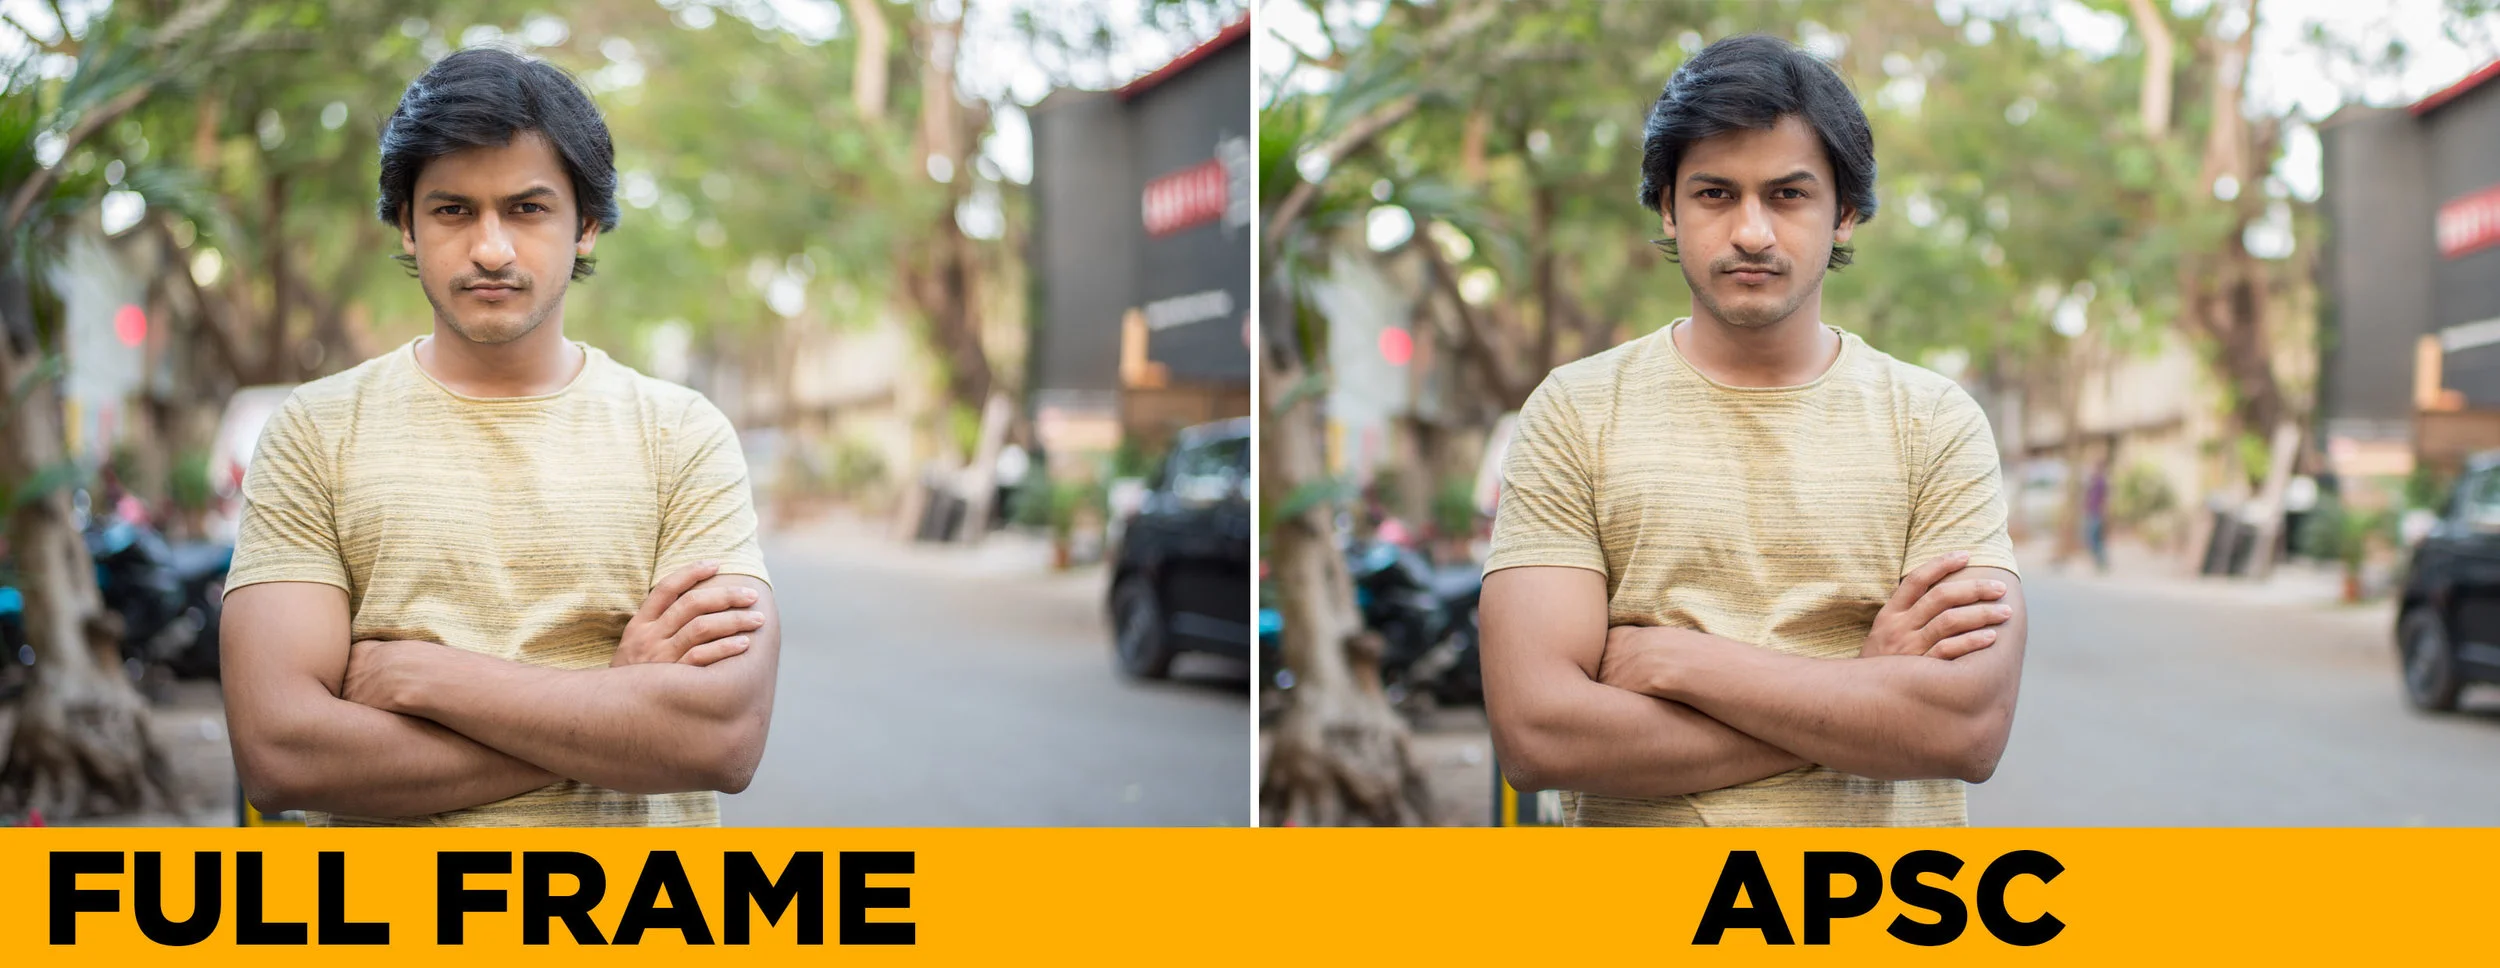
At 24x15mm, the average aps-c sensor is 1.5 times smaller than a full-frame. Which means that it creates an image using a smaller portion of the lens. Because of this, images taken at a focal length of 50mm will look like they're taken at a focal length of 75mm or 80mm.
This image was taken with a 50mm lens on a full-frame camera.
The same 50mm lens gave us a more zoomed in image on an aps-c sensor.
While the extra zoom provided by the aps-c sensor might be advantageous to some, you might need a wider lens in landscape or architectural photography to cover the area a photograph needs. With a full-frame, you can get more into the picture because the massive 35mm sensor allows it, and so the your focal length remains as advertised.
Shallower Depth Of Field
A shallower depth of field is one of the biggest advantages of a full-frame camera. A blurred background is easier to achieve with a 35mm sensor.
We all love a good bokeh.
Also, the degree to which you can separate your subjects from their background is also pretty high, and you don't need to spend extra money on lenses with wider apertures. If you have money to spare on quality lenses, your subjects will stand out even more.
Full-Frame Cameras Have More Features
Full-frame cameras are made from quality materials, can withstand the weather a little better, and are paired with functionalities like an advanced auto-focus system and precise metering options. Because they're targeted to the enthusiast or high-end user, they also have more in-camera customization options, and unique hardware. For e.g. a second LCD screen on the top right of the camera, electronic viewfinders, easy switching between different modes, etc.
But that doesn’t mean that an aps-c sensor camera won't give you great shots. As they say, "it's not the camera, but the guy who's holding it". Knowing the differences between camera sensors, and how those differences affect your style of photography, can help you make a better decision on what works best for you.
APS-C OR CROP SENSOR
The second most popular sensor is the Advanced Photo System Type C or the APS-C sensor. Most d-slr cameras come equipped with an aps-c Sensor.
At 24x15mm, standard aps-c sensors are 1.5 times smaller than the full 35mm sensor. Which means that the aps-c crops into the image times 1.5. This is known as the crop effect. Which is why aps-c sensors are also called crop sensors.
Every camera company delivers a slightly different field of view from the other. Therefore, they offer a different set of lenses for their aps-c versions and also name their cameras different from one another to avoid confusion.
Crop sensors come with their own set of advantages.
They Are Smaller In Size
Because of a smaller sensor and reduced pro-features (which some might call a luxury), crop sensor cameras can be made smaller. A smaller camera is lighter on your shoulders, neck and back. This really helps photographers who like to travel light or don't want to draw a lot of attention to themselves, in street photography for instance. A smaller camera also means more space in the bag for lenses, accessories or even a snack.
You Can Spend The Extra Money On Lenses
Lenses that give you a comparable field of view are easily available in the market. The entire package is lighter on your shoulders and your wallet.
Great For Wildlife Photography & Journalism
A 1.5 times crop factor also gives you 1.5x zoom. A standard aps-c camera which has a crop factor of 1.5 times will give you a focal length of 450mm at 300mm focal length. The extra focal length is really helpful in wildlife photography, because getting too close to a wild animal is not recommended. Crop sensor cameras also come in handy in live journalism, where the objective is to document the subject and not necessarily the background.
You Don't Always Need Shallow Depth Of Field
It's true that a full-frame can give you a shallower depth and make subjects pop. But often, you need more than one object in focus. So buying a camera for just shallower depth field is not a clever decision. Shallow depth can also be achieved on an crop sensor camera by using a faster lens or lenses with a wider aperture.
Almost No Difference When Shooting Low ISO
Being able to shoot at a higher ISO is definitely a plus, but when you're shooting at lower sensitivities, there's little to no difference in images taken with both sensors. For instance, when you're shooting outdoors during the day, or if you're shooting indoors with professional lighting equipment, a high ISO capability isn't what it's all about.
As you can see, at lower iso, it's hard to tell the difference between the two images.
Noise Is Well Controlled On Newer D-SLRs
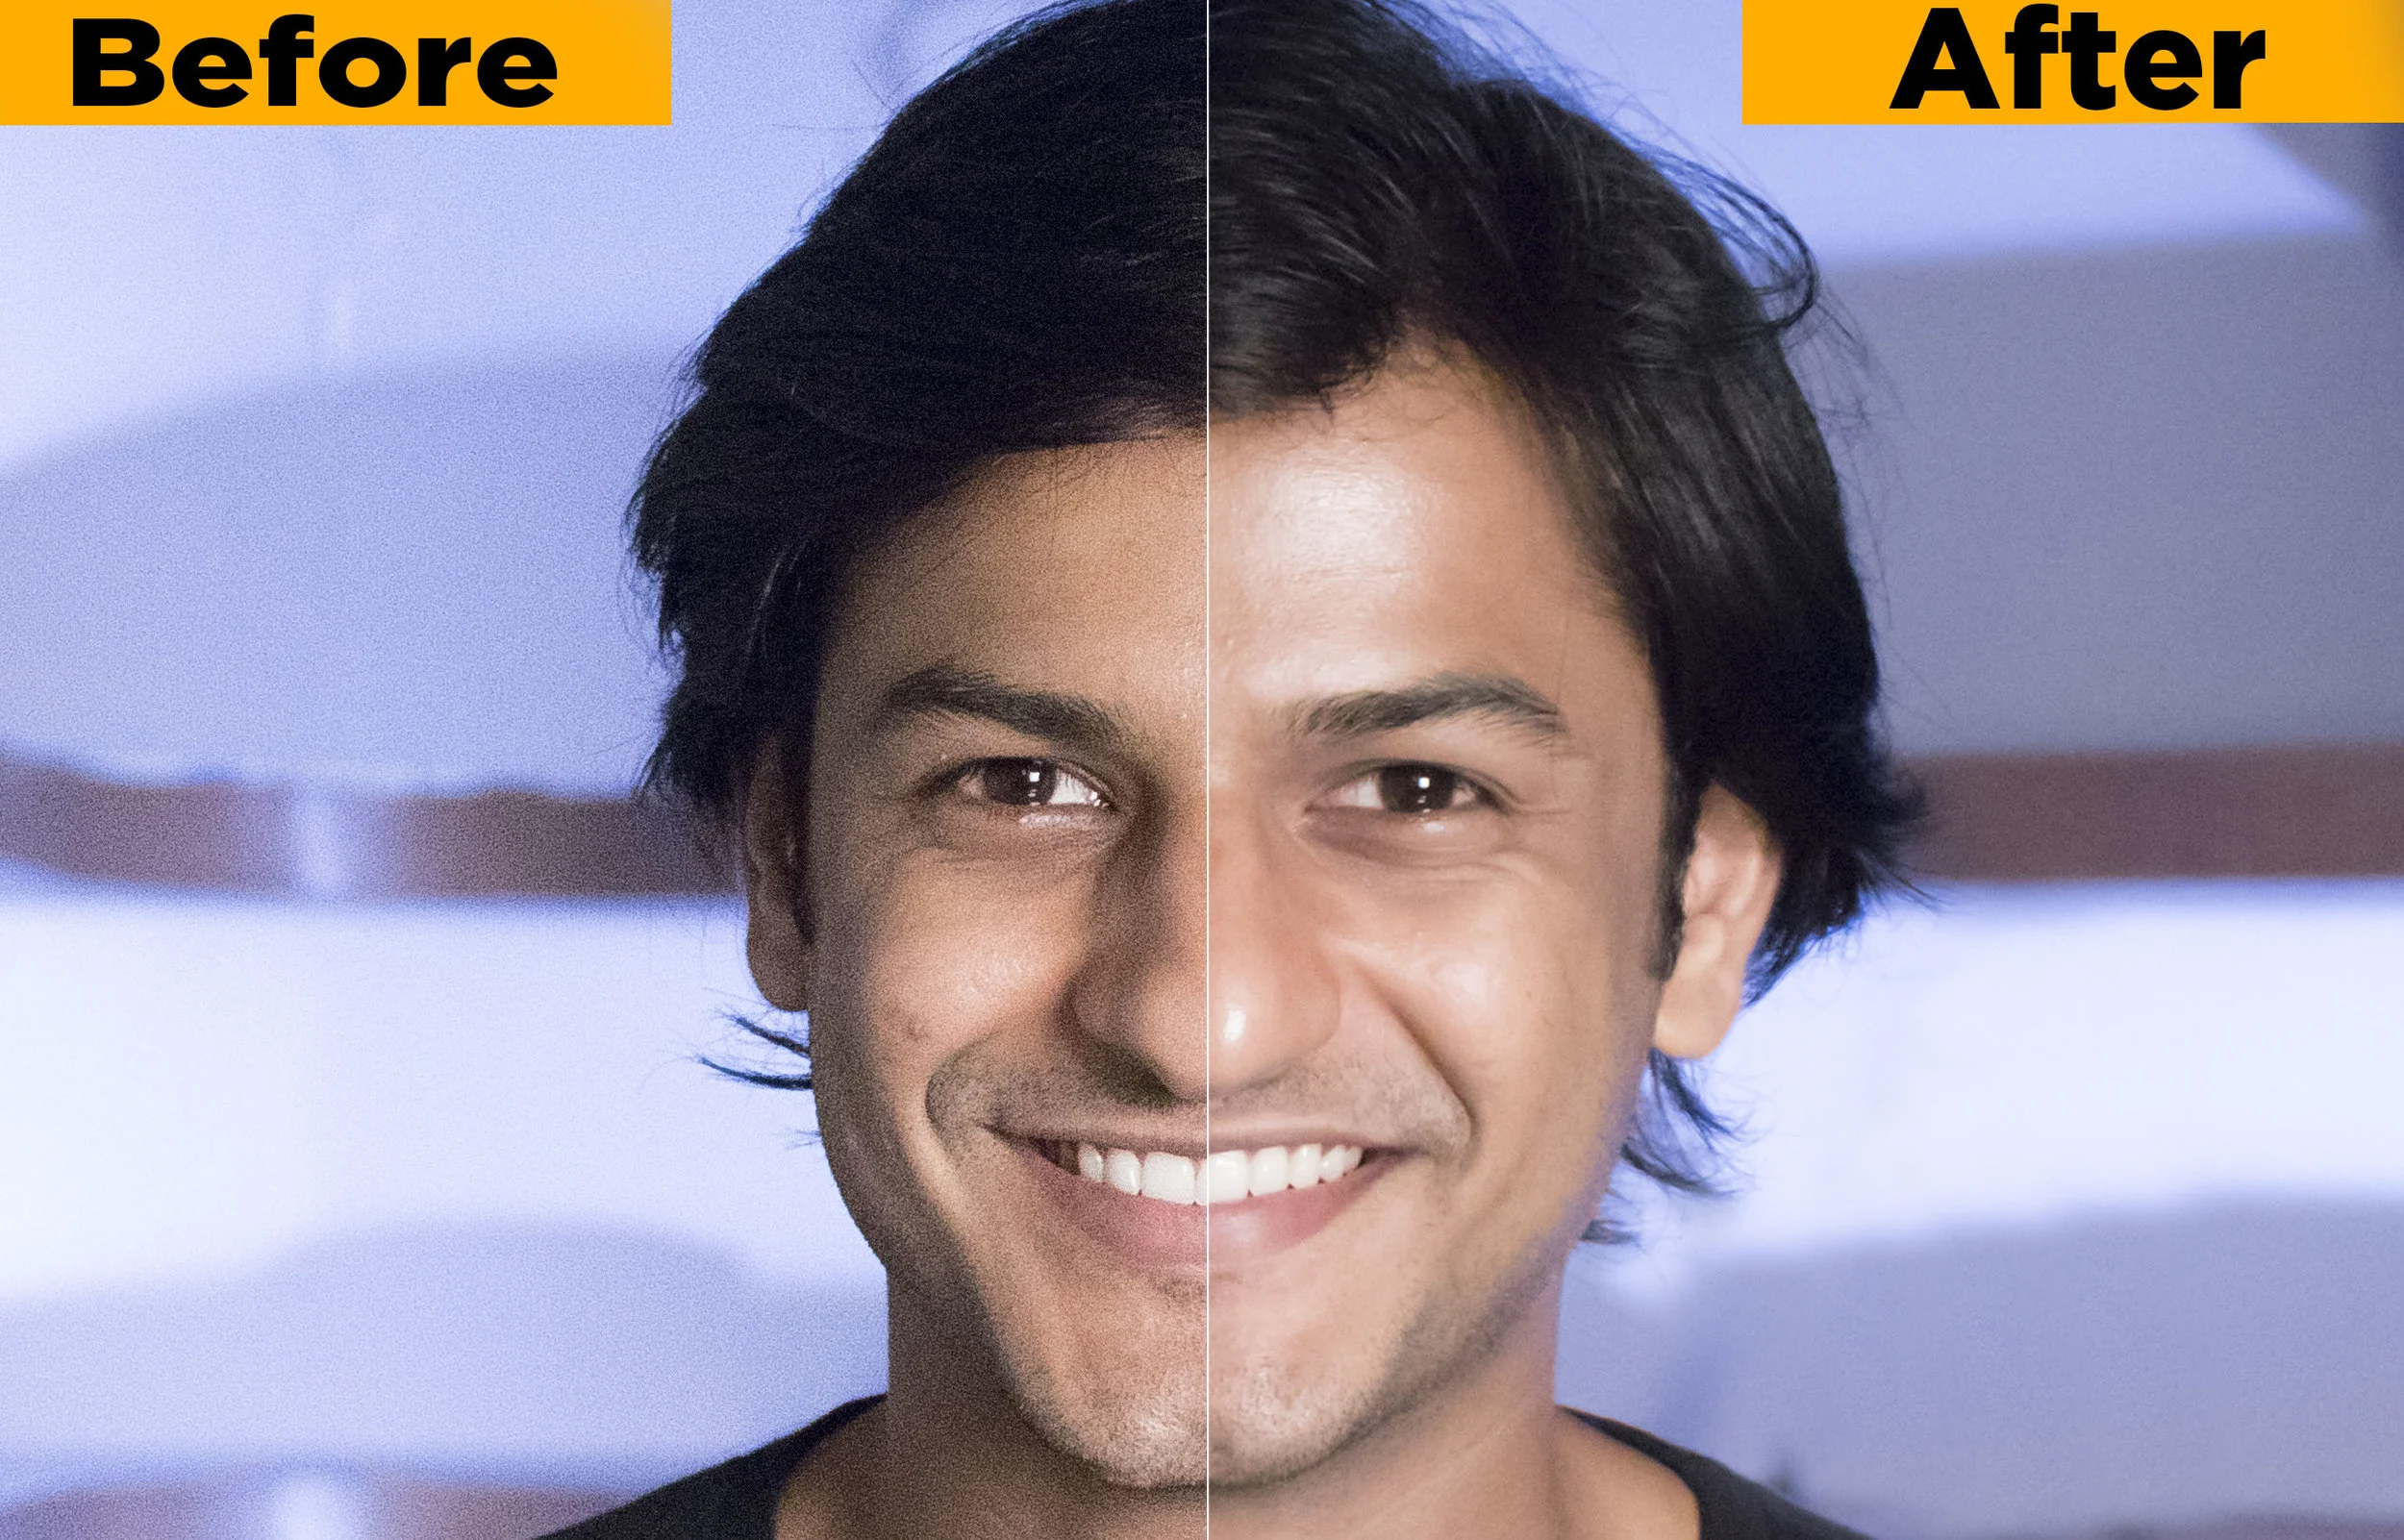
A lot of the newer crop sensor D-SLRs have great noise reduction ability. Unless you're somebody who shoots in extremely low-light situations, you should get a decent ISO performance from an aps-c sensor camera. Current post-production software can reduce a lot of the noise as well. Before buying a full-frame camera for it's high ISO performance, ask yourself if you really need it.
A before and after comparison of noise-reduction in Adobe Lightroom.
Little To No Difference In Resolution
Only rarely will you view an image at its 100% resolution. Most photographers today work exclusively on social media. While many new D-SLR's can shoot 4K, a lot of the social media platforms use a resolution of 1920x1080 pixels. Only in commercial photography do you need that kind of detail. And let's not forget that it takes a huge amount of effort to make use of a full-frame camera's image capabilities.
This image was shot on a full-frame camera.
This image was shot using the Nikon 5600 crop sensor camera. To the average person, which is most people - the difference isn't visible.
Cost
Crop-sensor cameras and lenses are cheaper than their full-frame counterparts. More often than not, the cost is the deciding factor in the purchase of a camera. But a difference in price shouldn't translate into a dip in quality. You can still get a lot done with an APS-C sensor camera.
Before buying a camera, you’ll need to figure out how a particular sensor will affect your personal brand of photography. Do you need a very shallow depth-of-field? Have you already invested in lenses that are compatible with a full-frame camera? And a sensor size is just one factor and that other aspects like color science and in-camera processing are just as important before buying a camera.
Still can't decide which sensor size is for you? Below is a video explaining sensor sizes in detail. Don't forget to subscribe to our YouTube channel by clicking here.
How to shoot a panorama
With the help of proper techniques and post-processing software, anybody can get near-perfect panoramic shots.
You’re out with your friends, and you’re standing on top of a mountain from where the view seems great. But your camera just won’t cover it all. There’s also no space to go back, and you’re not carrying a wide angle lens. This is where panoramas come in handy. They allow you to photograph an entire scene and not just part of it.
In the old days, photographers would create panoramas on manually by panning across a scene and taking a couple of exposures on film, then printing and stitching them in a lab. Or you got yourself one of those super expensive panorama cameras like the Hasselblad X-Pan.
It was far from ideal, and it was far from easy.
Panorama on film is very tough to achieve
But now, with the help of proper technique and post-processing software, you can get near-perfect panoramic shots. Some photographers stitch over a hundred photographs to create gigapixel panoramas.
WHAT IS A PANORAMA?
Panorama, or panoramic photography is wide-format photography in which you take multiple exposures and merge them together to create a massive picture, sometimes 180 degrees or more. Panorama was introduced by early painters who wanted to give a wider view of the scenes they were trying to project in their paintings.
Panoramic Painting By Maerten van Heemskerck
HOW DO YOU SHOOT A PANORAMA?
A panorama is created in two parts
Photographing the scene via your camera
Using post-processing software for e.g. Adobe Lightroom to merge them together
EQUIPMENT
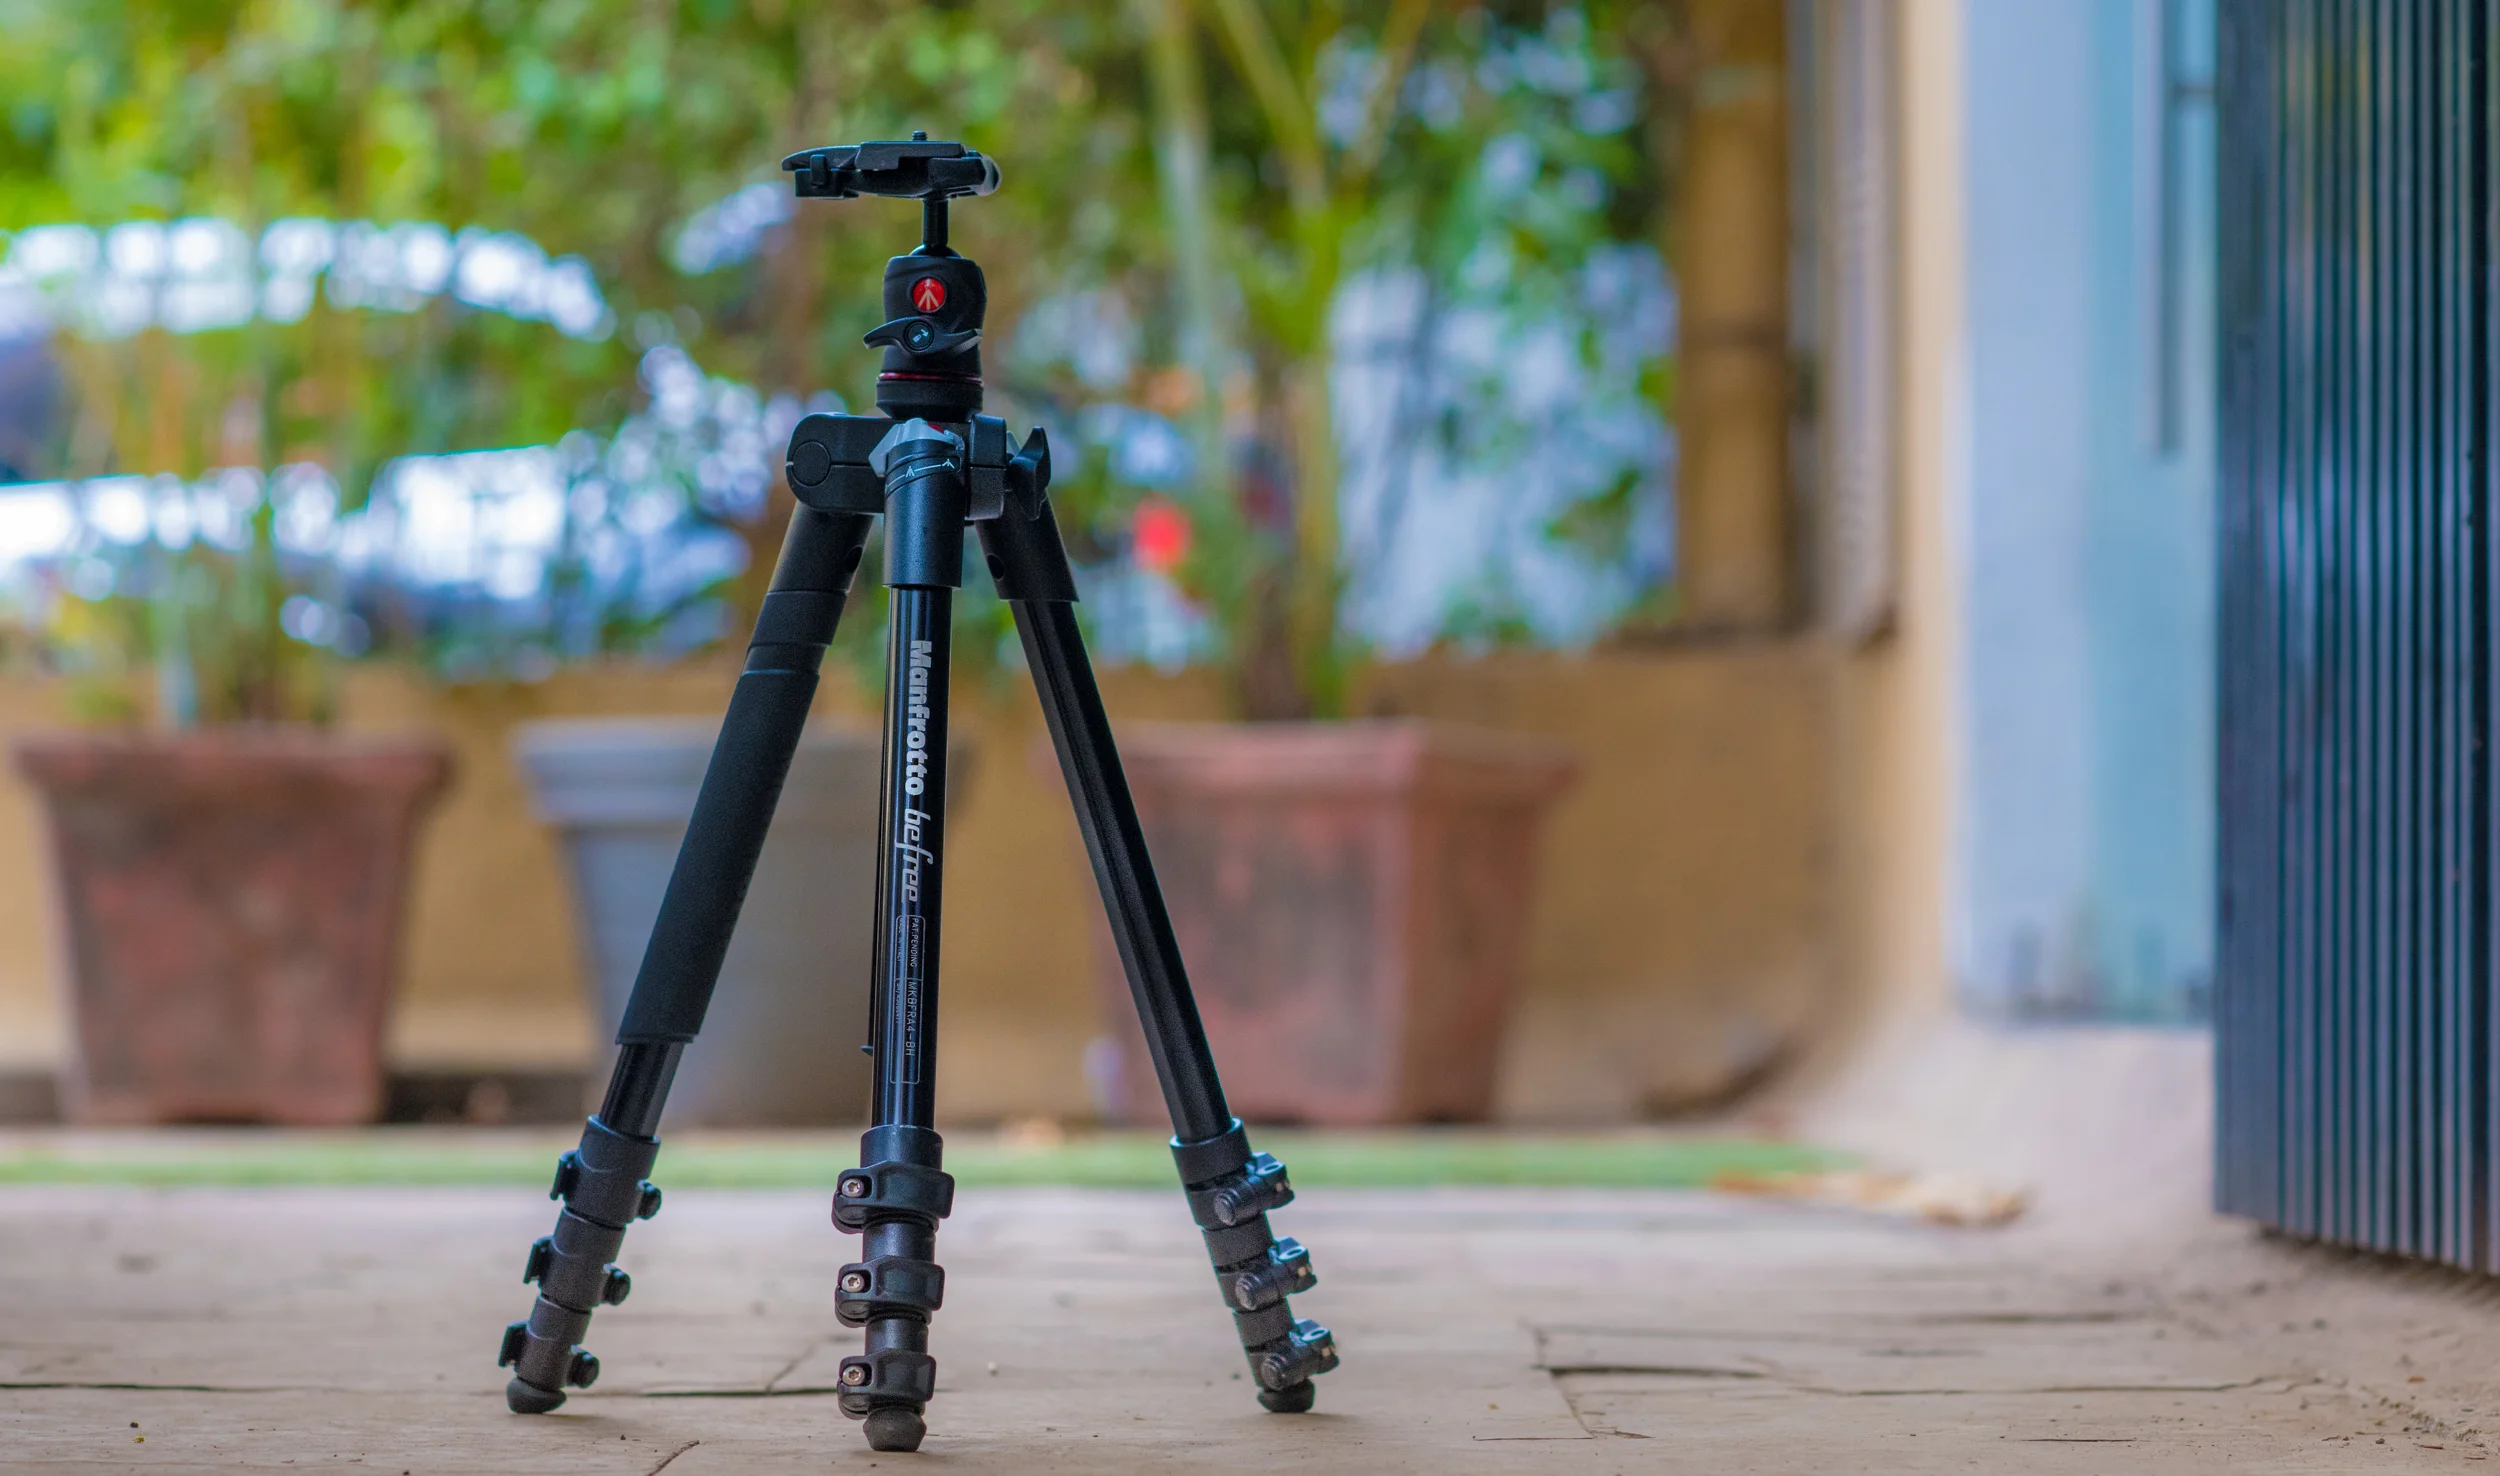
While there are people who can shoot a panorama handheld, a tripod will allow you shoot images along one horizontal plane easily. You can also get a panoramic head or an L bracket if you’re into real estate or architectural photography. But for our purposes, a tripod should do just fine.
With a tripod, your images will remain level and steady
SETTINGS
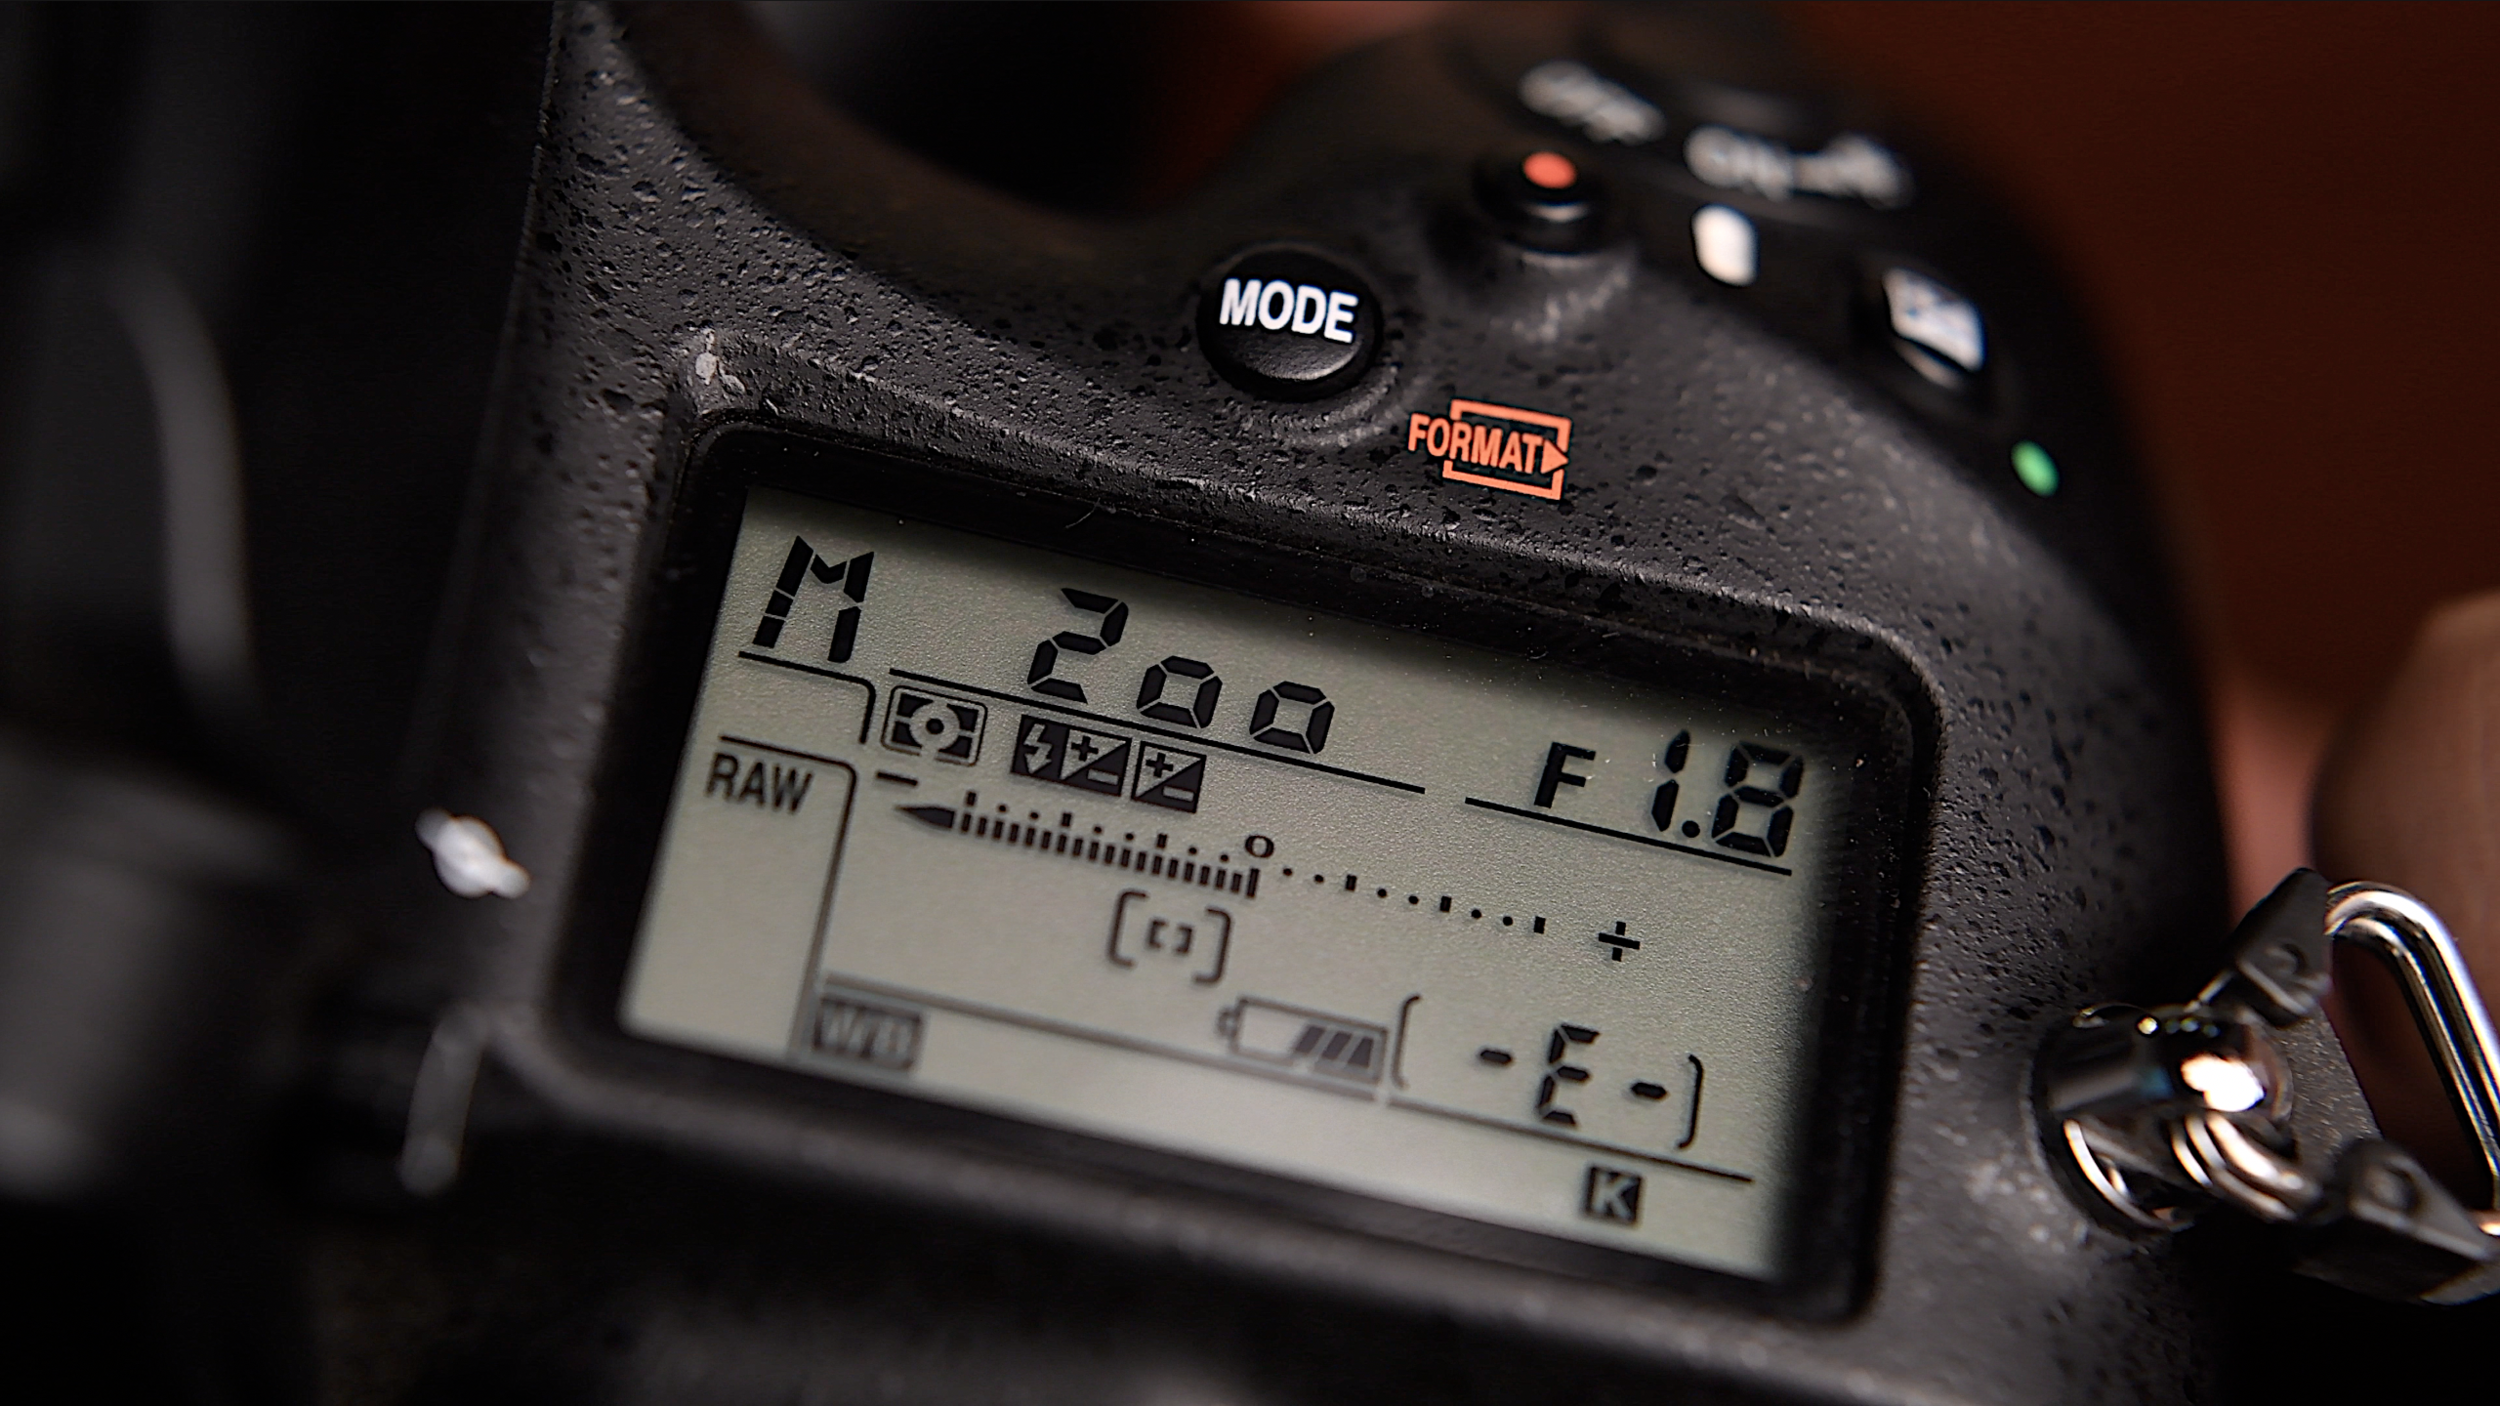
Making a panorama look like one photograph is the hard part. Which is why you have to adjust settings manually. The computer in your camera doesn’t know that you’re trying to shoot a panorama, and will expose each shot differently if you left the job of setting the exposure to it.
Switch your camera to manual mode and set the exposure manually to avoid varying exposures in every photograph
Focus
Focusing should also be done manually. Your focus should be set to a distant object that you're photographing or at infinity. This way, your camera won't change focus each time you take a picture.
Aperture
Because we want everything in focus, the aperture should be set to a higher f-stop, preferably f.8 or above.
Shutter Speed
Try to find a sweet spot in the center of the photograph using your camera's metering options. Take a few pictures to ensure the bright and dark areas of the photograph are exposed to your liking and not based on the automatic values suggested by your camera.
ISO
Set your ISO manually and use the same ISO for each picture.
White Balance
Because light reflects off each object differently, auto white balance could make your photograph look like a shade chart. Set and lock the white balance manually, like you did for your focus.
Shoot In RAW
Set your file format to raw, so it’s easier to correct exposure and color in post-processing. To fully understand the possibilities of shooting with a RAW file format, click here.
PHOTOGRAPHING THE SCENE
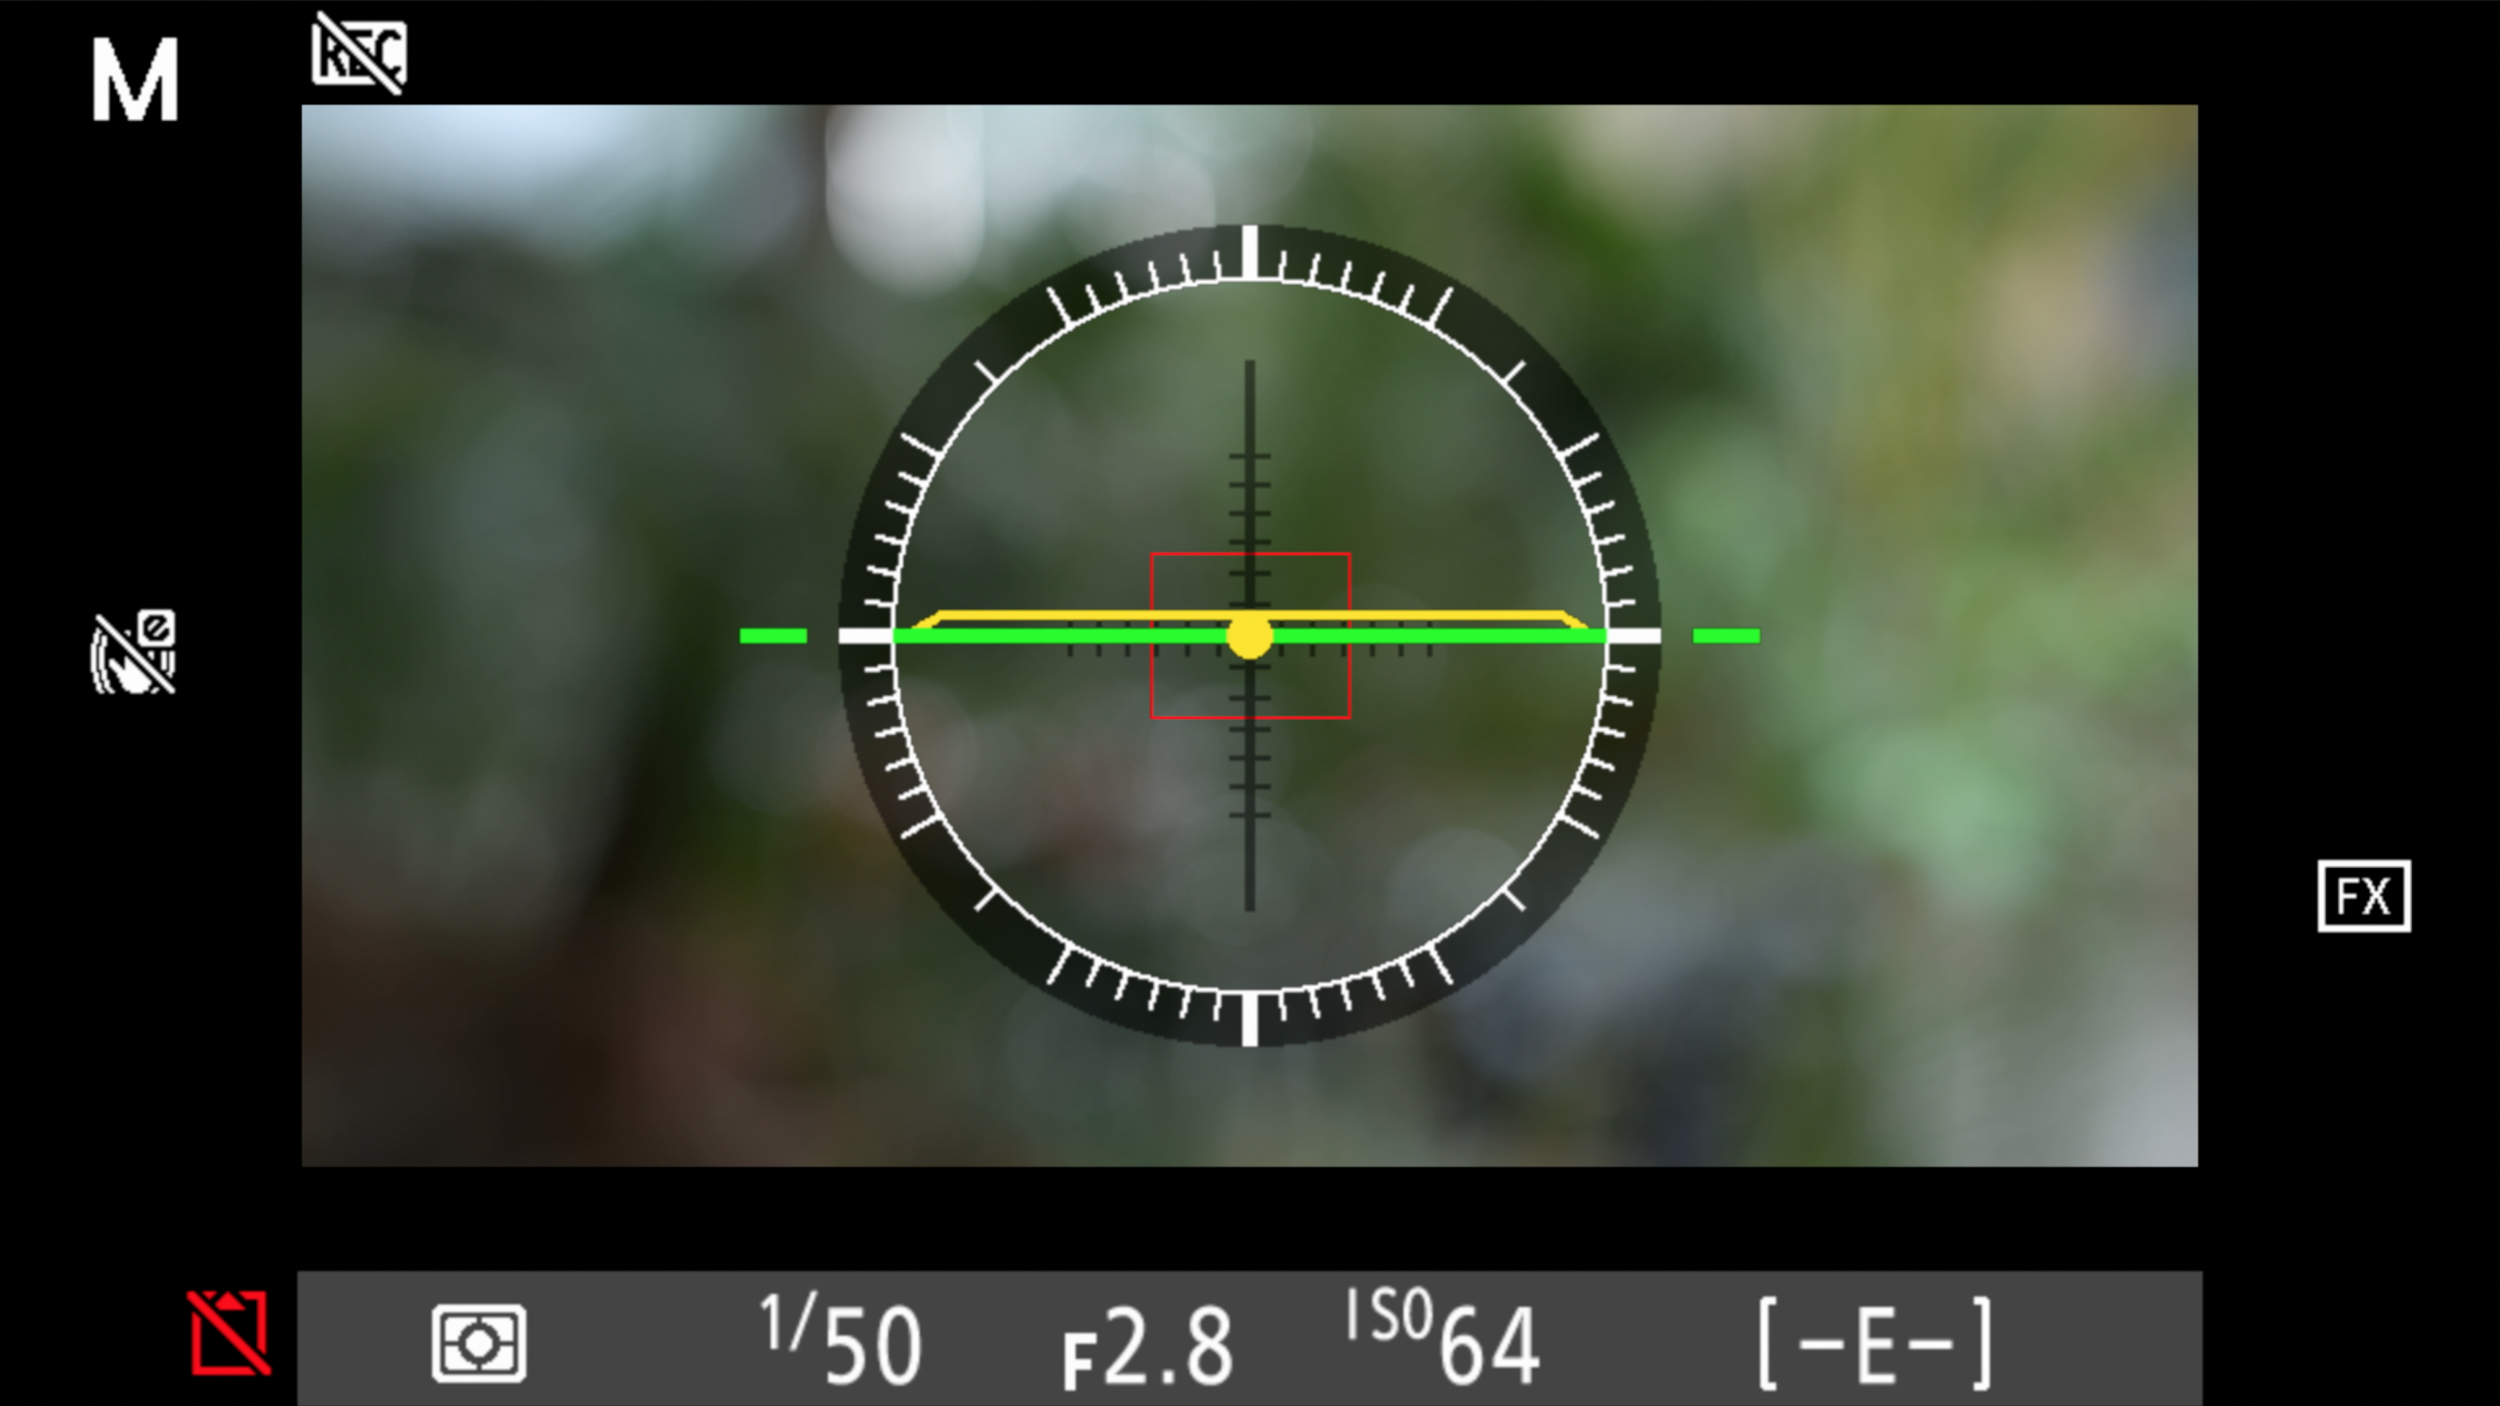
The next bit is taking the photographs. Once you’ve mounted your camera on the tripod, make sure the horizon is aligned correctly in your viewfinder.
A leveled horizon brings you a step closer to getting the perfect panorama
Simply pan the camera across the scene you want to photograph and click a few pictures. Make sure that each image overlaps the other by 30% to maintain focus across the entire picture, and to make your panorama look like one image.
Watch out for wind and moving objects when taking pictures. It can spoil the evenness of your panorama. Half of it will look like it’s moving while the other half might be still.
PROCESSING THE IMAGE
The second part of creating a panorama is the processing. There are tons of free software on the web for panoramic photography such as Hugin and Image composite editor, but we personally use Adobe Lightroom to stitch the images together.
One image has to overlap the other by at least 30% for maintaining focus and seamlessness
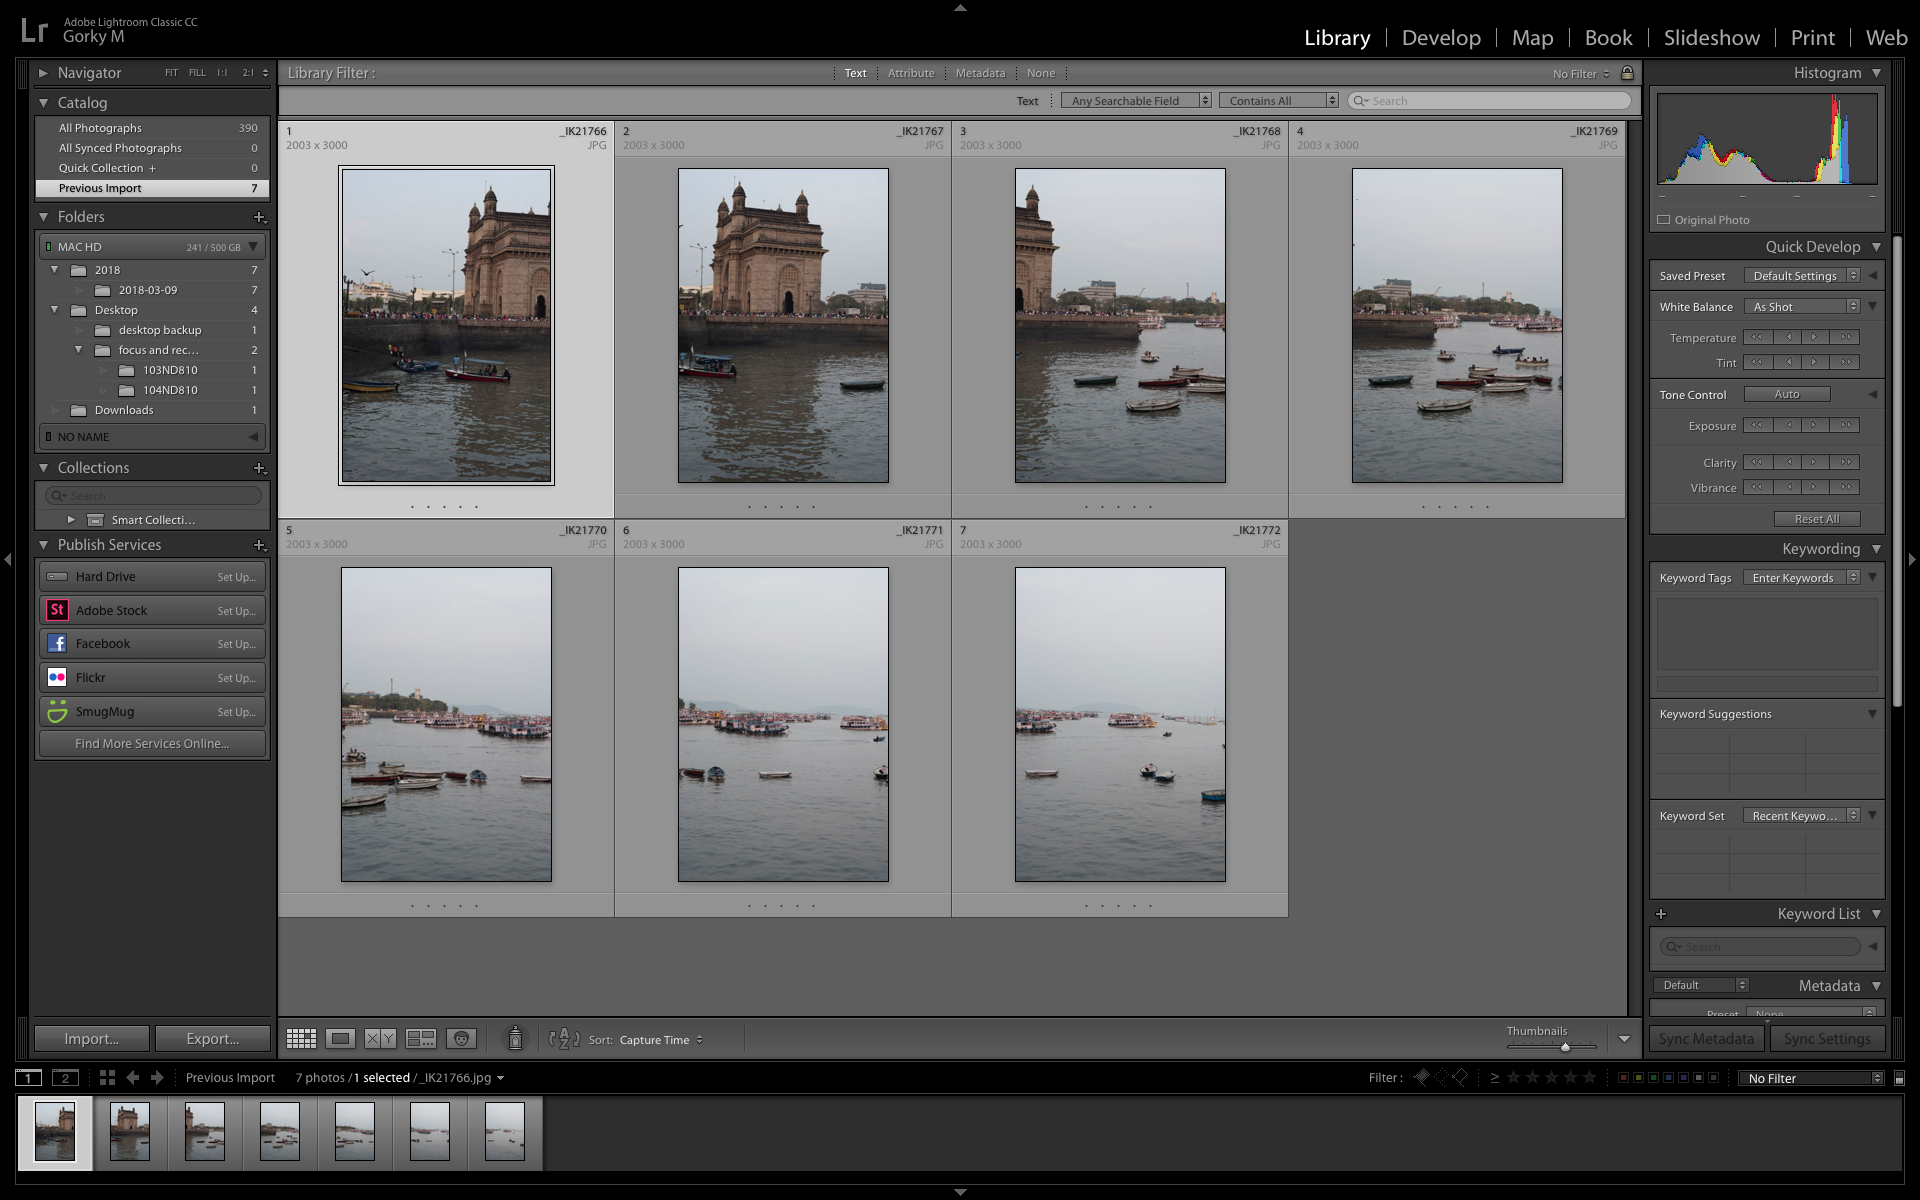
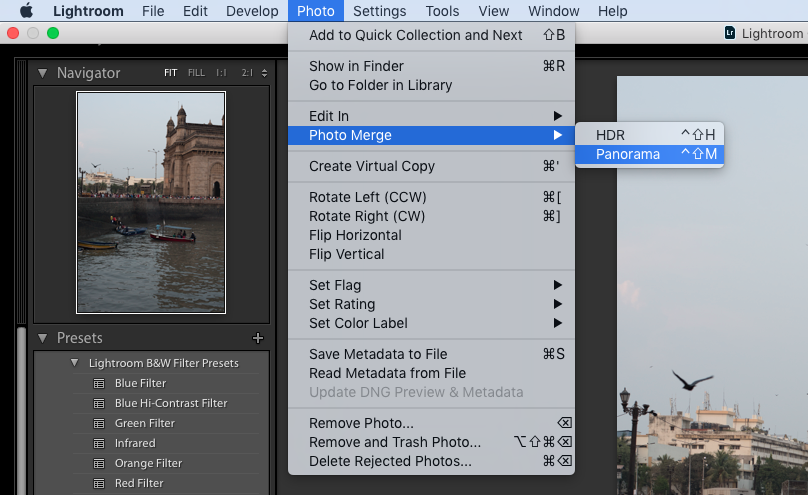
Open the images in Adobe Lightroom, then click on the ‘photo’ option and merge the images together.
You can straighten it a bit more, or crop it to your liking and that’s about it.
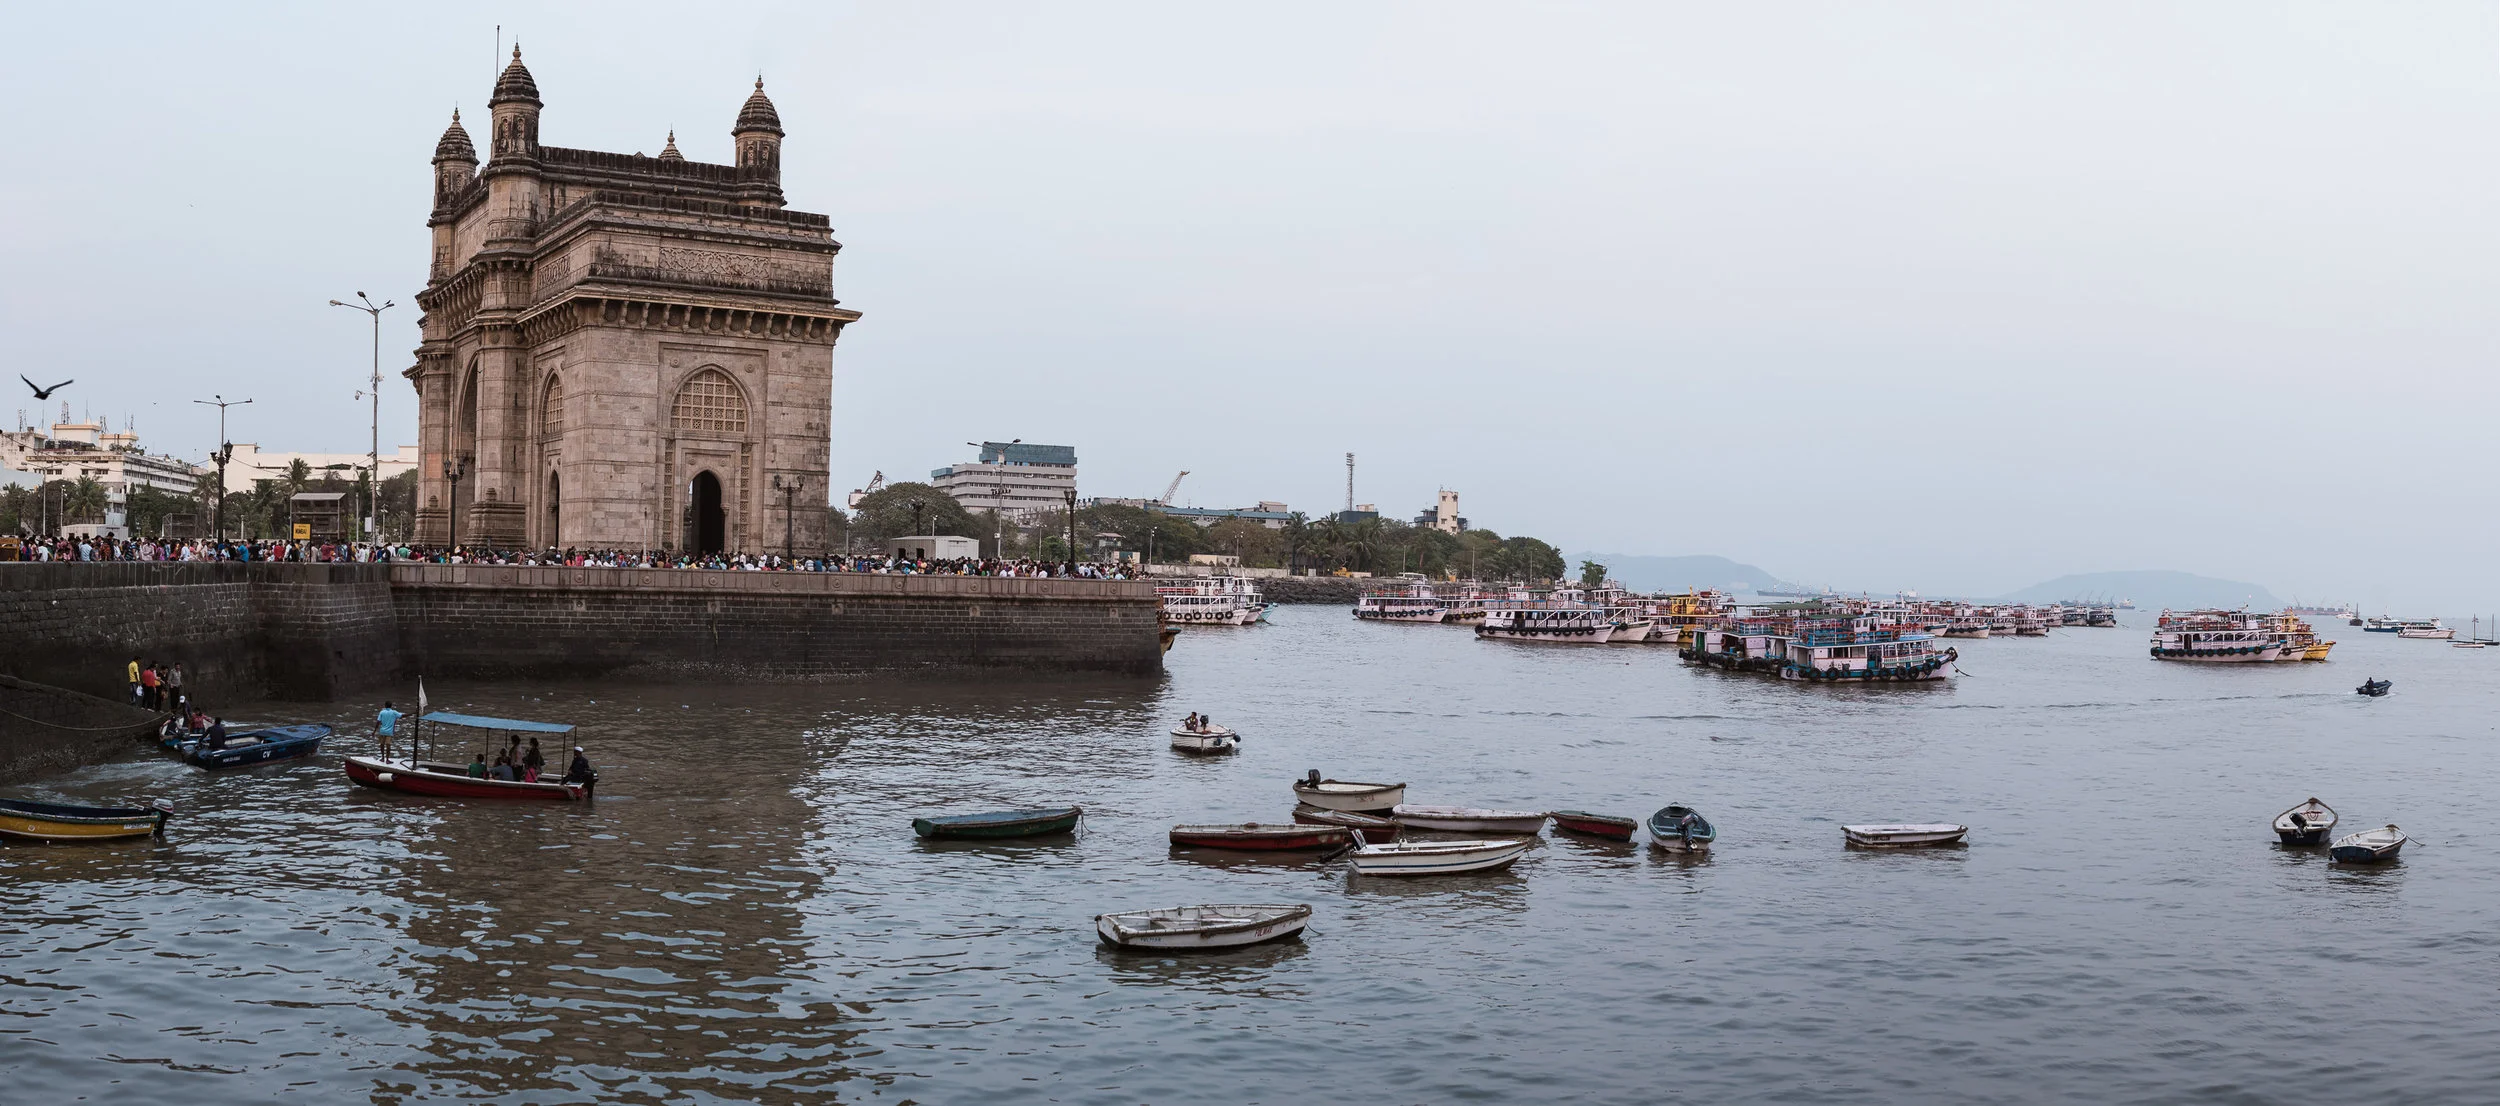
A panorama of the Gateway Of India
If you’d like an in-depth tutorial on how to create the perfect panorama, click on the video below.
Joseph Radhik | Photographing The Perfect Wedding | Why you need to attend PEPx Photocon Mumbai | What’s In My Camera Bag?
“At the end of the day, it’s about telling a story through the medium you have.”
At GMax Studios, we remain busy putting together photography and film-making tutorials for our loyal YouTube subscribers during the week. Our schedules allow us a little more than lunch now and then. But when a guy like Joseph Radhik stops by for a chat, we put stuff on hold indefinitely. Not because we’re suckers for star power, but because we never miss an opportunity to learn from the best.
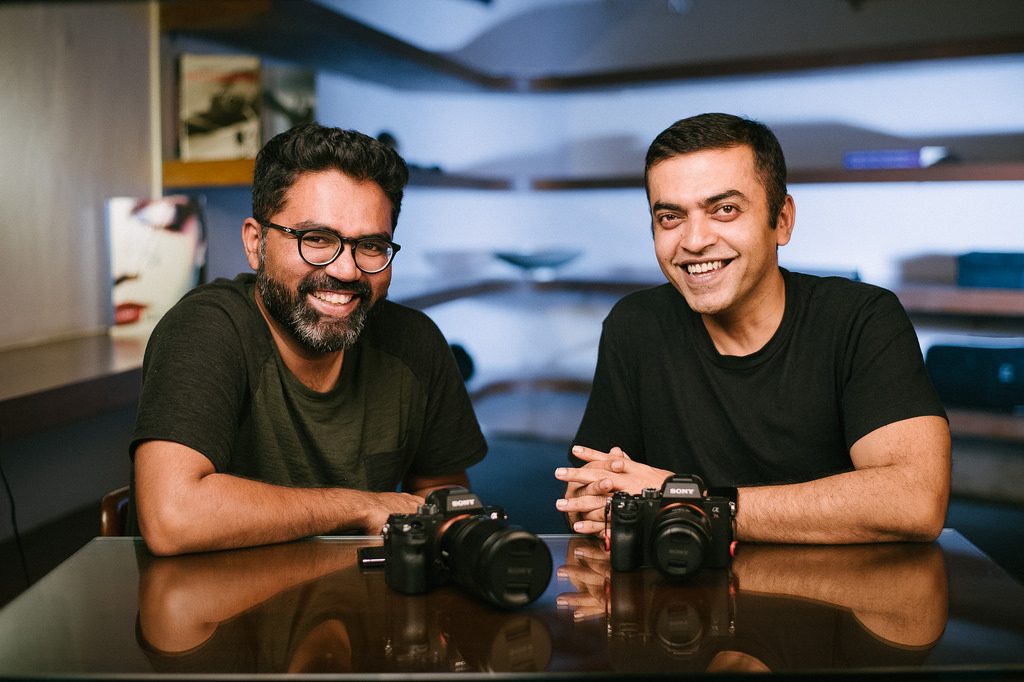
The boys and their toys: Joseph Radhik and Gorky M.
For those who don’t know Joseph Radhik: he owns and runs Stories By Joseph Radhik - an award winning team of photographers that create stories of love, laughter and happily ever after. In short, they’re super-cool wedding photographers who’ve been featured in celebrated magazines like Vogue, Grazia, Harper's, People Magazine and many more. That’s not exactly short; but in our defense, it’s not easy putting down his resume in a paragraph.
Oh, and did you know that he photographed, quite possibly, the wedding of the decade? That’s right. He photographed Virat Kohli and Anushka Sharma’s wedding.
That statement alone is enough to end any other workplace chit-chats you got going on. We met Joseph at a photography event last year, and a get-together at the studios was on the cards since then. When it finally happened, he spent an entire day talking to us about PEPx Photocon, what gets him going and what gear he uses when he’s out photographing.
Joseph’s mantra is simple. “Keep it simple, stupid.” While he certainly knows what he’s talking about, he doesn’t like getting too technical about camera settings and gear. “At the end of the day, it’s about telling a story through the medium you have.” We couldn’t agree more.
Joseph is also one of the most humble guys out there. “I’m never too busy to shoot group photographs at a wedding” he says. For a guy who is booked all year around, what Joseph carries in his camera bag will surprise you. Check out what's in Joseph Radhik's camera bag, in this video, where he talks to Gorky M.
Joseph also spoke in detail about a massive photography event he’s put together. It’s called PEPx Photocon(think TEDx for Photographers), a three day expo and photo fair that brings together great talent and brands together. PEPx is the first of its kind in India. It’s designed for the beginner, the enthusiast, the hobbyist, the not-professional, the student, and the lover of photography. The line-up itself will make you ditch whatever you’ve got going on and rush to Nehru Center, Mumbai.
You’ve got cultural documentary photographer Ira Block who’s produced over 30 stories for the National Geographic Magazine and led National Geographic Photo Workshops, Expeditions and private workshops across the world, Russian Portrait and Conceptual photographer, Natalia Arantseva, Dutch portrait/fashion photographer Brendan De Clercq to name a few.
There are also plenty of award-winning and deeply admired Indian photographers speaking at the event. You have the likes of Rafique Sayed, Dheeraj Paul, Diinesh Kumble, Umesh Gogna, Harsheen Jammu, Shiresh Karrale, Yuwraj Gurjar, Shiresh Karrale, Photriya Venky, Anup J Kat, Ankita Asthana, Sid Sharma and Auditya Venkatesh.
Sapan Verma is taking over mic duties with his stand-up act, and you have the man himself - Joseph Radhik.
It’s 1499 rupees for 3 days of some the most immersive and inspirational experiences you can have as a photographer. You can book tickets for it here.
Editor: Rishabh Udgata
How To Capture Milky Way In India | Astrophotography Basics For Beginners
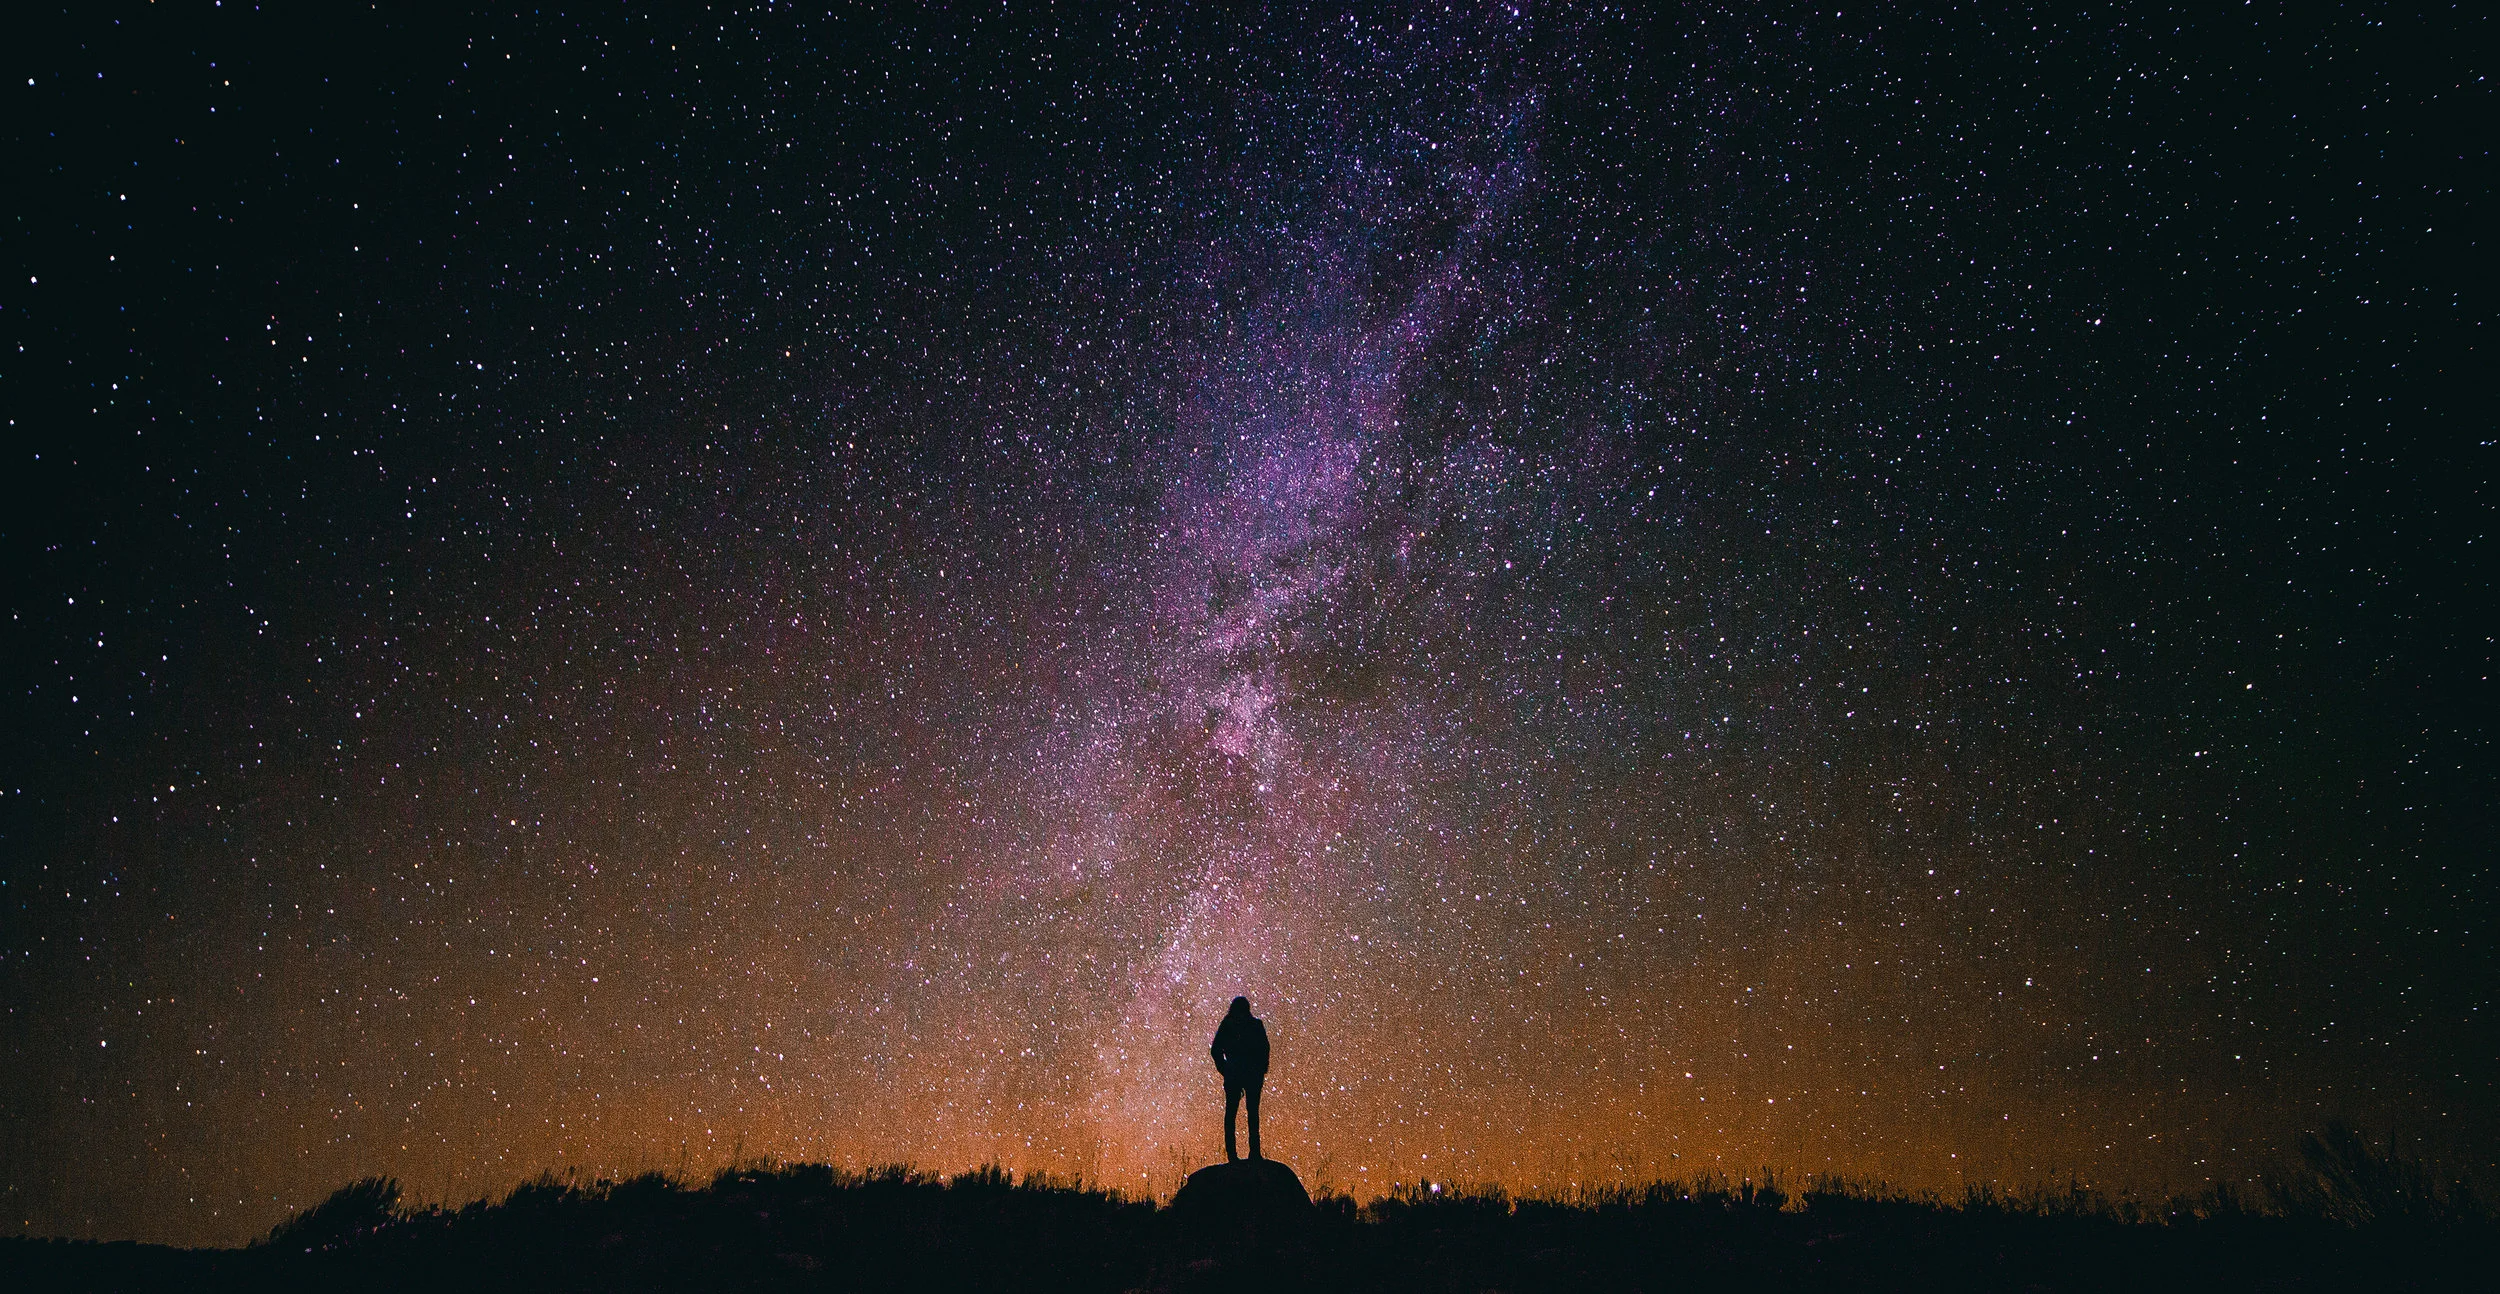
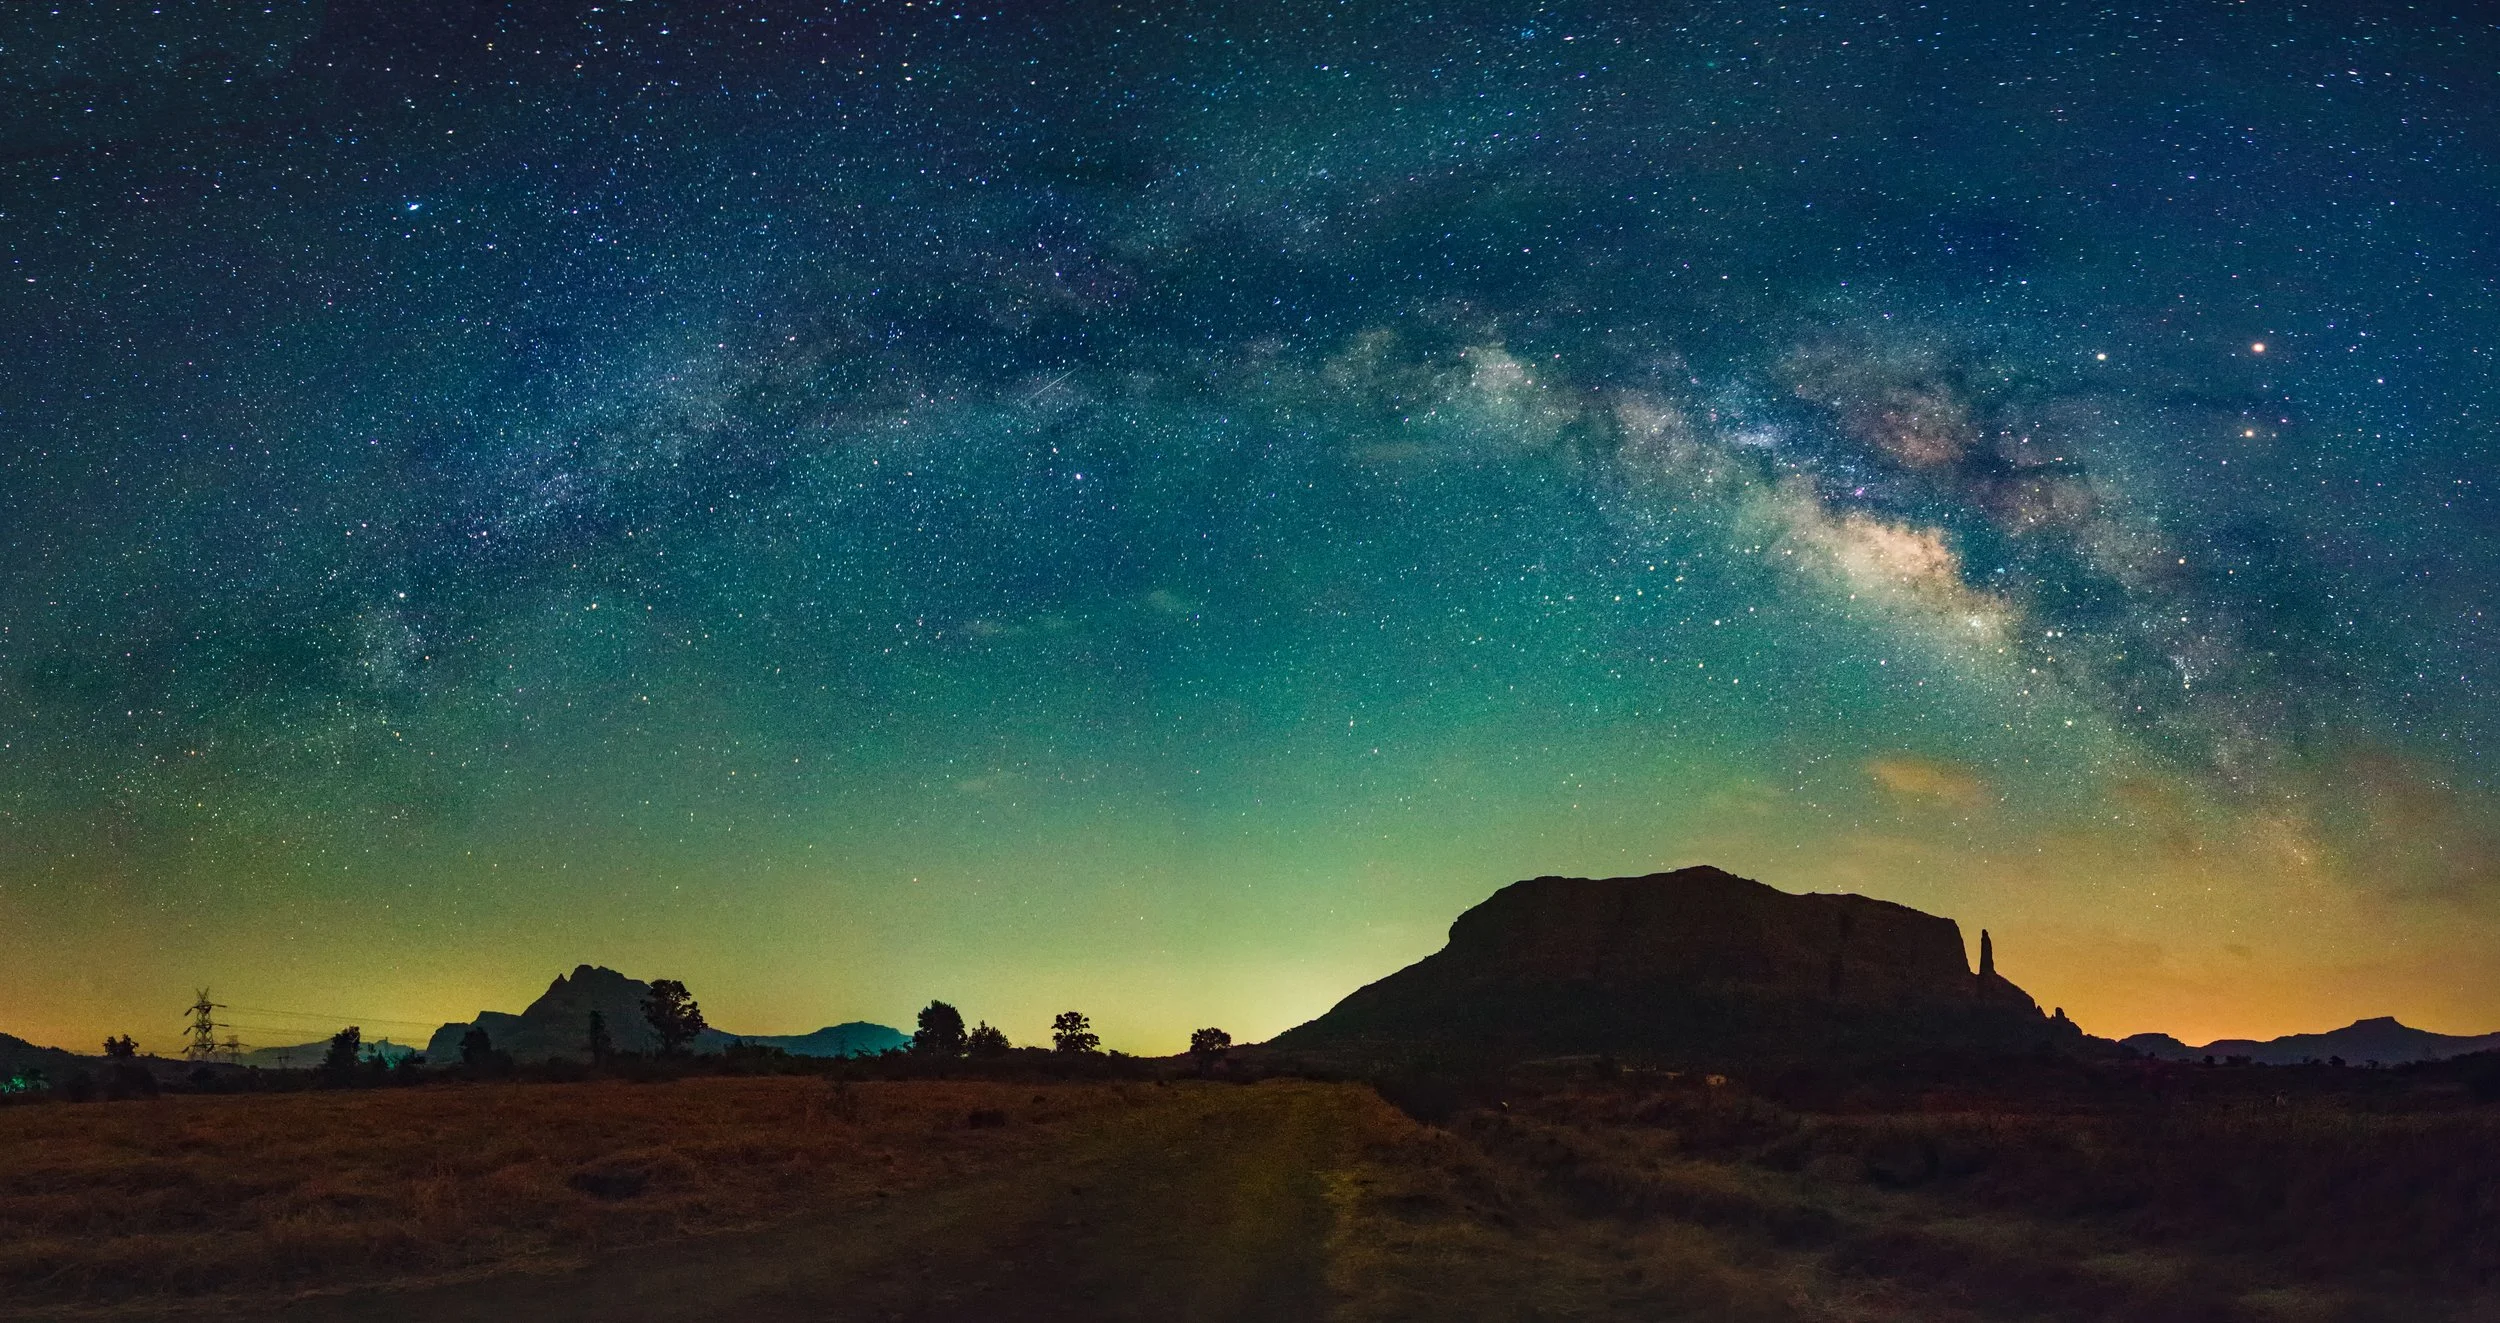
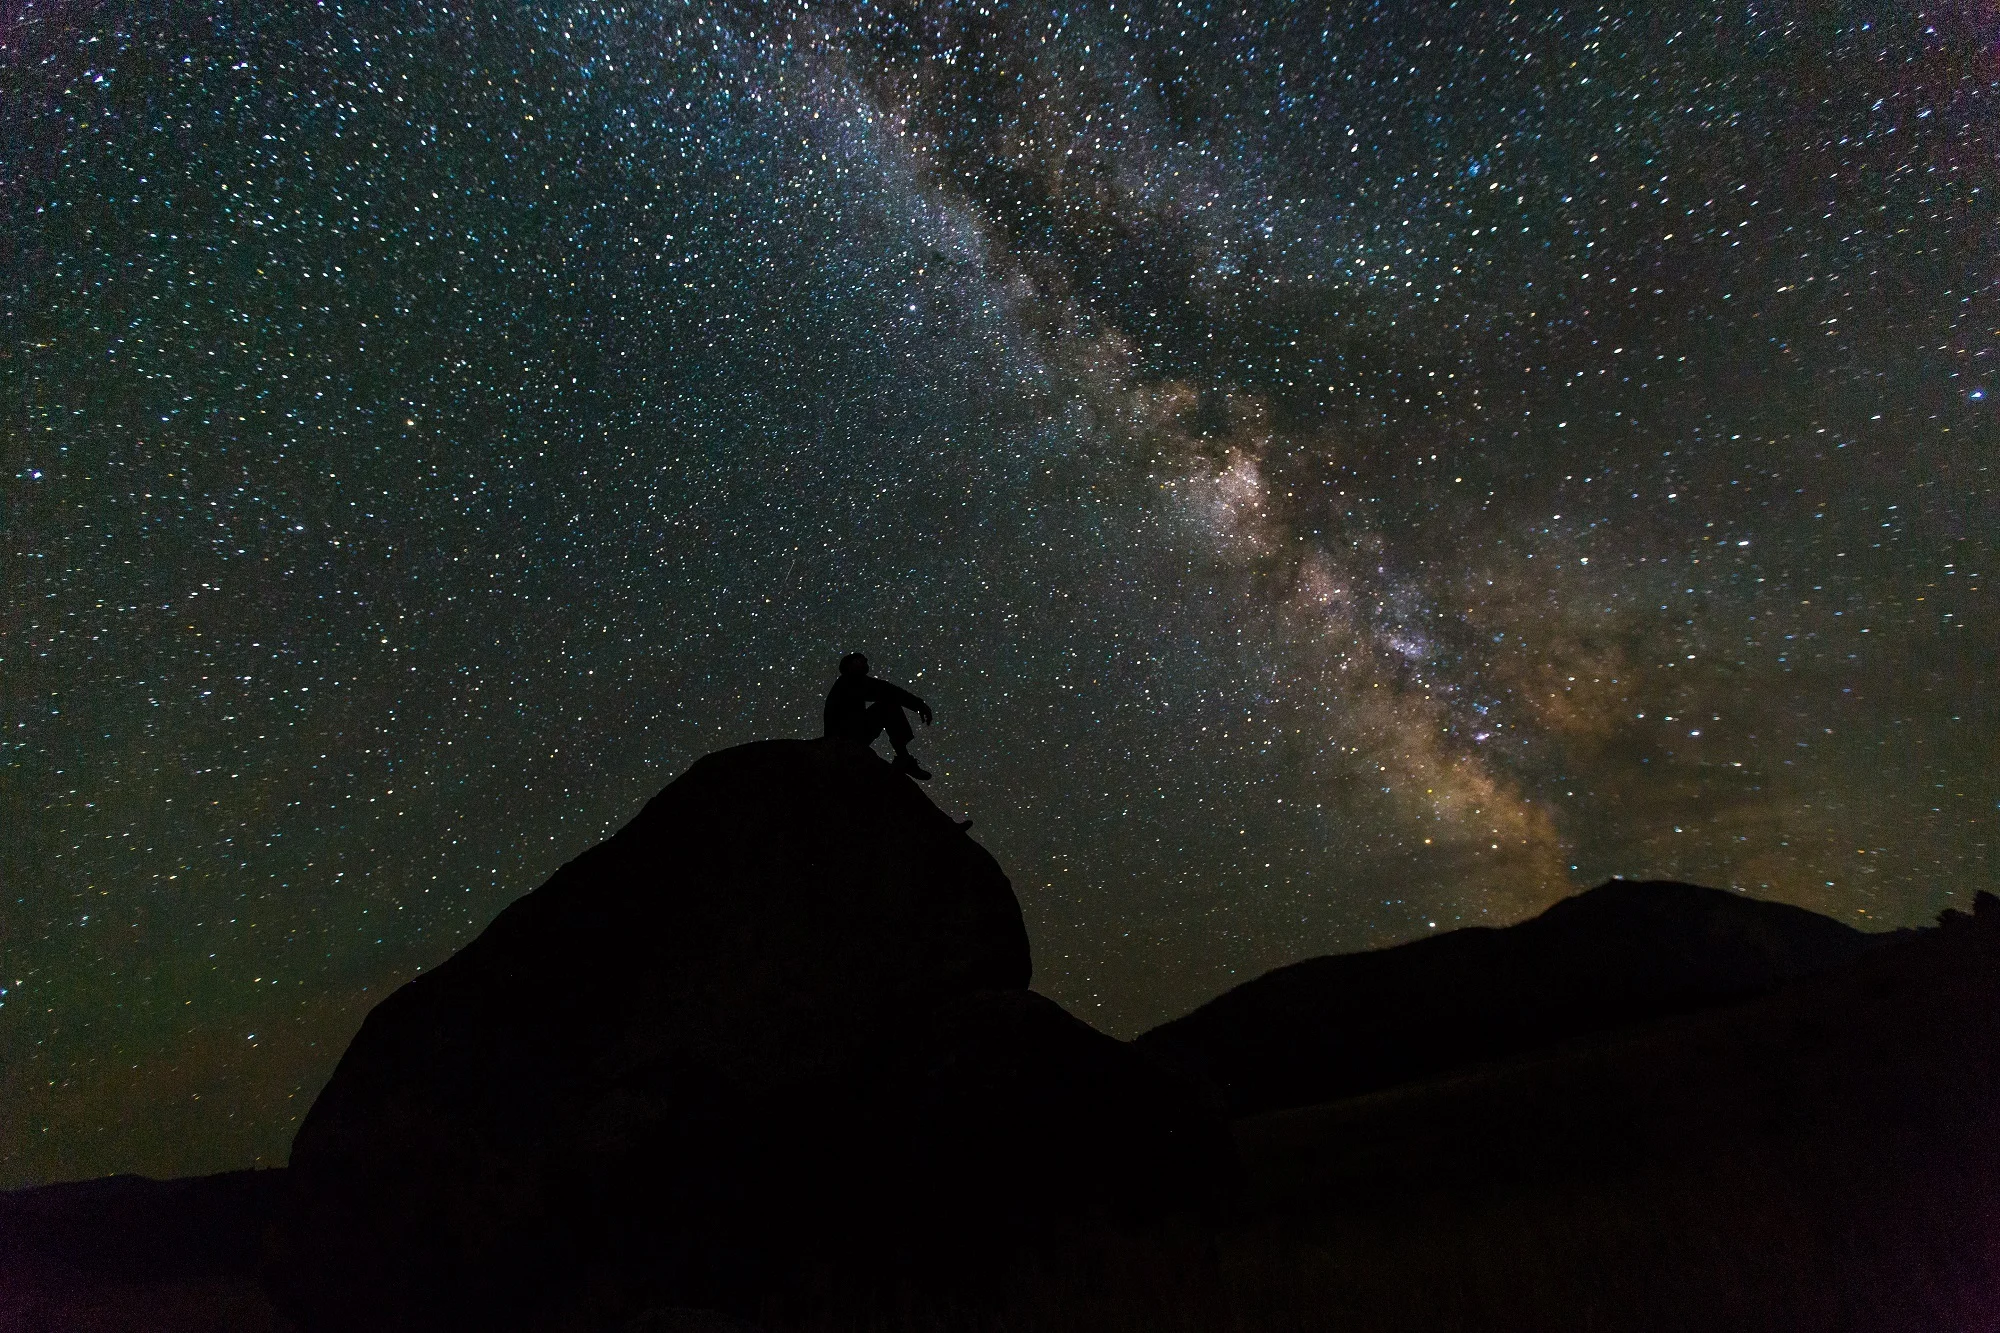
9 years back when I started with photography, photos of Milky way always fascinated me. A device (D-SLR) invented by humans which has the power to capture the great Milky way excited me even more. It always made me think that Milky way was not visible in India, but when I started studying about Milky way photography I got to know that our Earth is a part of Milky way Galaxy and it is visible from everywhere. It is true you cannot shoot milky way all year around, there are certain time slots when the “Core” of Milky-way is visible in certain parts of Earth. In Maharashtra, the best time to Shoot Milky way starts from March and ends after May as it get cloudy.
As I started to explore Milky way Photography I realized that shooting Milky way was not as easy as I thought. There is a strict workflow you need to follow if you want to capture Milky way. At start it was all Rocket science for me but as I started to explore I realized any one can capture Milky way if you follow the workflow. So I have tried my best to list down the workflow and techniques to capture Milky way in India.
Equipment
Camera
Milky way Photography is categorized under long exposure photography, which simply means, you need a camera which allows you to open the shutter for longer duration. Thus you need a camera which allows you to shoot in Manual Mode, giving you 100% control on your camera settings. We personally prefer using 25 to 30 seconds shutter speed to get good details of Milky way.
Lens
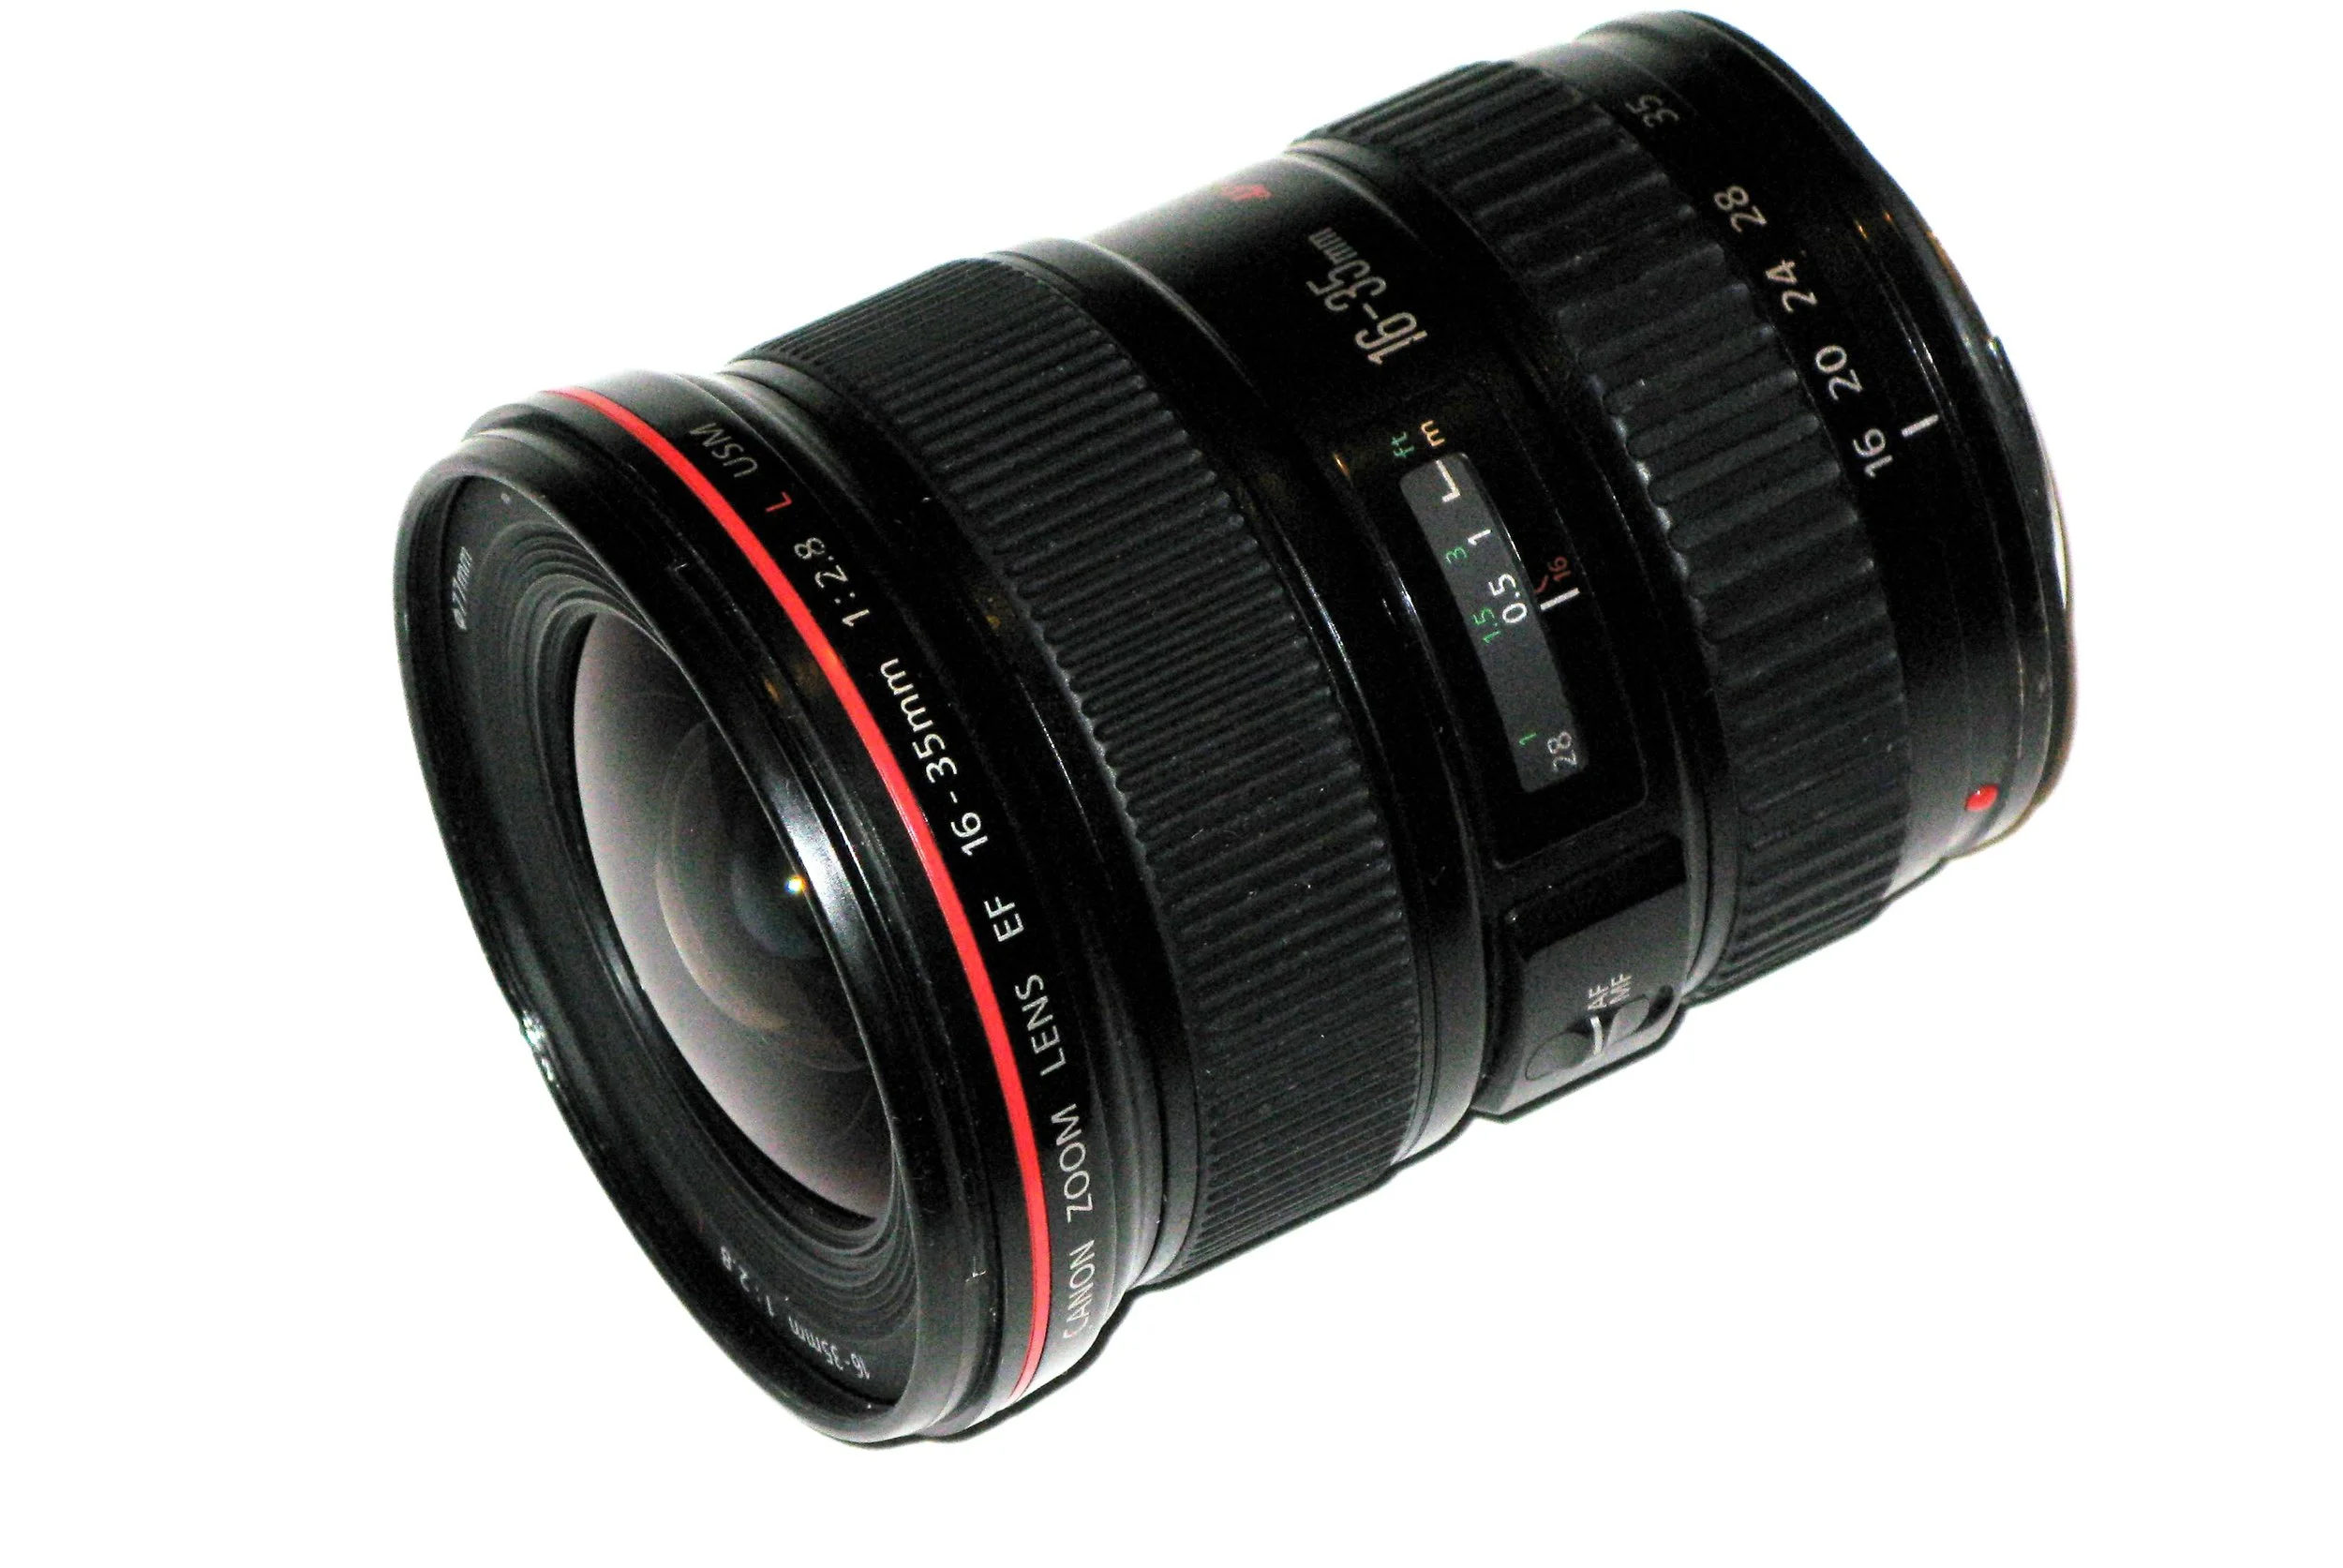
A fast super wide angle lens (f/2.8 or lesser) with infinity focus is a great equipment to capture the fine details of Milky way. If you are not able to find a fast lens with infinity focus you can always shoot with your kit lens at f/3.5. You simply have to auto focus on a far distance light source and then convert it into Manual Focus. If you keep your lens on Auto Focus mode it won’t be able to focus, thus always keep it on Manual mode. Always zoom in the photos and check whether the stars are in sharp focus or not.
Tripod
Any good sturdy tripod is suitable for Milk way Photography. As the shutter is going to be open for more than 20 seconds we have to make sure there is no camera shake.
Shutter Release Remote/Cable
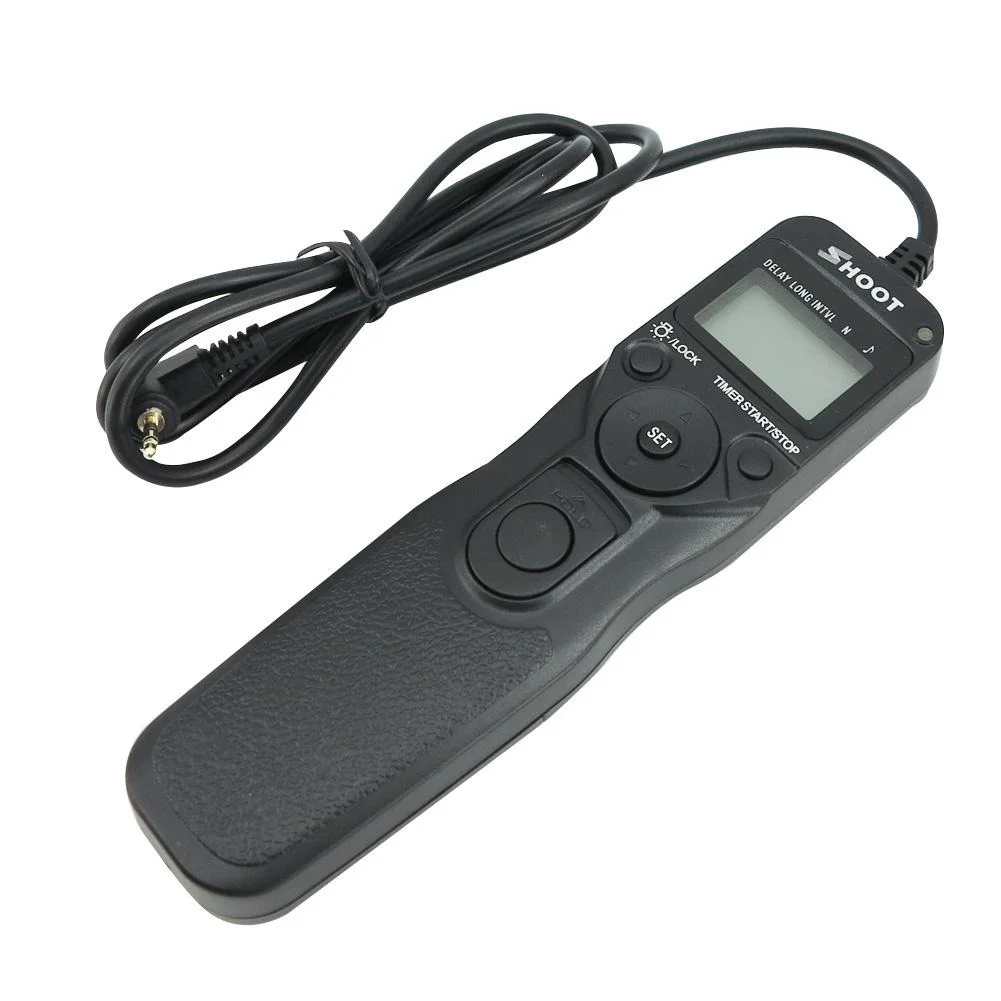
Wired or wireless shutter release cable is used by many Night Sky photographers as it helps to reduce the camera shake when you press the shutter button.
If you don’t have shutter release cable you can switch your camera to self timer mode and press the button which will help to avoid the unwanted shake. There are two types of gear available in market one is called Intervalometer and another is shutter release cable which is cheaper compared to intervalometer.
Weather
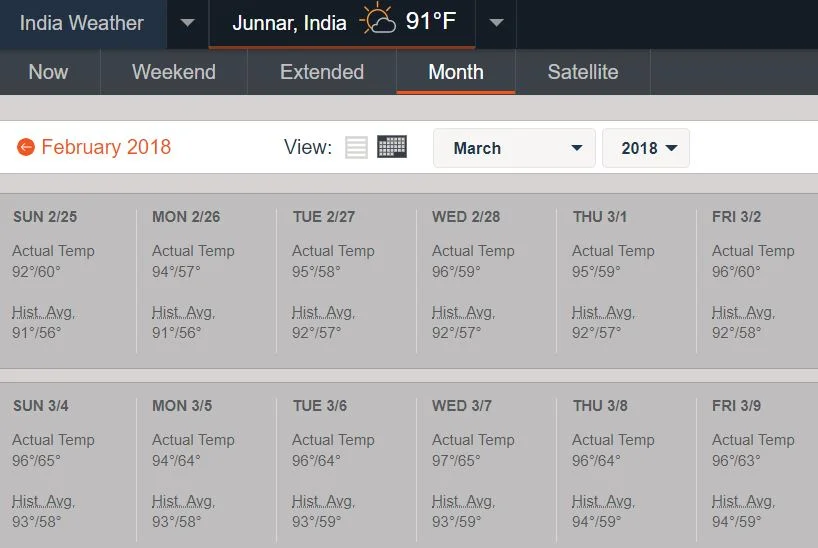
Always look for clear sky. In cloudy conditions, the Milkyway will get covered by the clouds. We use http://www.accuweather.com/en/in/india-weather to check the weather conditions and confirm the date accordingly.
Location
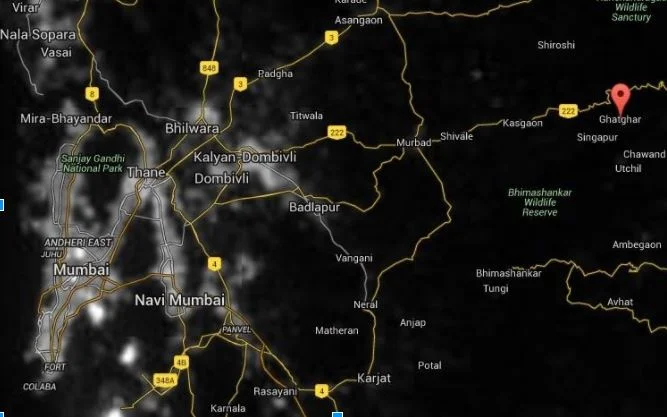
When it comes to Milkyway Photography a Dark Sky is the most suitable place. Dark sky is a place which is away from Light Pollution. Lesser the light pollution clearer the sky looks. We shoot a lot in Naneghat which is close to Ghatgar. You can go on this website http://www.blue-marble.de/ and type your location, if your location is not on the website type the closest known location and you will be able to see the dark sky in the map. The Map is divided into two different color patches, i.e. grey and black patch. The grey patches represent the light polluted areas which you have to avoid and dark patches represent the Dark Sky. With the help of this map you can find your own Dark Sky.
Software
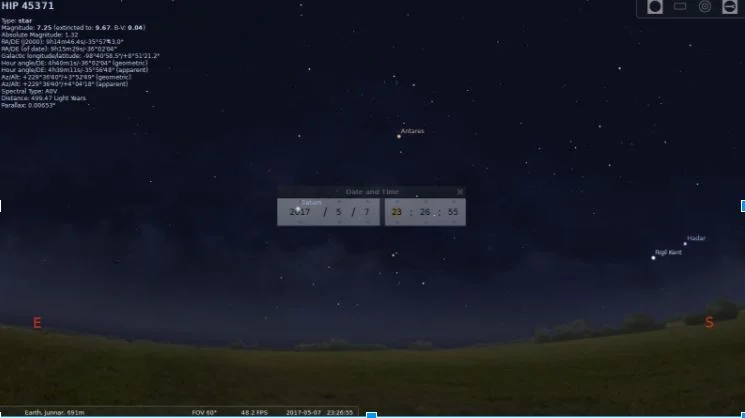
With the advancement in technology you have many different apps and software to locate the position of Milky way. We personally use ‘Stellarium’ as it is very precise and free. You can download this software for free from http://www.stellarium.org/. The moment you type your location the software will align according to your location. You can change the Date and Time and see the position of Milky way on that given Date and Time. It usually rises between South and East from Naneghat.
Camera Exposure
Aperture
f/2.8 with infinity focus gives best result. Bigger the aperture opening more light will enter. Thus always keep the widest lens opening available on your lens. If you are using your kit lens use f/3.5.
VISIT THE GMAX STUDIOS STORE ON AMAZON
ISO
As we will be shooting under Dark Sky we have to boost our ISO to minimum 1250 or 1600 depending upon the sensitivity of your D-SLR sensor. The Maximum ISO we used till now is 6400 on Nikon D7000 with Tokina 11-16mm shot at f/2.8.
Shutter Speed
There is a calculation rule called ‘500 Rule’ which means you have to divide 500 by the focal length of your lens and you get the required shutter speed. This Rule is followed to avoid Startrails in your Milkyway Photos. We personally prefer the trial and error method to get the best result for our photos. We use a shutter speed of 25 or 30 seconds for our photos.
White Balance
We always shoot in Auto Mode and then finalize the colors in Post processing.
Depending upon the feedback we will be working on a video on How to capture Milky way in India. Please write us back if you guys want a video on how to capture Milkyway in India. If you have any doubts please feel free to mail or leave a message. Please register yourself on our website for updates on our Milky way Photography Workshop.
Mathura widows play with colour after 400 years | Photographing Holi Celebrations In Vrindavan
It’s been two years since we visited Vrindavan to photograph the illustrious Holi celebrations. Here is a look back at that colourful photography expedition.
It’s been two years since we visited Vrindavan to photograph the illustrious Holi celebrations. While the trip was special to begin with, the famous widows of Vrindavan played Holi with color for the first time in 400 years - making the occasion extraordinary. It would've been ideal if we published this article in 2016 itself, but photographs are even better to look at when there’s a little history attached to them.
That being said, none of these photographs were easy to take. It was the first time our camera and gear was exposed to water. We’ve since done a live session and a video tutorial on how to protect your gear from water, but nothing could have prepared us for this. Once we made it to the dharamshala that we would be staying at(more like leaving our luggage there because we’d be shooting continuously), we headed to Gopinath Temple.
There are streets in India that even google maps can't figure out, and a lot of the shortcuts and alleys in Vrindavan are like that. The people in Vrindavan were extremely kind and courteous, and pointed us in the direction we needed to go. At times they would even get on to the rickshaw and tell the driver exactly where to turn! Once we were on the right path, they would get down and start walking back. Something like this is unheard of in Mumbai. To the people of Mathura, it’s just life.
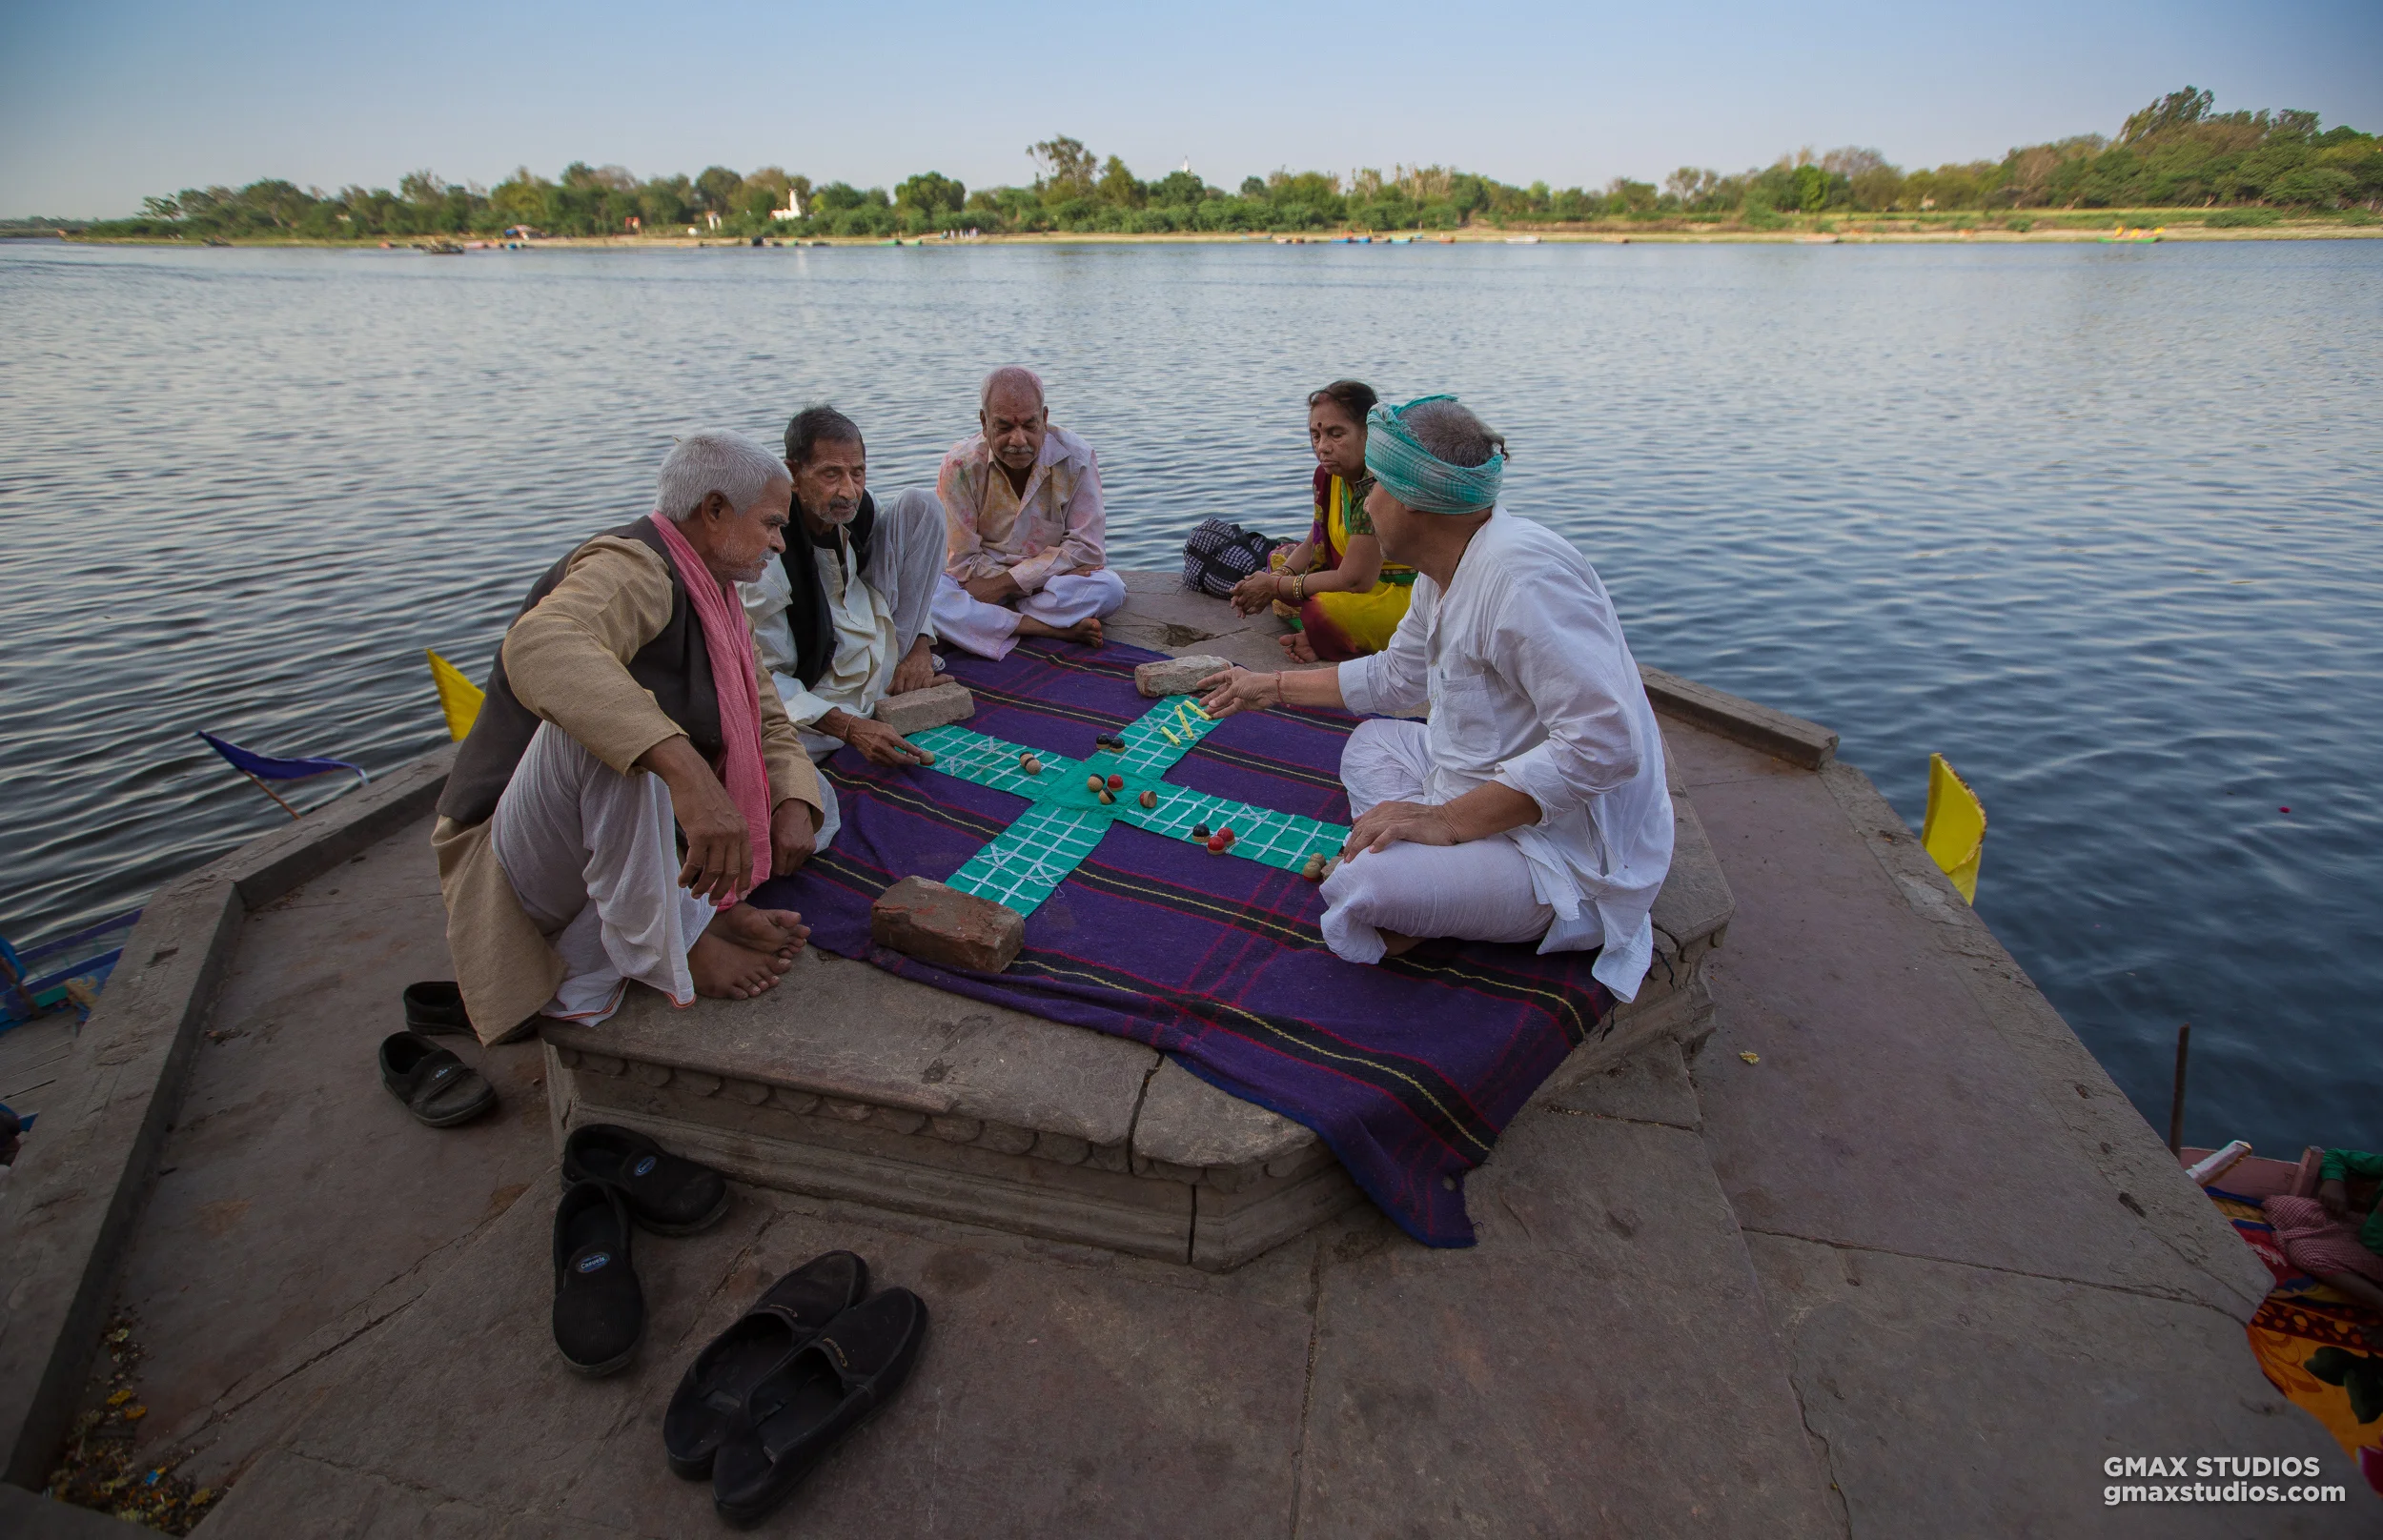
Chill unparalleled: Folks kickback and play a game of chausar.
On the way to Gopinath Temple, we witnessed absolute chaos. People were celebrating without a care in the world, sparing none and soaking just about anybody who happened to cross paths with them. We had a faint idea that something like this could happen, and so we wrapped our lenses in cling foil and also practiced changing lenses with the cling foil a few days in advance. This helped keep the water, color and dust out, and allowed us to get some decent photos of people celebrating in the streets.
Holi celebrations were in full flow in Nandgaon.
The scene at Gopinath Temple was nothing short of a riot. In the corridor, hymns and songs of celebration were being sung to the rhythm of mrdangas and kartals. The white saris of the widows were laden with color. Local priests and scholars, who in the past had kept up the practice of not interacting with the widows joined in on the fun. There was so much going on that the photographic possibilities were endless and making decisions was difficult.
It was like a scene from a film. The clothing, their refined choreography and their unique personalities was something we’d never come across. It seemed like a place free from the hassles of daily lives, where things like fear and anxiety don’t exist. That day, we learned a new way to live life. And that the widows have an endless supply of energy! The celebrations carried on from 10 in the morning to 3 in the afternoon.
“We’re happy that we can finally play Holi like everybody else, but even if it didn’t happen, we are still deeply moved by Krishna in our hearts” said an old widow to us, when we asked her if she’s excited about celebrating Holi with color.
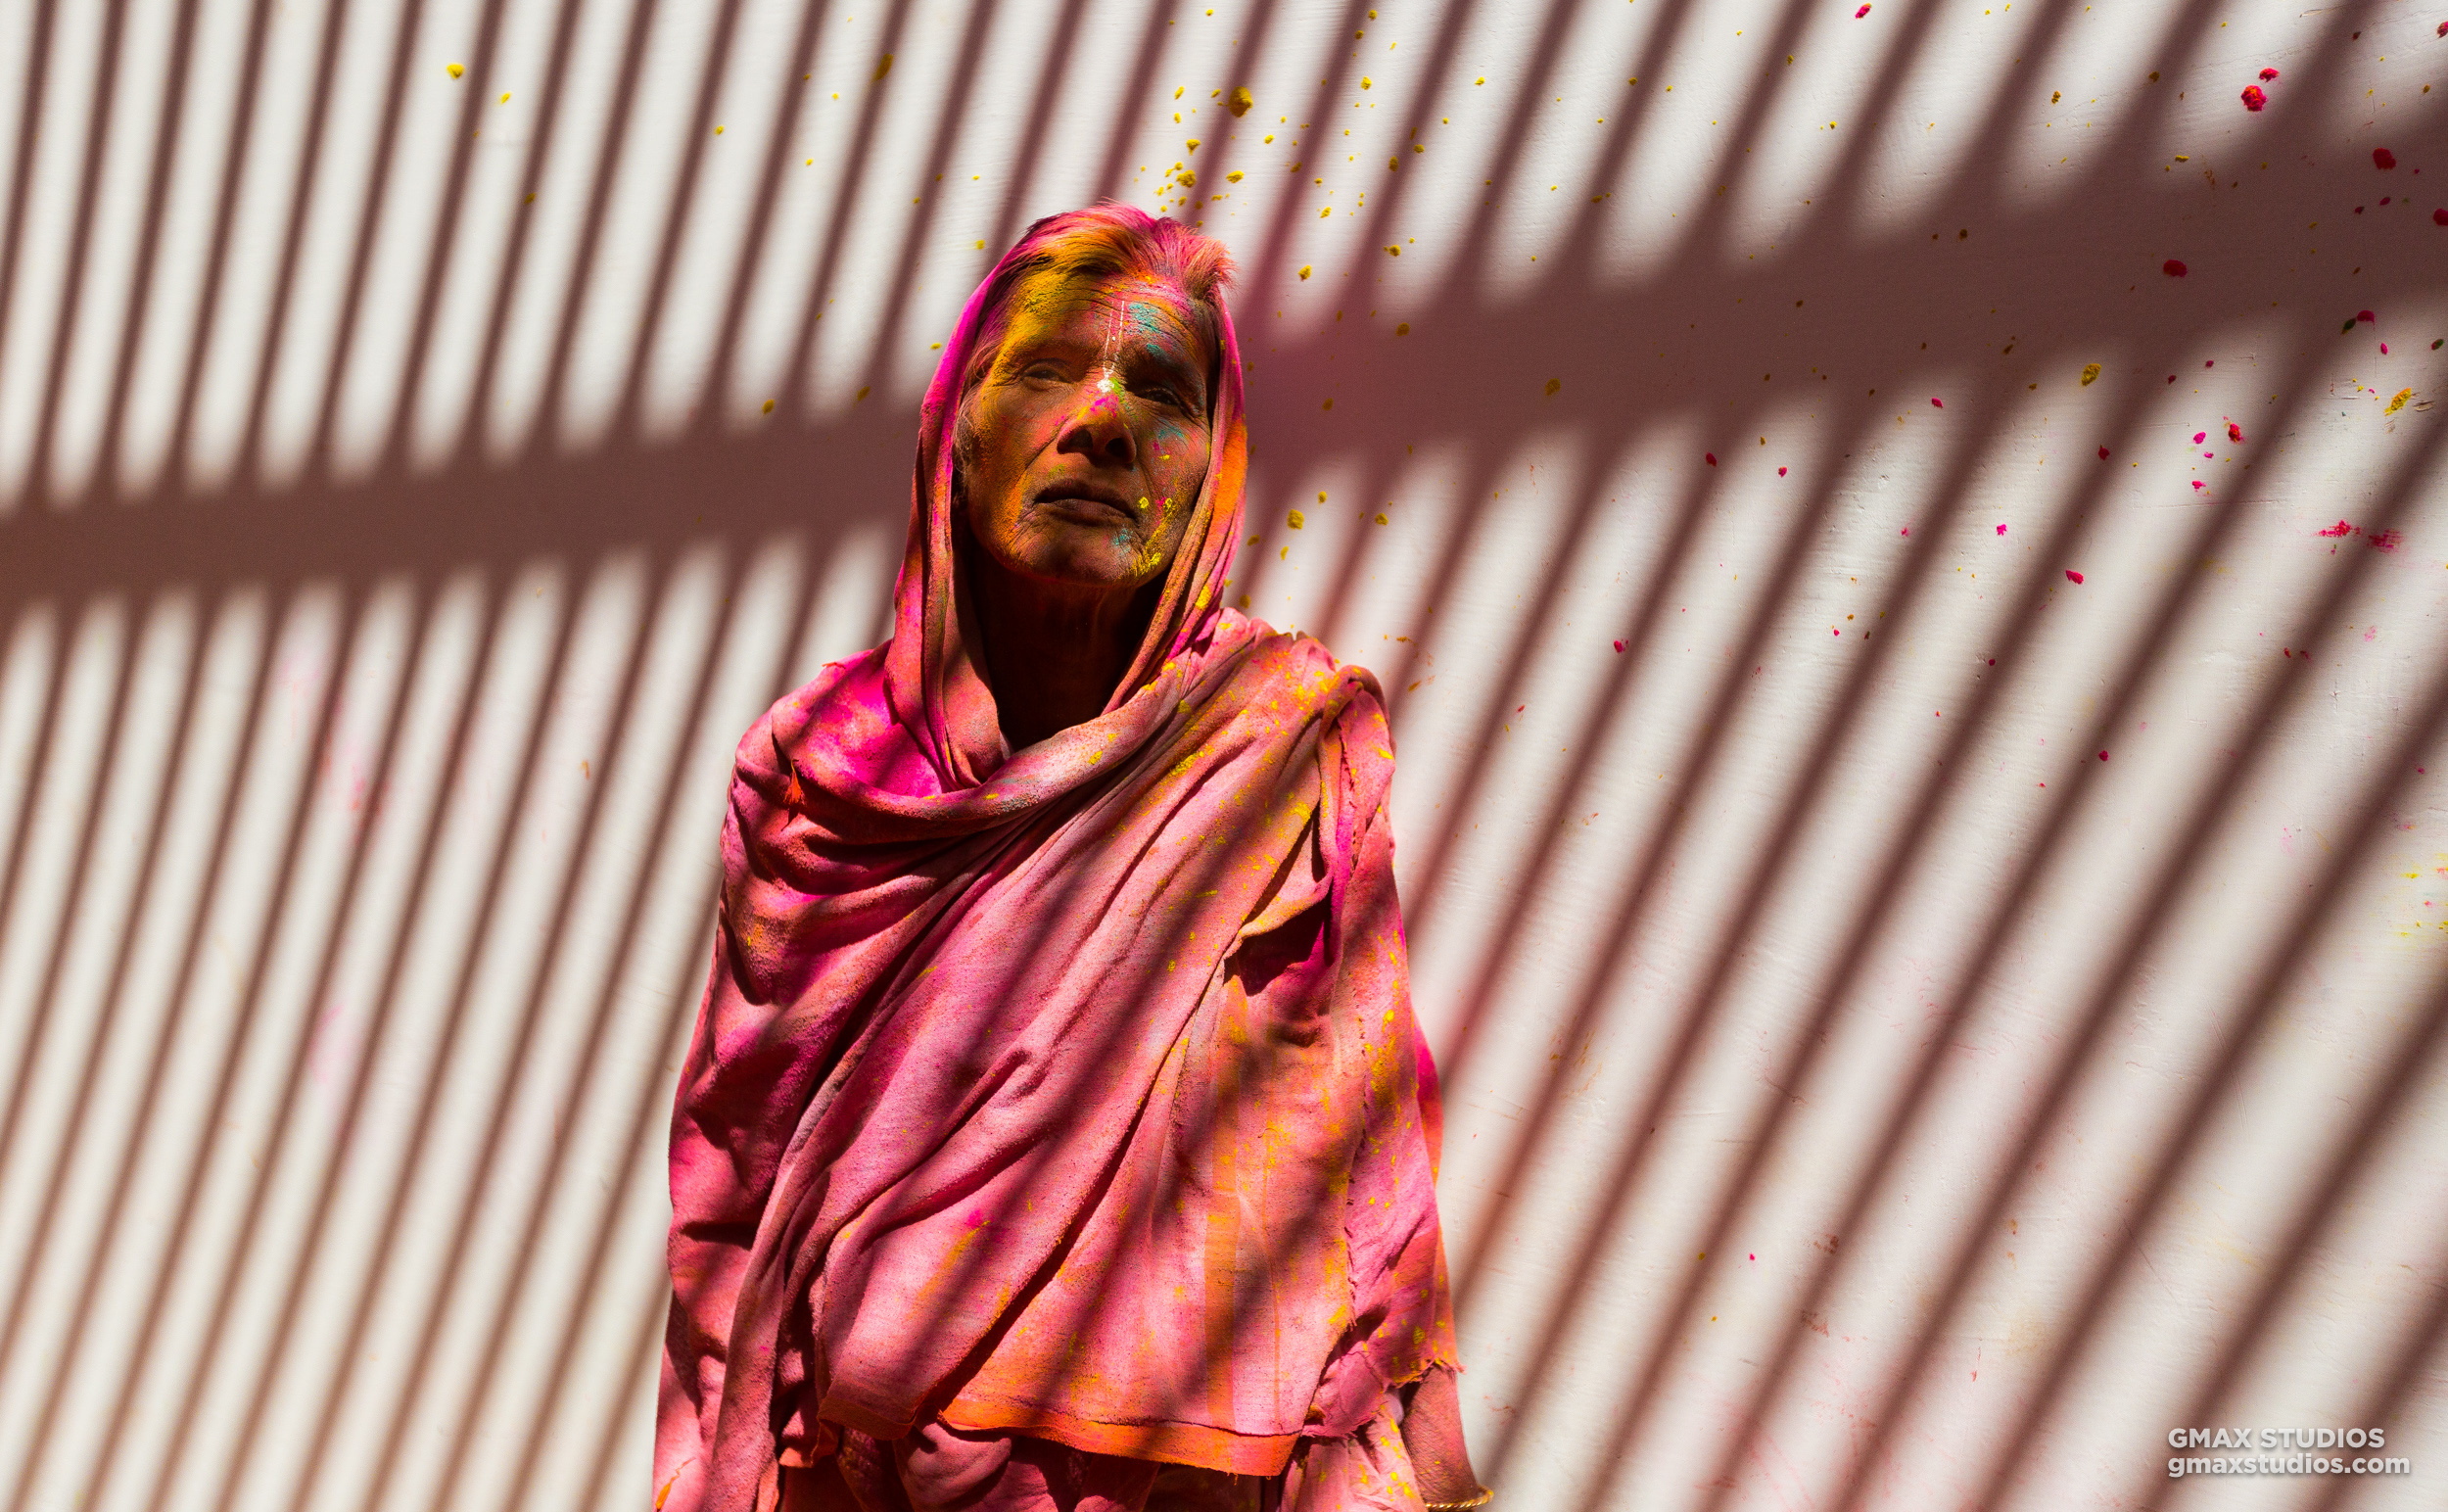
The widows don’t partake in the consumption of bhang or any other intoxicants. But clearly, the lady in the picture was having the time of her life.
As a photographer, if you’re determined enough, the opportunities present themselves. The tarpaulin roof in the temple corridor had a hole in it, and a trail of light shone through - making the moment even more magical.
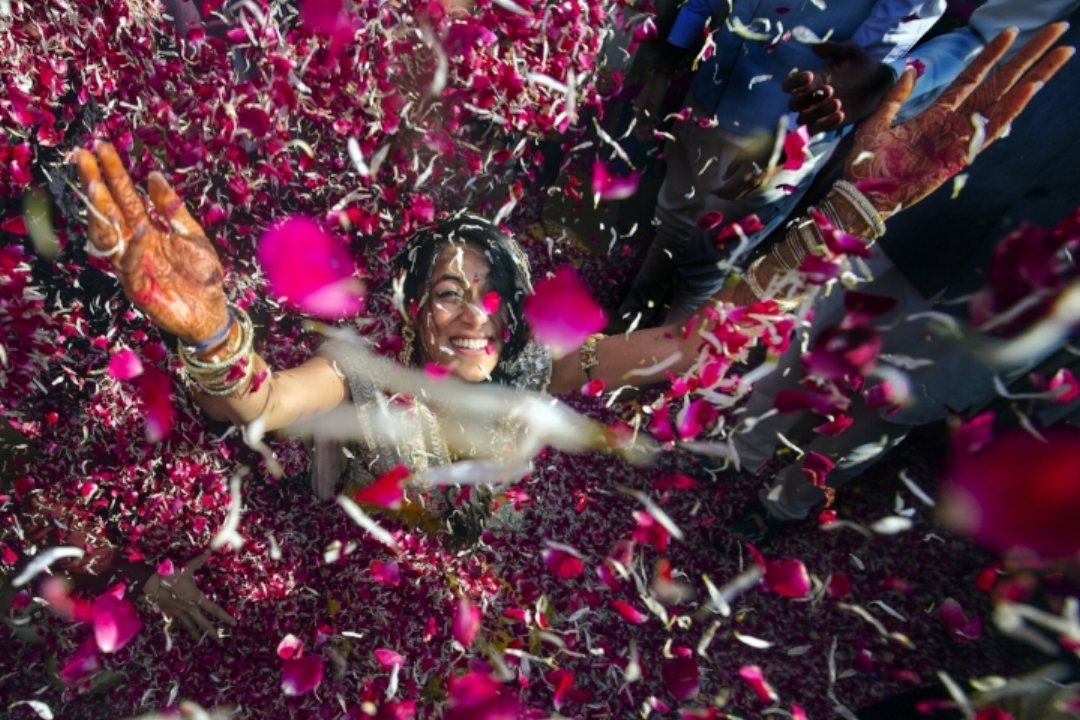
We had gone up an empty staircase to change lenses when we saw the lady in the picture surrounded by flower petals. Moments later, another widow came by and unloaded a bucket of green color on her.
Devotion that's heard of in folktales and myths was prominent in Vrindavan: a widow breaks down in servitude to Krishna
We asked the lady in the photograph if she would let us take a picture of her. She didn’t respond with a yes or no but simply stood still. The photograph is an indicator of the love Vrindavan widows have for humanity and what humanity has put them through.The striped pattern on the wall resembles a prison both literal and psychological, that the widows have inhabited for centuries.
After a few refreshments and a sip or two of Holi’s most cherished drink - bhang, we headed to Banke Bihari Ji Temple.
The temple houses Lord Krishna’s supreme avatar. Every year millions flock to see Krishna in His tri-bent, playful pose during Holi. He’s hidden behind a screen that is lifted only for five seconds during the festival.
One needs to have steely determination to photograph in a crowd like this because there wasn’t any room to even stand. The longest time we spent in one position was 3 seconds. And then the crowd would blow us away with the combined weight of at least fifty elephants.
There was another big task to overcome. The task of not getting other photographers in the frame because there were tons of photographers from various publications and agencies documenting the event.
But the most challenging shot was photographing the Holika Dehan.
The event would take place at 5 am in Phalen, approximately 50 kilometers away from Vrindavan, so we needed to head to the location early to prepare. We arrived at 4 the previous evening.
The Holi that burns in the city is a decent sized flame, but pales in comparison to what goes on in Vrindavan. It’s much longer, and consists of fast-burning bushes and twigs. Also, temperatures soar in comparison to the spontaneous assortment of logs that one can find in the city.
What piqued our interest even more is the fact that a priest by the name of Babulal runs barefoot across the entire length of the fire. The practice has been passed down generations in his family.
But one does not simply take a picture of a fire.
We grabbed a 70-200 zoom lens and sat atop a two floor building across from where action would take place. We carried refreshments, and began considering all possible angles to take the photograph from where we were standing. After that, it was a game of patience. One of us managed to speak to the priest beforehand, who told us about the entire process. He would wait for his sister to pour some water over the fire to appease the gods, and once she had done that, he’d come sprinting towards the fire.
It felt like we had prepared enough and would get the photograph easily. But we were pretty, pretty wrong.
It was around one in the morning when the people started gathering around the pit. Some people had begun to climb up the building we were on. Their arrival wasn’t favourable by any means. As the night grew, they started to lose patience, because they wanted to get as close as possible on the ledge where we were seated to view the action more clearly. So the rest of our time was spent waiting for the priest's run to start and hanging on for dear life.
The crowd was going so berserk that police officials had to use lathis to keep the public at bay.
At 5 am sharp, the priest’s sister poured the water over the fire. Without a second's delay, the priest came running in. There was barely any time to frame the shot. We followed him to the end of the flame and pressed the shutter button.
Mind over matter: year after year, the priest keeps this extremely dangerous ritual alive
We boarded a cab at dawn, contended with ourselves and the things we had photographed. The experience in Vrindavan brought us closer to photography, and people in general. It all came with us - the kindness we’d received, the people we’d met - and the faces that we’d seen. As Holi nears, we can't help but get nostalgic over the experience we had in Vrindavan. It was certainly difficult to say goodbye to.
Editor - Rishabh Udgata


