What is ISO in photography?

GMax_Studios-0173.jpg

What is ISO in photography? In times when people used film cameras to take photographs, ISO sensitivity expressed the speed of photographic negative materials and it used to be expressed as ASA. But now, since digital cameras do not use film but use image sensors instead, the ISO equivalent is usually used.

What ISO denotes is how sensitive the image sensor is to the amount of light present. The higher the ISO, the more sensitive the image sensor is to the available light. So if you are shooting in low light conditions, you need to increase the ISO. Most cameras have 100 ISO as their lowest setting.

When people used film, they usually had to change the roll of film to change their ISO. It was not uncommon for people to carry two different cameras with two different rolls of film - each with a different ISO in order to shoot under different situations. The lower ISO 100 film would be used for shooting in daylight and the higher ISO, 400 and above would be used to capture night scenes.

Now you just need to change your  ISO within your camera from a lower to higher setting to be able to take night shots.

Caution

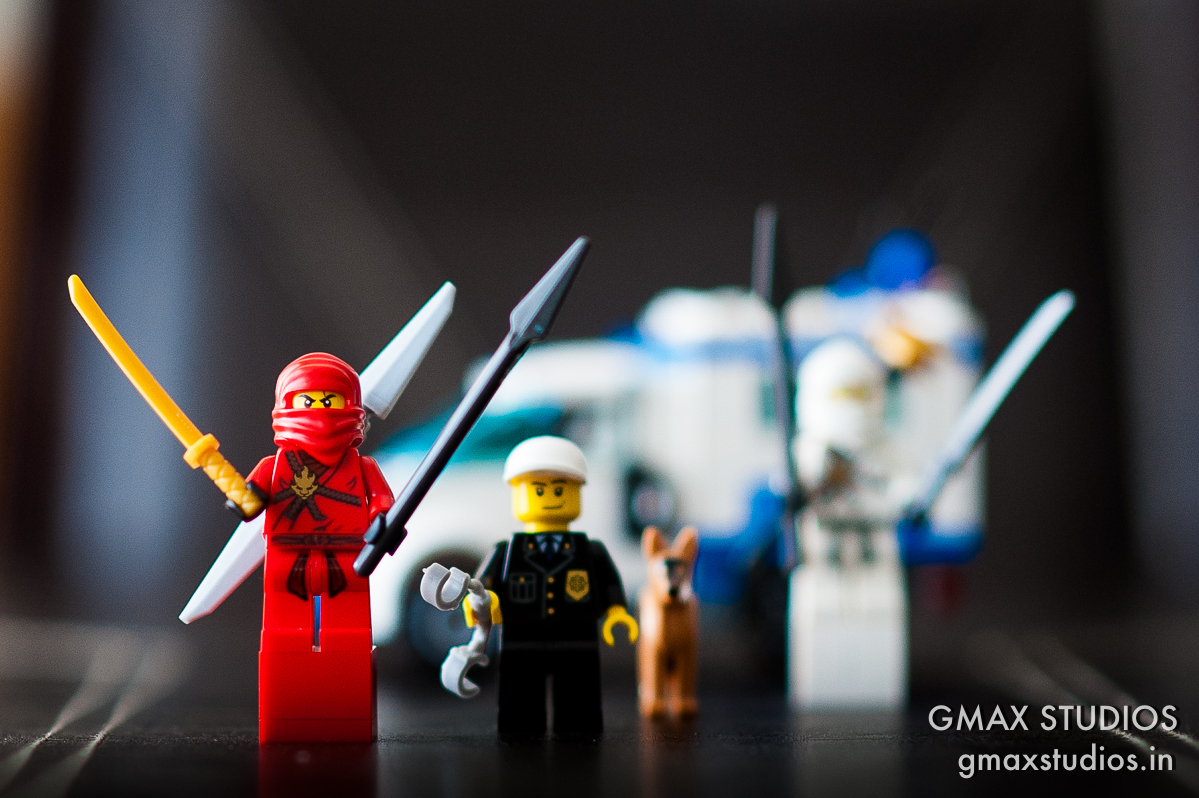
Having this great feature in your camera can be quite powerful but be careful, shooting at high ISO can cause noise to appear in your photographs. This can be seen in the photographs below.
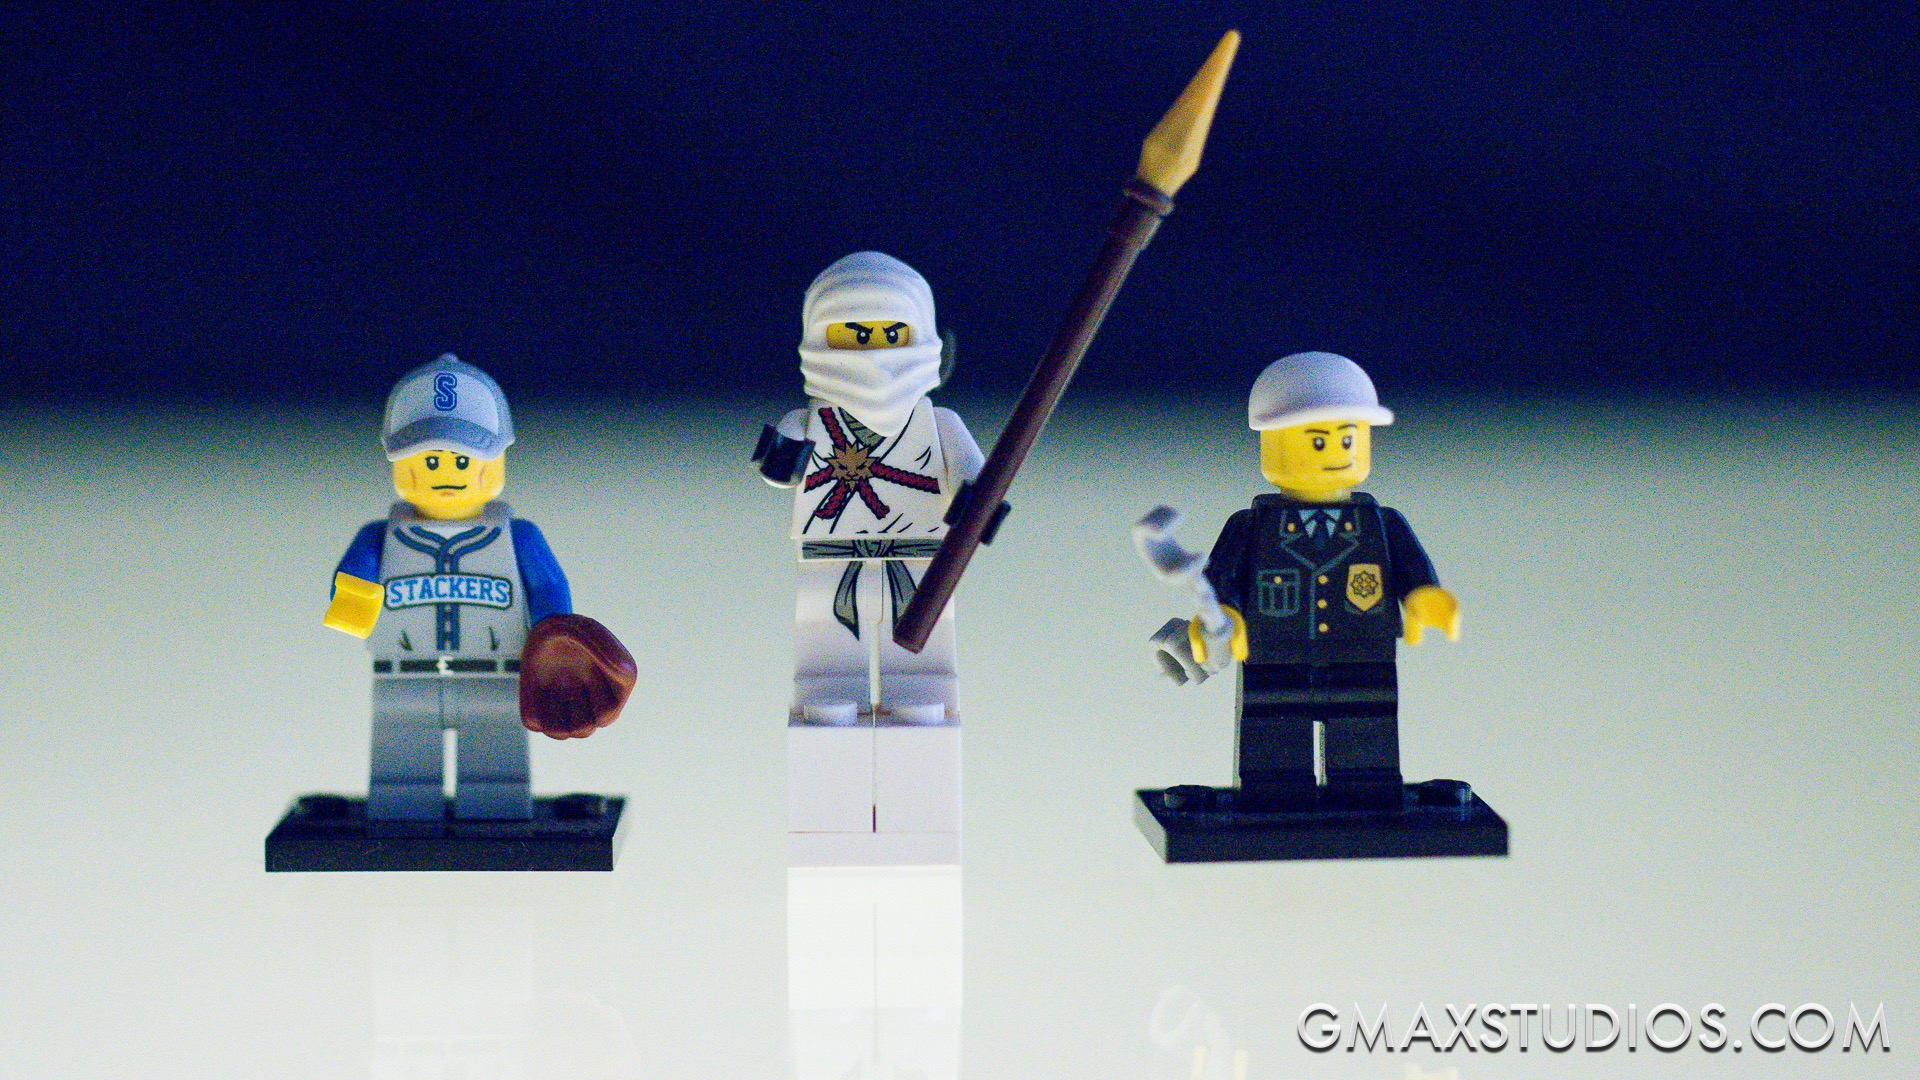
GMax_Studios-0173.jpg

ISO in photography

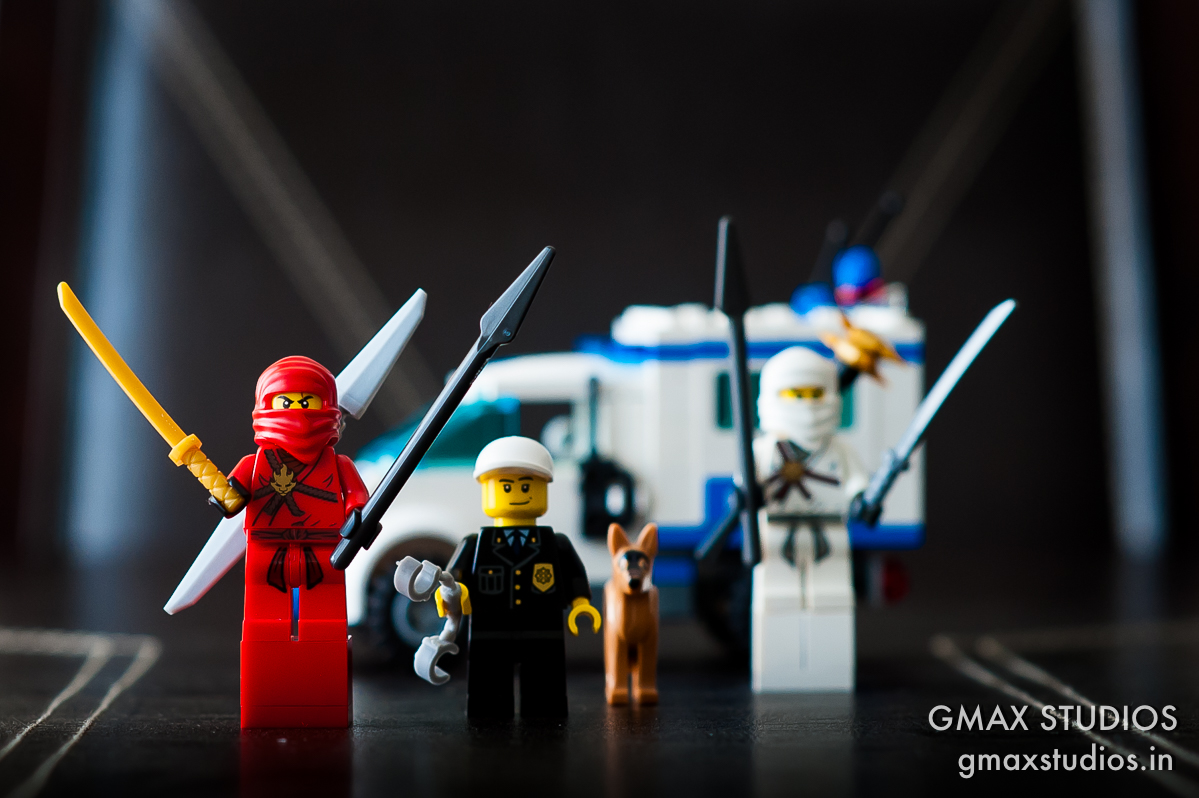
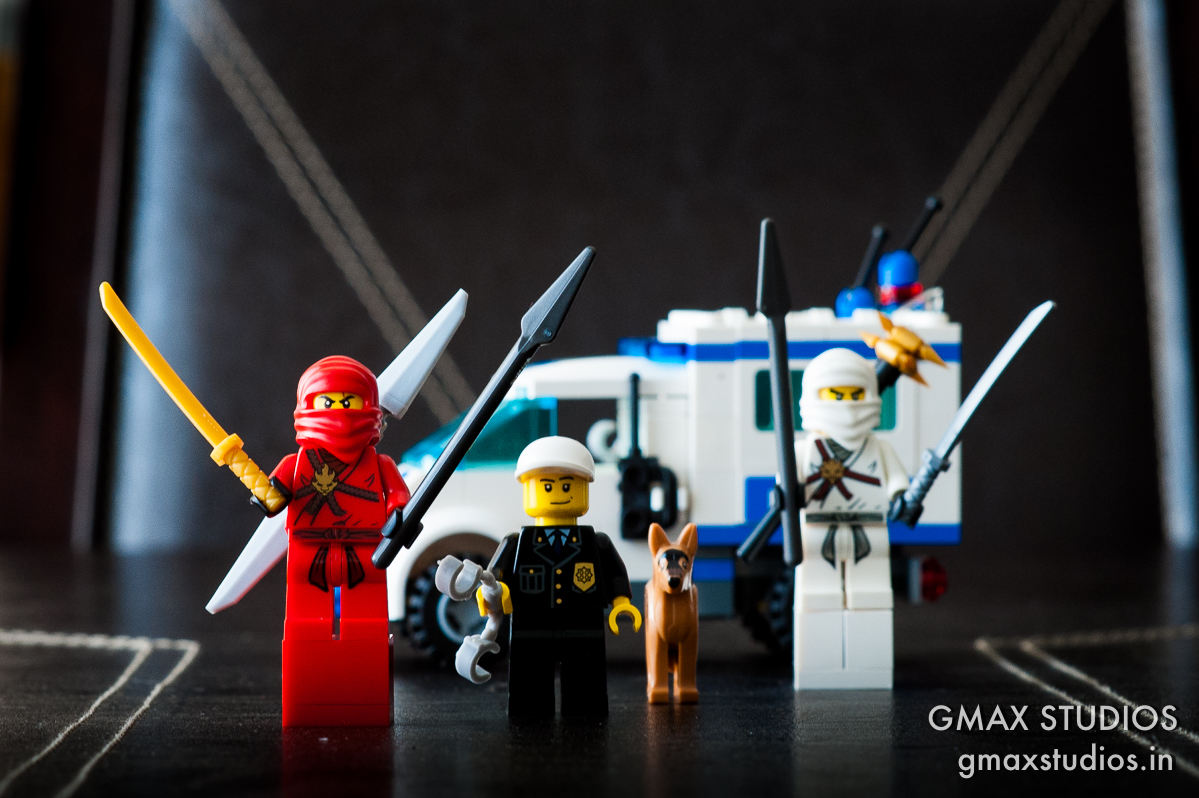
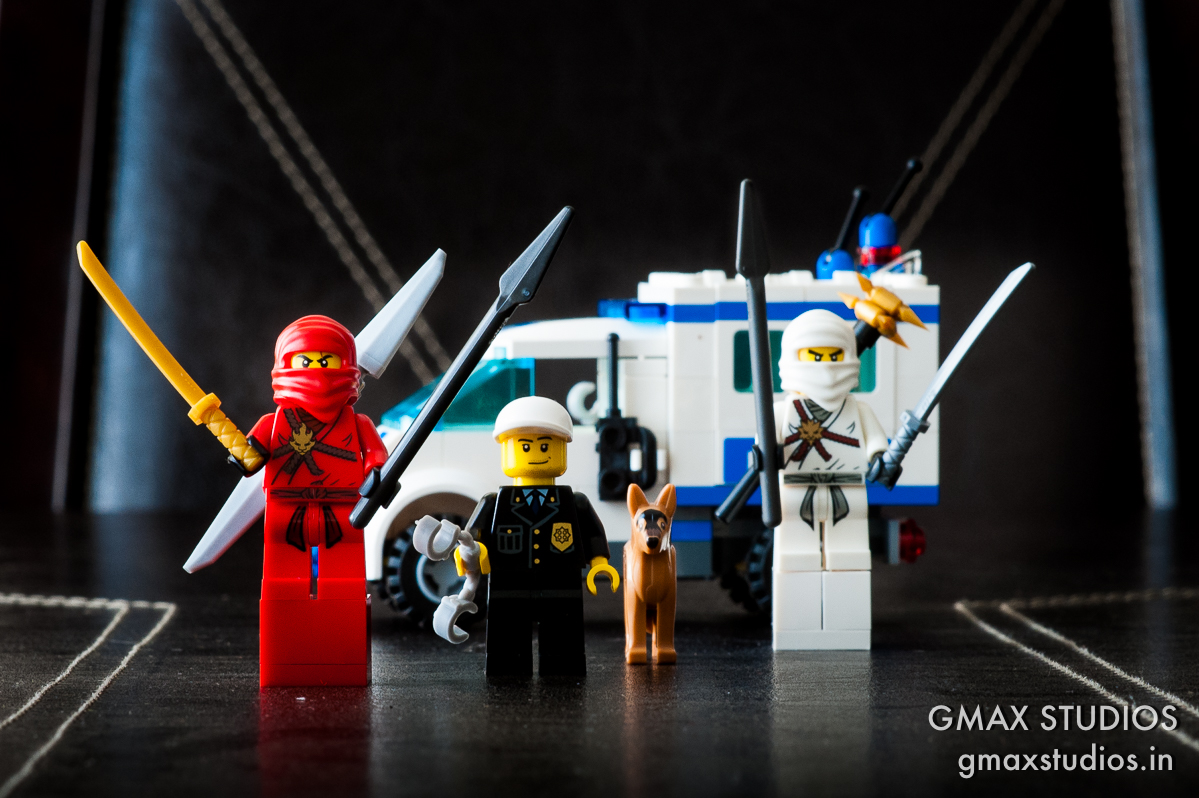
The above image was shot at ISO 100 and as you can see there is hardly or no noise. The image below was shot at ISO 3200 to illustrate how noise can appear at higher ISO settings. Each camera has it's own noise threshold, so make sure you test your own camera before you increase the ISO levels.

What is ISO in photography

What is ISO in photography

Watch this video to understand more about ISO and please remember to subscribe to our channel by clicking here.

 Please share this post with your friends if you found it helpful.

Understanding aperture in photography

Understanding aperture in photography

Imagine in your mind, how the camera works. For you to make a good photograph, a certain amount of light needs to hit the sensor. Let us assume this amount of light to be hundred units. If the light hitting the sensor lesser than the amount of light required, the photographs will be dark or “underexposed”. Similarly, if the amount of light hitting the sensor is more than the amount of light required, the picture will be over-bright or “overexposed”.

There are two ways of controlling the amount of light hitting the sensor-via the aperture or with the shutter speed.

What is aperture?

The aperture is nothing but the hole in the lens through which the light enters the camera. For the time being, all you need to know about the aperture is that smaller the number [1.4 or 1.8], the bigger the aperture and similarly, the larger the number will [16 or 22], the smaller the aperture or the size of the hole on the lens.

Understanding aperture in photography

Understanding aperture in photography

All these numbers are often referred to by using the alphabet F in front of them. So 1.4 is referred to as F1 .4 and 16 is referenced to as F-16. This is just another way of trying to sound cool. There is actually no difference if you say 16 or F-16.

Understanding aperture in photography - Aperture closed down

Understanding aperture in photography - Aperture closed down

Just remember, the smaller the number-the bigger the whole AND the bigger the number, the smaller the hole. This is all that you need to remember about the aperture. This will become second nature as time goes by but it is crucial that for the time being, you remembered this!!!

Understanding aperture in photography - Full open aperture

Understanding aperture in photography - Full open aperture

The size of the aperture is measured in f-stops, which control the depth of field. With few exceptions, each f-stop lets in half as much light as the next larger opening and twice as much light as the next smaller one. From the largest opening to smallest, standard f-stops are as follows: f/1, f/1.4, f/2, f/2.8, f/4, f/5.6, f/8, f/11, f/16, f/22, f/32 and f/45. This can be a little confusing because the larger the f-stop, the smaller the amount of light that is let into the camera. The easiest way to think off-stops is in terms of fractions: just as '/i6 is less than l/s, an f-stop of f/16 is smaller than, and lets in less light than, f/8.

You won't find the full range of settings on any one lens. In most cases, the standard lens on a digital camera is in the f/3.5—f/16 range.

The maximum aperture of a lens determines by how much it can be opened. The maximum aperture is also referred to as the maximum iris, or the speed of a lens. Although lenses are referred to by their focal length, the description of a lens also carries a second number, such as 2.0 or 3.5, which indicates the maximum aperture of the lens. Larger maximum apertures, such as f/1.8, let in more light than smaller apertures, such as f/3.2, allowing you to take better shots in low-light situations.

Watch the video below to understand aperture better.

 Also read: How aperture affects your photograph  - Depth of field

Subscribe to GMax Studios YouTube channel

Subscribe to GMax Studios YouTube channel

Please share this post with your friends if you found this useful.

 Learn photography by reading: The Ultimate Photography Guide for Beginners

How aperture affects photos |Depth of field

When you learn photography, it is easy to get confused between the various modes on the camera.

I shoot on A aperture priority mode on my camera 99% of the time (see Aperture).The main reason I do this is because I don't shoot too much of action and sports and thus find no reason to switch to S, shutter priority mode. I also like  to control my depth of field or DoF as it is known. In easy terms, depth of field refers to how blurred out your background is, compared to the focus point. This is controlled by the aperture.

How aperture affects photos - Depth of field

To demonstrate this point, enter "The GMAX Team":

I shot the image below on an aperture setting of 1.8 on my camera. The camera automatically set the shutter speed to 1/160th of a sec.

How aperture affects photos

The focus is on Kai, the red Ninja. Notice, that though the difference between the team members is only inches - they have been arranged slightly one behind the other - the policeman, appears to be blurred. The focus gently blurs from Kai, to the policeman's handcuffs and the dog Tommy and Zane, the white Ninja are completely blurred.

For the next shot I changed the aperture setting to f4. The background is gradually beginning to come in focus. The policeman is happy now.

GMAX Studios-6080

 Let us stop down the aperture a bit more as in, make it smaller by stopping it down to f8. We see that  more of the background is coming into focus even though the main focus point still remains the same.

GMAX Studios-6082

If we make the aperture even smaller by closing it down to f11, the background is almost completely in focus.  The eyes of the white Ninja are almost sharp too. You can also make out the form of the chair at the dining table. which was not the case at all when we were shooting at f1.8. Also notice how the stitching on the dining table is in focus BEFORE and AFTER the focus point.

GMAX Studios-6084

For comparison, here is the first image shot at f1.8 again:

GMAX Studios-6079

Thumb Rule:

The higher the number of the aperture, more of the background will be in focus. This can be summarised by the graphic below.

Depth of field

You can download a hi-res version of this graphic to your computer or smartphone by adding us to your Google Plus circles. Also watch the video below to understand this concept better and see a practical demonstration of how aperture affects photos and depth of field. If you like the video, please consider subscribing to our channel by clicking here.

https://youtu.be/q3SvCAlgFLw

Shoot me your questions in the comments or leave your suggestions as to what articles or videos would you like to see next.

Subscribe to GMax Studios YouTube channel

Learn photography in one hour

How to restore old photos with 1 click

GMAX-Studios-08-2.jpg

There are many ways to restore old photos and many complicated ways to do them. Most of them require a lot of patience and understanding of various post-processing techniques and software. In fact, most of them are so complicated that we end up never using them and restoring the old photographs that we want to. But anyway, what I usually do to my pictures is as follows and though "one click" will get you there but it will be almost! Feel free to tweak the settings and sliders as you wish. I have used a normal flatbed scanner which is used to scan documents to scan this photograph. If you use a higher end scanner, your results will be much better. You will need:

If you don't have Lightroom, download it. It comes with a 30 day free trial, so you can use it free and 30 days should be enough for you to correct all your old pictures. But anyway, this is my primary software for all my processing needs so I highly recommend it. Anyway, import your scanned photograph into Lightroom.

Scanned photograph

Restore old photos
Restore old photos

Now that magic one click that I was talking about is the one on the top right hand corner.

GMAX-2_lrcat_-_Adobe_Photoshop_Lightroom_-_Develop

Select the eyedropper and click on any neutral colour in the photograph. I was lucky that this was a school photo so I could click on the grey trousers that my friends were wearing. Bingo! The software knows which is a neutral colour in the picture and removes the magenta/green cast automatically!

Processed picture

GMAX Studios-10009
GMAX Studios-10009

Add some contrast and sharpness and maybe increase the exposure a bit to make the old picture pop. That's it! You are done! Give it a shot! This is what I do to restore my pictures quickly. Here is the comparison.

Also read: How to create a professional white background on any photo in Adobe Lightroom

Restore old photographs - Comparison

Do share the pictures that you have restored using this technique. Take look at the video  below. Subscribe to our channel by clicking here.

Aperture

Aperture - Learn photography

Imagine in your mind, how the camera works. For you to make a good photograph, a certain amount of light needs to hit the sensor. Let us assume this amount of light to be hundred units. If the light hitting the sensor lesser than the amount of light required, the photographs will be dark or “underexposed”. Similarly, if the amount of light hitting the sensor is more than the amount of light required, the picture will be over-bright or “overexposed”.

Aperture scale.jpg

There are two ways of controlling the amount of light hitting the sensor-via the aperture or with the shutter speed.

The aperture is nothing but the hole in the lens through which the light enters the camera. For the time being, all you need to know about the aperture is that smaller the number [1.4 or 1.8], the bigger the aperture and similarly, the larger the number will [16 or 22], the smaller the aperture or the size of the hole on the lens. All these numbers are often referred to by using the alphabet F in front of them. So 1.4 is referred to as F1 .4 and 16 is referenced to as F-16. This is just another way of trying to sound cool. There is actually no difference if you say 16 or F-16. Just remember, the smaller the number-the bigger the whole AND the bigger the number, the smaller the pool. This is all that you need to remember about the aperture. This will become second nature as time goes by but it is crucial that for the time being, you remembered this!!!

Adobe Lightroom Tutorial | Professional white background

GMAX-Studios-3054.jpg

More than a proper Adobe Lightroom tutorial, this is a quick and dirty tip.  When you learn photography and do it commercially for a client - it is often your responsibility to make sure that the client gets the final photograph that he/she wants. At these times, just taking the photograph does not help. You have to go beyond photography and into what we call post-processing.

So, this is more of a photography hack when you don't have all the proper resources, including time, at your disposal. I had to do it once and I realised that I could do it to make my photographs look slightly better and to solve certain problems. By problems I mean, when the purpose of  doing this is to create enough contrast so that the subject can be easily cut out from the background and placed in another layout. This is a pretty standard procedure in lots of commercial work done today.

Have you ever felt envious of the way other "professional" photographers manage to shoot their images against a stark white professional looking image? Let us face it - not all of us have a white seamless backdrop at our disposal but that does not mean that we cannot create images that emulate that look. While these may not be perfect but in some cases no one will be able to tell whether you have actually shot them against a white seamless or not. Like all other things, this too depends on how much practice you put into the process and how you fine tune it to suit your own needs.

 Also read: 

THE ULTIMATE GUIDE TO  LEARN PHOTOGRAPHY

Well, here is a short Adobe Lightroom tutorial video on how to make your pictures look like they have been shoot against  a white seamless backdrop.

This is the first screencast that I have made and I promise that these will get better with time, so please do leave a comment if you would like to see some more. You can subscribe to the channel by clicking here.

 Adobe Lightroom Tutorial:  

How to restore old photographs in 1 click in Adobe Lightroom

Subscribe to GMax Studios YouTube channel

Subscribe to GMax Studios YouTube channel

You can visit my personal website and blog here.